
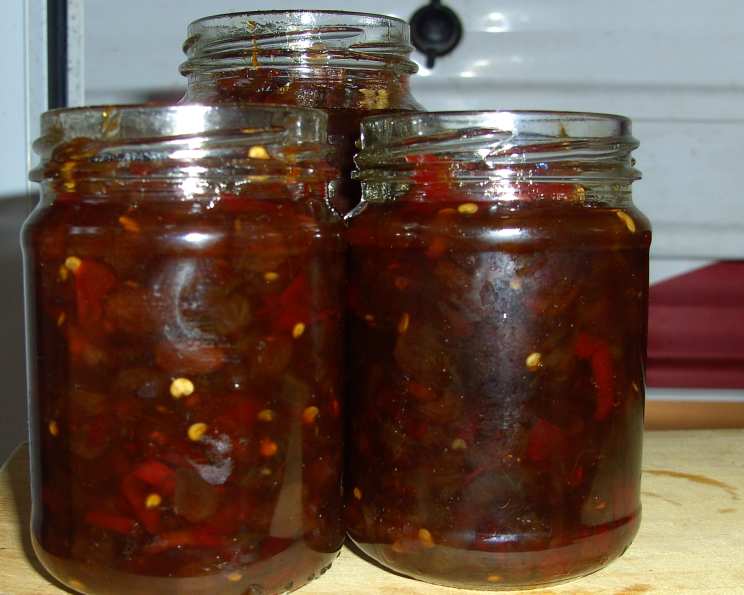
Fiery Bliss: Crafting the Perfect Chilli Chutney
The first time I tasted proper chilli chutney, it was a revelation. I was backpacking through Southeast Asia, and a tiny street vendor in a bustling Bangkok market offered me a sample. It wasn’t just heat; it was a symphony of sweet, tangy, and umami notes that danced on my palate. Paired with a simple grilled chicken skewer, it was culinary perfection, a memory I’ve chased ever since in my own kitchen.
Recipe Overview
- Prep Time: 15 minutes
- Cook Time: 45 minutes
- Total Time: 1 hour
- Yields: Approximately 1 cup
- Dietary Type: Vegan, Gluten-Free
Ingredients
- 1 cup hot chili peppers (a mix of varieties is great for complexity)
- 1 cup sugar (granulated or caster sugar works well)
- 1 cup sultanas (golden raisins)
- 1 cup vinegar (white wine vinegar or apple cider vinegar recommended)
- 1 cup onion, finely chopped
Equipment Needed
- Chopping board
- Sharp knife
- Large saucepan or pot
- Wooden spoon or spatula
- Sterilized jars with airtight lids
Instructions
- Begin by preparing your ingredients. Carefully chop the chili peppers and onion into small, even pieces. Remember to use caution when handling chilies; wearing gloves is advisable to avoid skin irritation. Also, consider removing some of the seeds and membranes if you prefer a milder heat level.
- In a large saucepan or pot, combine the chopped chilies, onion, sugar, sultanas, and vinegar.
- Place the pot over medium heat and bring the mixture to a simmer.
- Once simmering, reduce the heat to low and continue to simmer for approximately 45 minutes, stirring regularly. This is crucial to prevent the chutney from sticking to the bottom of the pan and burning. The sugar needs to dissolve completely, and the ingredients need to soften and meld together beautifully.
- As the chutney cooks, it will gradually thicken and darken in color. You’re aiming for a rich, brown hue and a jam-like consistency. To test for doneness, place a small spoonful of chutney on a chilled plate. If it sets quickly and doesn’t run, it’s ready.
- Once the chutney has reached the desired consistency, remove it from the heat.
- While the chutney is still hot, carefully transfer it into sterilized jars. Ensure that the jars are properly sterilized to prevent spoilage.
- Seal the jars with airtight lids while the chutney is still hot. This will create a vacuum seal as the chutney cools, further preserving it.
- Allow the jars to cool completely at room temperature before storing. As they cool, you should hear a “pop” sound, indicating that the jars have sealed properly.
Expert Tips & Tricks
- Spice Level Control: The type and quantity of chili peppers you use will directly impact the heat level of the chutney. For a milder chutney, use milder chilies like jalapenos or poblano peppers and remove most of the seeds and membranes. For a fiery chutney, opt for hotter varieties like habaneros or scotch bonnets. Always taste as you go!
- Sultana Power: Sultanas add sweetness and texture to the chutney. If you’re not a fan of sultanas, you can substitute them with other dried fruits like cranberries, raisins, or chopped dates.
- Vinegar Variety: Experiment with different types of vinegar to create unique flavor profiles. White wine vinegar provides a crisp, clean taste, while apple cider vinegar adds a hint of sweetness and complexity. Balsamic vinegar can also be used for a richer, more intense flavor, but be mindful of its sweetness.
- Depth of Flavor: For a more complex flavor, consider adding a small amount of grated ginger, minced garlic, or a pinch of ground spices like cumin, coriander, or cardamom to the chutney while it’s simmering. These additions will enhance the overall taste and aroma.
- Preventing Burning: Stirring the chutney regularly is crucial to prevent it from sticking to the bottom of the pan and burning. Use a wooden spoon or spatula to scrape the bottom of the pan as you stir, ensuring that all the ingredients are evenly heated.
- Jam Thermometer (Optional): For precise results, use a jam thermometer. The ideal temperature for the chutney is around 220°F (104°C), which is the setting point for jams and preserves.
Serving & Storage Suggestions
Chilli chutney is incredibly versatile and can be used in a variety of ways. It’s delicious as a condiment with grilled meats, cheeses, sandwiches, and crackers. It can also be used as a marinade for meats or vegetables, or as a flavorful addition to stir-fries and curries.
Once opened, the chutney should be stored in the refrigerator for up to 2-3 weeks. Unopened jars of chutney can be stored in a cool, dark place for up to 6 months.
Nutritional Information
Please note that these values are estimates and may vary based on specific ingredients and portion sizes.
| Nutrient | Amount per Serving (approx. 1 tbsp) | % Daily Value |
|---|---|---|
| Calories | 60 kcal | 3% |
| Total Fat | 0.2g | 0% |
| Saturated Fat | 0g | 0% |
| Cholesterol | 0mg | 0% |
| Sodium | 2mg | 0% |
| Total Carbohydrate | 15g | 5% |
| Dietary Fiber | 0.5g | 2% |
| Sugars | 13g | N/A |
| Protein | 0.1g | 0% |
Variations & Substitutions
- Fruit Forward: For a sweeter chutney, add a cup of chopped fruit like apples, peaches, or mangoes along with the other ingredients.
- Smoked Chilli Chutney: Use smoked paprika or chipotle peppers to add a smoky flavor to the chutney.
- Ginger-Garlic Kick: Add a tablespoon of grated fresh ginger and a clove of minced garlic for an aromatic and spicy twist.
- Herb Infusion: Add fresh herbs like cilantro, mint, or basil during the last few minutes of cooking for a refreshing flavor.
- Vegan Alternative: This recipe is inherently vegan.
FAQs (Frequently Asked Questions)
Q: How do I sterilize jars for preserving the chutney?
A: Wash jars and lids in hot, soapy water, rinse well, and then place them in a boiling water bath for 10 minutes. Alternatively, you can run them through a hot cycle in the dishwasher.
Q: Can I reduce the sugar content in this recipe?
A: While you can reduce the sugar slightly, it plays a crucial role in preserving the chutney. Reducing it too much may affect the shelf life.
Q: How do I know if the jars have sealed properly?
A: After cooling, the lid should be slightly concave and not flex when pressed. If the lid flexes, the jar hasn’t sealed properly and should be refrigerated and consumed within a few weeks.
Q: What if my chutney is too thick?
A: If your chutney becomes too thick during cooking, add a tablespoon or two of vinegar or water to thin it out.
Q: Can I use frozen chili peppers for this recipe?
A: Yes, you can use frozen chili peppers. However, they may release more moisture during cooking, so you may need to simmer the chutney for a longer time to achieve the desired consistency.
Final Thoughts
Making your own chilli chutney is a rewarding culinary experience. It allows you to customize the flavor to your liking and create a condiment that’s far superior to anything you can buy in a store. So, gather your ingredients, put on your apron, and get ready to embark on a fiery adventure in your kitchen. Don’t be afraid to experiment with different chilies and flavor combinations to create your signature chilli chutney. Once you’ve perfected your recipe, share it with friends and family – they’ll thank you for it! I personally love it with a grilled cheese sandwich and a side of tomato soup on a chilly day! And remember, the best way to learn is by doing, so get cooking!