
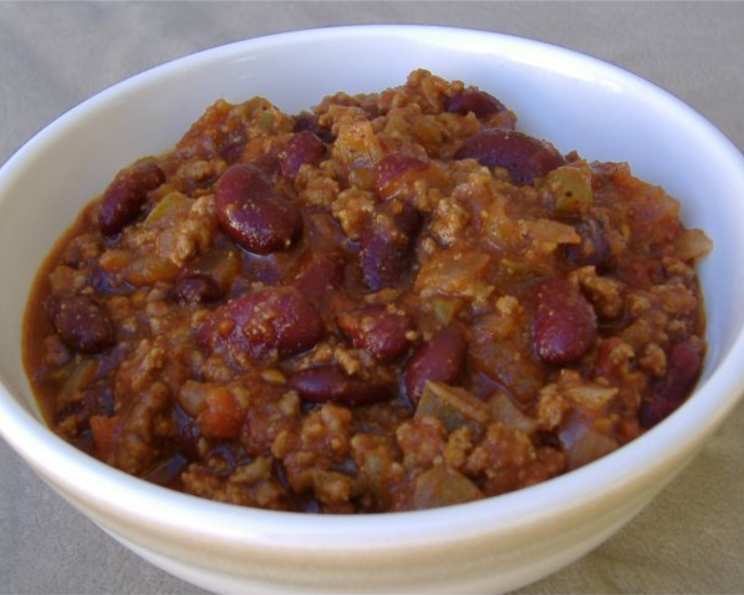
Chilly Day Chili: A Kitchen Classic
The first time I made chili, I was barely tall enough to see over the stove. It was a blustery autumn afternoon, the kind where the wind howls and the leaves dance in a frenzy. My mom, sensing my boredom, pulled out a tattered recipe card stained with years of use. As the aroma of simmering tomatoes, spices, and beef filled our little kitchen, a sense of warmth and comfort enveloped me. It wasn’t just a meal; it was a feeling – a cozy, secure feeling that only a steaming bowl of homemade chili can evoke. That memory, etched in my mind, is why chili remains a staple in my kitchen, a dish I turn to whenever the weather turns and a craving for simple, hearty goodness arises.
Recipe Overview
- Prep Time: 15 minutes
- Cook Time: 45 minutes
- Total Time: 1 hour
- Servings: 10
- Yields: 10 cups
- Dietary Type: Gluten-Free
Ingredients
- 2 medium onions, chopped
- 1 green bell pepper, chopped
- 1 tablespoon vegetable oil
- 2 lbs lean ground beef
- 1 (14 1/2 ounce) can diced tomatoes or 2 cups chopped fresh tomatoes
- 1 (15 ounce) can tomato sauce
- 1/2 cup ketchup
- 2 tablespoons chili powder
- 1 teaspoon salt
- 1/4 teaspoon pepper
- 2 (16 ounce) cans red kidney beans, partially drained
Equipment Needed
- Large skillet
- Large pot or Dutch oven
- Wooden spoon or spatula
Instructions
- Begin by preparing your vegetables. Chop the onions and green bell pepper into roughly equal-sized pieces. Consistent sizing ensures even cooking.
- Heat the vegetable oil in a large skillet over medium heat. Once the oil is shimmering, add the chopped onions and green bell pepper. Sauté for 1-2 minutes, stirring frequently, until the onions begin to soften and become translucent. This brief sautéing step helps release the natural sweetness of the vegetables.
- Add the lean ground beef to the skillet. Cook the beef, breaking it apart with a spoon or spatula, until it is fully browned. It’s important to break up the beef to prevent large clumps from forming in your chili.
- Once the beef is browned, drain off any excess fat. Leaving the fat in will make the chili greasy. A simple way to do this is to carefully tilt the skillet and spoon the fat out, or transfer the beef to a colander.
- Transfer the browned beef and vegetables to a large pot or Dutch oven.
- Stir in the diced tomatoes (or fresh chopped tomatoes), tomato sauce, ketchup, chili powder, salt, and pepper. Mix well to ensure all ingredients are evenly distributed.
- Bring the mixture to a simmer over medium heat. Once simmering, reduce the heat to low, cover the pot, and simmer for 30 minutes, stirring occasionally to prevent sticking. The simmering process allows the flavors to meld together and the chili to thicken.
- After 30 minutes, add the partially drained red kidney beans. Partially draining the beans helps to thicken the chili while still adding their rich flavor and texture.
- Continue to simmer, uncovered, for an additional 15 minutes, stirring occasionally. This final simmering period allows the beans to fully incorporate into the chili and further enhance the flavor.
- Remove from heat and let rest for a few minutes before serving. This allows the flavors to meld even further.
Expert Tips & Tricks
- Spice it up: If you prefer a spicier chili, add a pinch of cayenne pepper or a finely chopped jalapeño pepper along with the chili powder. Adjust the amount to your desired heat level.
- Sweeten the deal: For a slightly sweeter chili, add a tablespoon of brown sugar or molasses along with the ketchup.
- Thickening agent: If your chili is too thin, you can thicken it by mashing some of the kidney beans against the side of the pot. Alternatively, you can mix a tablespoon of cornstarch with a tablespoon of cold water and stir it into the chili during the last 15 minutes of simmering.
- Make-ahead magic: This chili is even better the next day! The flavors have more time to meld and deepen overnight. Prepare the chili a day in advance and store it in the refrigerator. Gently reheat before serving.
- Slow Cooker Adaptation: You can easily adapt this recipe for a slow cooker. After browning the beef and sautéing the vegetables, transfer everything to your slow cooker. Cook on low for 6-8 hours or on high for 3-4 hours.
Serving & Storage Suggestions
Serve your Chilly Day Chili hot, garnished with your favorite toppings. Some popular choices include shredded cheddar cheese, sour cream, chopped green onions, a dollop of plain Greek yogurt, or a sprinkle of fresh cilantro. A side of cornbread or crusty bread is also a perfect complement to soak up all the delicious chili juices.
Leftover chili can be stored in an airtight container in the refrigerator for up to 3-4 days. For longer storage, freeze the chili in freezer-safe containers for up to 2-3 months. To reheat, thaw the chili overnight in the refrigerator and then gently heat it on the stovetop or in the microwave.
Nutritional Information
| Nutrient | Amount per Serving | % Daily Value |
|---|---|---|
| Calories | 332.1 kcal | N/A |
| Calories from Fat | 102 g | 31% |
| Total Fat | 11.3 g | 17% |
| Saturated Fat | 4 g | 20% |
| Cholesterol | 59 mg | 19% |
| Sodium | 682 mg | 28% |
| Total Carbohydrate | 31.1 g | 10% |
| Dietary Fiber | 9 g | 36% |
| Sugars | 7.3 g | N/A |
| Protein | 27.7 g | 55% |
Variations & Substitutions
- Vegetarian Chili: Substitute the ground beef with crumbled plant-based ground meat or an additional can of beans. Black beans, pinto beans, or great northern beans work well.
- Turkey Chili: Replace the ground beef with ground turkey for a leaner option.
- Spicy Chorizo Chili: Add 1/2 pound of cooked and crumbled chorizo sausage for a smoky and spicy kick. Reduce the amount of ground beef accordingly.
- Sweet Potato Chili: Add 1 cup of diced sweet potato to the chili along with the tomatoes for a touch of sweetness and added nutrients.
- White Chicken Chili: Substitute ground beef for shredded chicken and use white beans (cannellini or great northern) instead of kidney beans. Add a can of green chilies for flavor.
- Bean-less Chili: For those who prefer a bean-free chili, simply omit the kidney beans. You may need to adjust the amount of tomato sauce or add a thickening agent to achieve the desired consistency.
FAQs (Frequently Asked Questions)
Q: Can I use dried beans instead of canned?
A: Absolutely! You’ll need to soak the dried beans overnight and then cook them until tender before adding them to the chili. Using dried beans can enhance the flavor and texture of the chili.
Q: How can I prevent the chili from sticking to the pot?
A: Stir the chili frequently, especially during the simmering process. Also, make sure the heat is set to low to prevent burning.
Q: Can I freeze this chili for later?
A: Yes! Chili freezes very well. Allow it to cool completely before transferring it to freezer-safe containers. It can be stored in the freezer for up to 2-3 months.
Q: What’s the best way to reheat frozen chili?
A: Thaw the chili overnight in the refrigerator for best results. Then, reheat it on the stovetop over medium heat, stirring occasionally. You can also reheat it in the microwave.
Q: What if my chili is too spicy?
A: Adding a dollop of sour cream, plain Greek yogurt, or a sprinkle of shredded cheese can help to cool down the spice. You can also add a touch of sweetness, such as a teaspoon of sugar or honey, to balance the flavors.
Final Thoughts
This Chilly Day Chili is more than just a recipe; it’s an invitation to create memories in your kitchen. It’s a comforting, adaptable dish that welcomes experimentation and personal touches. So, gather your ingredients, put on some music, and let the aroma of simmering chili fill your home. Don’t be afraid to get creative with toppings and sides. Most importantly, share it with the people you love. I hope this recipe brings you as much warmth and happiness as it has brought me over the years. Enjoy!