
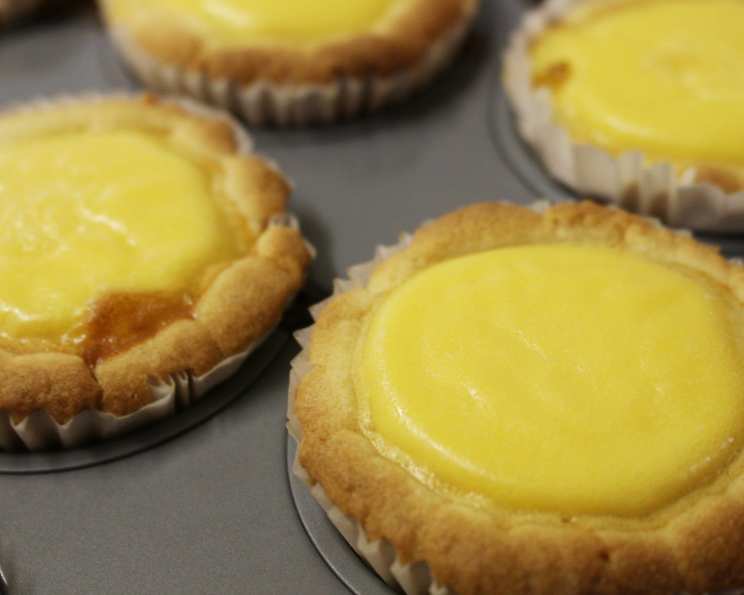
Golden Memories: Crafting Chinese Egg Custard Tarts
The first time I tasted a Chinese egg custard tart, I was a wide-eyed child exploring the bustling streets of Hong Kong with my grandmother. The scent of warm, buttery pastry mingled with sweet custard hung in the air, beckoning me towards a small bakery. That first bite—the shattering crispness of the shell giving way to the silken, wobbly filling—was pure magic. Years later, the memory of that simple pleasure still inspires me to recreate those perfect tarts in my own kitchen, hoping to share a piece of that golden, delicious nostalgia.
Recipe Overview
- Prep Time: 30 minutes
- Cook Time: 15-20 minutes
- Total Time: 45-50 minutes
- Yields: 10-12 tarts
- Serves: 10-12
- Dietary Type: Not Gluten-Free
Ingredients
For the Crust:
- 8 ounces softened butter
- 4 ounces confectioners’ sugar
- 1 egg (sift egg through strainer)
- 13 ounces flour
- 3-5 drops vanilla extract
For the Egg Filling:
- 4 ounces sugar
- 24 ounces water
- 3-5 drops vanilla extract
- 9 eggs (sift egg through strainer after eggs have been beaten)
- 8 ounces evaporated milk (or regular milk is fine too)
Equipment Needed
- Mixing bowls
- Sifter or fine-mesh strainer
- Tart molds (approximately 1.5-inch diameter)
- Saucepan
- Whisk
- Oven
Instructions
- Prepare the Crust: In a large mixing bowl, combine the softened butter, confectioners’ sugar, and flour. Using your hands or a pastry blender, mix the ingredients until they form a crumbly mixture.
- Add the Wet Ingredients: Add the strained egg and vanilla extract to the mixture. Mix well until a dough forms. The dough should be slightly moist, not dry or oily.
- Tip: If the dough is too dry, add a small amount of softened butter or margarine, a little at a time. If the dough is too oily, add a bit more flour.
- Shape the Crust: Take a small portion of the dough (about 1.5-inch diameter) and shape it into a ball. Press the dough into the tart mold, starting from the center and pushing it up the sides. Make sure the dough goes slightly higher than the edge of the mold.
- Create the Tart Edge: Use your fingers to shape the edge of the tart into an “A” shape for a classic look. Repeat steps 3 and 4 until all the tart molds are filled with the crust.
- Prepare the Egg Filling: In a saucepan, combine the sugar and water. Bring the mixture to a boil, stirring until the sugar is completely melted.
- Cool the Sugar Syrup: Remove the sugar syrup from the heat and allow it to cool completely to room temperature. This is a critical step to prevent the eggs from cooking prematurely.
- Combine the Filling Ingredients: In a mixing bowl, beat the eggs until well combined. Add the vanilla extract and evaporated milk (or regular milk) to the beaten eggs.
- Add the Cooled Syrup: Gradually pour the cooled sugar syrup into the egg mixture, whisking constantly to ensure a smooth and even consistency.
- Strain the Filling: Strain the egg mixture through a fine-mesh strainer. This will remove any lumps or bits of cooked egg and create a perfectly smooth custard filling. This ensures that your custard will be incredibly silky.
- Fill the Tart Shells: Carefully pour the strained egg filling into each tart crust, filling them almost to the top.
- Preheat the Oven: Preheat your oven to 230 degrees Celsius (approximately 446 degrees Fahrenheit) for at least 10 minutes to ensure a consistent baking temperature.
- Bake the Tarts: Place the filled tart molds on a baking sheet and bake in the preheated oven for 15-20 minutes, or until the crust is golden brown and the filling has risen slightly and has a slight wobble. Keep a close eye on them, as ovens can vary.
- Note: The filling should be just set, not overly firm. A slight wobble indicates the custard is perfectly cooked.
- Cool and Serve: Remove the tarts from the oven and let them cool completely on a wire rack before serving. This prevents the custard from cracking.
Expert Tips & Tricks
- Achieving a Crispy Crust: For an extra crispy crust, blind bake the tart shells for a few minutes before adding the filling. This involves pre-baking the crust partially to prevent it from becoming soggy.
- Preventing a Soggy Crust: Ensure the butter is properly incorporated into the flour mixture during crust preparation. Avoid overmixing, as this can develop the gluten in the flour, leading to a tougher crust.
- Perfectly Smooth Filling: Straining the egg mixture is essential for achieving a silky smooth custard. Don’t skip this step!
- Baking Consistency: Keep a close watch on the tarts during baking. If the crust is browning too quickly, you can lower the oven temperature slightly or tent the tarts with foil. Rotate the baking sheet halfway through for even browning.
- Room Temperature Ingredients: Using room temperature butter for the crust makes it easier to work with and helps create a more tender texture.
- Egg Substitution: Although it will alter the taste slightly, a small amount of cornstarch mixed with the milk can help provide a similar texture to the evaporated milk if it is unavailable.
Serving & Storage Suggestions
These Chinese egg custard tarts are best served slightly warm or at room temperature. Their delicate flavor pairs well with a cup of Chinese tea or coffee.
- Storage: Store leftover tarts in the refrigerator for up to 3 days.
- Room Temperature: They can be left at room temperature for a few hours, but refrigeration is recommended for longer storage.
- Reheating: To reheat, you can warm them gently in a low oven (around 150 degrees Celsius or 300 degrees Fahrenheit) for a few minutes, or microwave them briefly. Be careful not to overheat, as the custard can become rubbery. Freezing is not recommended as it can affect the texture of the custard.
Nutritional Information
| Nutrient | Amount per Serving | % Daily Value |
|---|---|---|
| Calories | 250 kcal | 13% |
| Total Fat | 15g | 23% |
| Saturated Fat | 9g | 45% |
| Cholesterol | 100mg | 33% |
| Sodium | 50mg | 2% |
| Total Carbohydrate | 25g | 8% |
| Dietary Fiber | 0g | 0% |
| Sugars | 12g | – |
| Protein | 5g | 10% |
Nutritional information is an estimate and can vary based on specific ingredients and portion sizes.
Variations & Substitutions
- Gluten-Free Crust: For a gluten-free option, use a gluten-free flour blend specifically designed for baking. Be sure to add a binding agent like xanthan gum to help hold the crust together.
- Dairy-Free Filling: You can substitute the evaporated milk with a plant-based milk such as almond milk or soy milk, but be aware that this will alter the taste and texture of the filling slightly.
- Flavor Variations: Experiment with different flavorings for the filling. A touch of almond extract or lemon zest can add a unique twist.
- Coconut Egg Tart: Replace a portion of the water with coconut milk for a tropical twist.
FAQs (Frequently Asked Questions)
Q: Why is it important to strain the egg filling?
A: Straining the egg filling removes any cooked egg particles, resulting in a smooth and silky custard texture. It’s a crucial step for achieving the perfect consistency.
Q: Can I use regular milk instead of evaporated milk?
A: Yes, you can use regular milk, but the custard may not be as rich and creamy. Evaporated milk adds a unique richness and helps the custard set properly.
Q: How do I prevent the crust from shrinking during baking?
A: Make sure the butter is cold when making the dough, and avoid overworking it. Chilling the dough before pressing it into the tart molds can also help prevent shrinkage.
Q: What if my filling cracks while baking?
A: Cracking can occur if the oven temperature is too high or if the tarts are baked for too long. Lower the temperature slightly and monitor the tarts closely. Also, allow them to cool gradually to prevent cracking.
Q: How can I tell when the tarts are done baking?
A: The crust should be golden brown, and the filling should be slightly risen and have a slight wobble when gently shaken. It will continue to set as it cools.
Final Thoughts
Now that you have all the secrets to crafting these delicate Chinese egg custard tarts, it’s time to step into your kitchen and create a little magic. Whether you’re sharing them with loved ones or savoring them on your own, I hope these golden treats bring you as much joy as they’ve brought me over the years. Don’t be afraid to experiment with variations and make them your own. And please, share your creations and feedback – I’d love to hear about your custard tart adventures!