
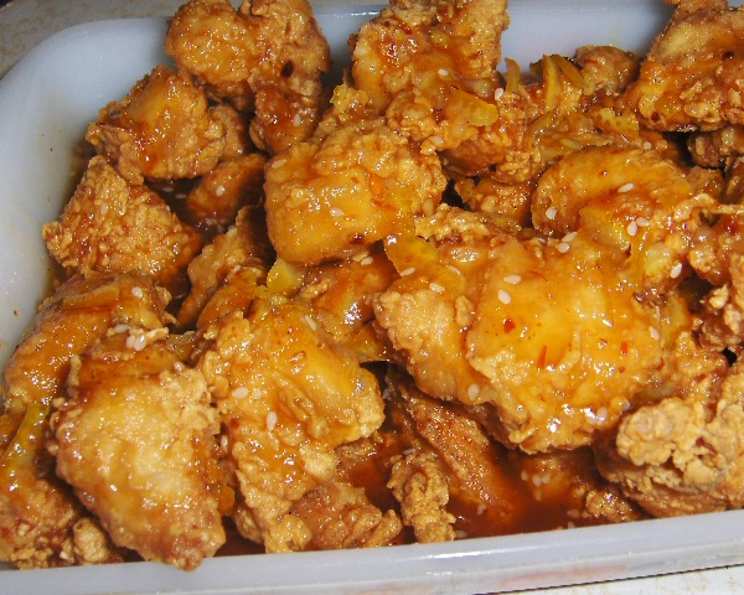
Golden Nuggets: Mastering Chinese-Style Fried Chicken
The memory still makes my mouth water. It was a rainy Saturday afternoon, and my grandfather, a man of few words but immense culinary talent, was in the kitchen. The air hung thick with the savory aroma of soy sauce and something undeniably…delicious. He emerged, carrying a platter piled high with golden-brown pieces of fried chicken, glistening under the kitchen light. Each bite was a revelation – crispy, savory, and utterly addictive. He winked, patted my head, and said, “Secret family recipe.” I’ve spent years since then trying to unlock that secret, and this recipe, inspired by his, gets me incredibly close to that perfect childhood bite.
Recipe Overview
- Prep Time: 25 minutes
- Cook Time: 20 minutes
- Total Time: 45 minutes
- Servings: 6
- Dietary Type: Not specified
Ingredients
- 6 chicken breasts, cut into 1-inch pieces
- 6 egg whites
- 1 1/2 cups soy sauce
- 2 cups flour
- 2 cups cornstarch
- 2 cups vegetable oil or canola oil
Equipment Needed
- Large bowl
- Resealable plastic freezer bag
- Wok or deep fryer
- Cookie sheet or bowl lined with paper towels
Instructions
- Begin by preparing the chicken. Cut the chicken breasts into bite-sized, 1-inch pieces. This ensures even cooking and a satisfyingly crispy exterior.
- In a large bowl, whisk together the egg whites and soy sauce. This mixture will act as a marinade, tenderizing the chicken and infusing it with umami flavor.
- Place the chicken pieces into the egg white and soy sauce mixture. Ensure all pieces are well-coated. Cover the bowl and refrigerate for at least 20 minutes. This allows the chicken to absorb the marinade, resulting in a more flavorful and juicy final product.
- While the chicken is marinating, prepare for frying. Add 2 cups of vegetable oil or canola oil to a wok or deep fryer. Heat the oil to 350°F (175°C). Using a thermometer is crucial for maintaining the correct temperature, which is essential for achieving that perfect golden-brown crispness without burning the chicken.
- In a resealable plastic freezer bag, combine the flour and cornstarch. This combination creates a light and crispy coating that adheres well to the chicken.
- Remove the chicken from the marinade. Add the chicken pieces to the bag with the flour and cornstarch mixture, a little at a time. Seal the bag and shake until the chicken is evenly coated. Add more of the flour mixture as needed to fully coat all the chicken. The goal is to create a thin, even layer of coating.
- Once the oil is hot, carefully add the coated chicken pieces to the wok or deep fryer. It’s crucial to work in batches to avoid overcrowding the fryer, which can lower the oil temperature and result in soggy chicken.
- Fry the chicken for just 15 seconds. The purpose of this first fry is not to brown the chicken, but to set the coating.
- Remove the chicken from the oil and place it on a cookie sheet or bowl lined with paper towels to drain. Allow the chicken to cool for a few minutes. This resting period allows the coating to further adhere to the chicken.
- After the chicken has cooled slightly, return it to the hot oil for a second fry of an additional 15-20 seconds, or until it turns golden brown. The second fry is what gives the chicken its signature color and ultimate crispness.
- Always check the internal temperature of the chicken to ensure it is fully cooked. If it is still pink inside, continue frying for a few more seconds until it reaches a safe internal temperature of 165°F (74°C).
- Remove the fried chicken from the oil and place it back on the paper towel-lined cookie sheet or bowl to drain any excess oil.
- Serve hot and top with your favorite lemon or orange sauce.
Expert Tips & Tricks
- For an extra crispy coating, try adding a tablespoon of baking powder to the flour and cornstarch mixture.
- Don’t overcrowd the wok or deep fryer. Fry the chicken in batches to maintain the oil temperature and ensure even cooking.
- If you want to add a bit of spice, incorporate a pinch of cayenne pepper or some red pepper flakes to the flour mixture.
- To keep the fried chicken warm while you’re working in batches, preheat your oven to 200°F (93°C) and place the cooked chicken on a wire rack set over a baking sheet in the oven.
- The key to the perfect fry is maintaining a consistent oil temperature. Use a deep-fry thermometer and adjust the heat as needed to keep the oil at 350°F (175°C).
Serving & Storage Suggestions
Serve this Chinese-style fried chicken hot, ideally immediately after frying, to enjoy its maximum crispness. It pairs exceptionally well with a vibrant lemon or orange sauce, or even a simple sweet and sour dip. Garnish with sesame seeds and chopped green onions for added visual appeal.
Leftovers can be stored in an airtight container in the refrigerator for up to 3 days. To reheat, the best method for maintaining crispness is to bake the chicken in a preheated oven at 350°F (175°C) for about 10-15 minutes, or until heated through. You can also reheat it in an air fryer for similar results. Microwaving is not recommended, as it will make the chicken soggy. Freezing is possible, but the texture may suffer slightly upon thawing. For best results, freeze the chicken in a single layer on a baking sheet, then transfer to a freezer-safe bag or container once frozen solid.
Nutritional Information
| Nutrient | Amount per Serving | % Daily Value |
|---|---|---|
| Calories | 949.8 kcal | N/A |
| Calories from Fat | 584 g | 62% |
| Total Fat | 65 g | 99% |
| Saturated Fat | 10 g | 50% |
| Cholesterol | 69.6 mg | 23% |
| Sodium | 3129.5 mg | 130% |
| Total Carbohydrate | 56.2 g | 18% |
| Dietary Fiber | 1.6 g | 6% |
| Sugars | 1.2 g | 4% |
| Protein | 34.4 g | 68% |
Note: Nutritional information is an estimate and may vary based on specific ingredients and preparation methods.
Variations & Substitutions
- Gluten-Free: Substitute the all-purpose flour with a gluten-free flour blend for a gluten-free version.
- Lower Sodium: Use low-sodium soy sauce to reduce the sodium content of the dish.
- Spicy Kick: Add a dash of cayenne pepper or a pinch of chili flakes to the flour mixture for a spicy twist.
- Vegetarian Option: Consider using firm tofu, cut into similar sizes as the chicken, for a vegetarian alternative. Marinate the tofu in the soy sauce mixture as directed.
- Different Oils: Peanut oil can be used for frying, adding a nutty flavor.
FAQs (Frequently Asked Questions)
Q: Why do I need to fry the chicken twice?
A: The double frying method ensures that the chicken is cooked through and achieves maximum crispness. The first fry sets the coating, while the second fry deepens the color and creates a perfectly crunchy exterior.
Q: Can I bake the chicken instead of frying it?
A: While baking will result in a healthier dish, it won’t achieve the same level of crispness as frying. If you choose to bake, preheat your oven to 400°F (200°C), place the coated chicken on a wire rack set over a baking sheet, and bake for approximately 20-25 minutes, or until cooked through.
Q: How do I prevent the chicken from becoming soggy?
A: Ensure the oil is at the correct temperature (350°F/175°C) before adding the chicken, and avoid overcrowding the fryer. Overcrowding lowers the oil temperature, which can lead to soggy chicken. Drain the chicken thoroughly on paper towels after frying.
Q: Can I use chicken thighs instead of chicken breasts?
A: Absolutely! Chicken thighs are a great alternative. Just be sure to cut them into similar-sized pieces as you would the chicken breasts, and adjust the cooking time as needed to ensure they’re fully cooked.
Q: What kind of sauce goes well with this fried chicken?
A: The classic choices are lemon or orange sauce. Sweet and sour sauce, plum sauce, or even a spicy garlic sauce are also excellent pairings.
Final Thoughts
This Chinese-style fried chicken is more than just a recipe; it’s a gateway to a childhood memory, a celebration of flavor, and a testament to the simple joy of sharing delicious food. Don’t be intimidated by the double-frying process – the results are well worth the effort. I urge you to try this recipe, experiment with different sauces and seasonings, and make it your own. Share your creations with friends and family, and let the crispy, savory goodness speak for itself. And who knows, maybe you’ll unlock a few “secret family recipes” of your own along the way!