
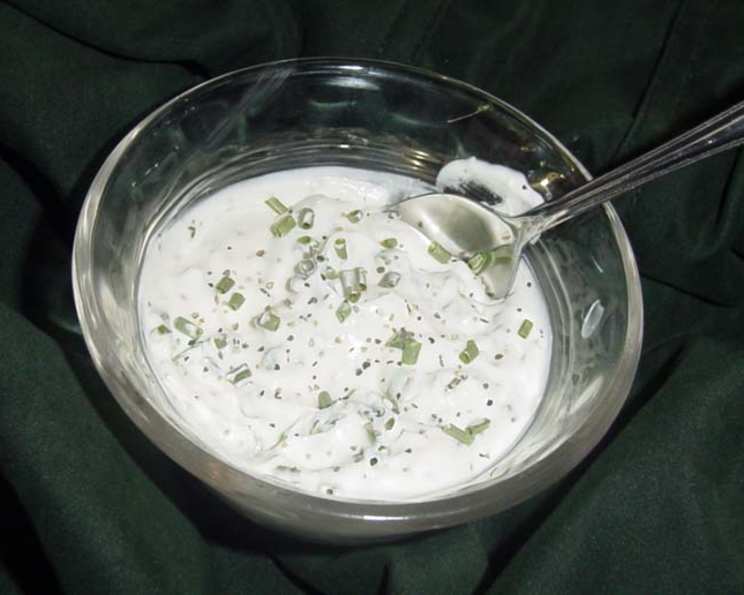
Elevate Your Snacking with Homemade Chive and Garlic Dip Mix
I have fond memories of summer picnics as a child. My grandmother always brought an enormous wicker basket overflowing with goodies. While everyone else clamored for the potato salad and fried chicken, I made a beeline for her creamy, herbaceous dip. The simple combination of sour cream and a savory blend of dried herbs and spices was utterly irresistible. She always kept her recipe secret, but after much experimentation, I’ve created a version that evokes those cherished flavors, and it all starts with this magical Chive and Garlic Dip Mix.
Recipe Overview
- Prep Time: 10 minutes
- Cook Time: 2 hours (Chill Time)
- Total Time: 2 hours 10 minutes
- Servings: About 3 cups of prepared dip
- Yield: 1 batch of dip mix
- Dietary Type: Vegetarian (easily adaptable to vegan – see variations)
Ingredients
For the Dry Mix:
- 4 teaspoons dried chives
- 2 teaspoons dried onion flakes
- 1 teaspoon garlic salt
- 1 teaspoon garlic powder
- 1 teaspoon celery seed
- 1 pinch black pepper (about 1/8 teaspoon)
To Complete the Dip:
- 3 cups sour cream (or vegan alternative)
Equipment Needed
- Small mixing bowl
- Spoon or whisk
- Measuring spoons
- Ziplock bag (3″ x 4″) or small jar for storage
- Airtight container for storing the prepared dip
Instructions
- In a small mixing bowl, combine the dried chives, dried onion flakes, garlic salt, garlic powder, celery seed, and black pepper.
- Stir the dry ingredients thoroughly until they are well blended and evenly distributed. This ensures a consistent flavor throughout the dip.
- Transfer the Chive and Garlic Dip Mix to a 3″x4″ ziplock bag or a small jar. This keeps the mix fresh and ready to use. Seal the bag or jar tightly. This mix can be stored for several months in a cool, dark place.
- When ready to make the dip, in a larger bowl, combine the Chive and Garlic Dip Mix with the 3 cups of sour cream.
- Stir the mixture until the dry ingredients are fully incorporated into the sour cream. Ensure there are no clumps of spices remaining. A whisk can be helpful for this step.
- Cover the bowl tightly with plastic wrap or transfer the dip to an airtight container.
- Refrigerate the dip for at least 2 hours before serving. This allows the flavors to meld and deepen, creating a richer and more complex taste. For the best flavor, chilling overnight is ideal.
Expert Tips & Tricks
- Toast your spices: For an extra layer of flavor, lightly toast the dried onion flakes and celery seed in a dry skillet over medium-low heat for a minute or two, until fragrant, before adding them to the mix. Be careful not to burn them.
- Adjust the garlic: If you prefer a more subtle garlic flavor, reduce the amount of garlic salt or garlic powder slightly. Conversely, if you’re a garlic lover, you can add a pinch more of garlic powder.
- Make it ahead: The dry mix can be prepared weeks in advance and stored in an airtight container in a cool, dark place. This makes it a convenient option for last-minute gatherings.
- Blooming the spices: For a more intense flavor, consider “blooming” the dry spice mix in a tablespoon of warm milk or water for 10-15 minutes before adding it to the sour cream. This helps to rehydrate the dried herbs and spices.
- Consistency is key: If you prefer a thinner dip, add a tablespoon or two of milk or cream until you reach your desired consistency. For a thicker dip, use full-fat sour cream and avoid adding any extra liquid.
- Dealing with lumps: If your dip has any lumps after mixing, use a whisk to smooth it out. Alternatively, you can briefly blend the dip in a food processor or blender until it’s completely smooth.
Serving & Storage Suggestions
This Chive and Garlic Dip is incredibly versatile and can be served with a variety of accompaniments.
- Chips and Crackers: Classic potato chips, tortilla chips, and assorted crackers are always a hit.
- Fresh Vegetables: Serve with crudités like carrot sticks, celery sticks, cucumber slices, bell pepper strips, and broccoli florets.
- Bread: Offer toasted baguette slices, pita bread, or soft pretzels for dipping.
- Baked Potatoes: Use it as a topping for baked potatoes or sweet potatoes.
- Grilled Meats: Serve it alongside grilled chicken, steak, or fish as a flavorful sauce.
Storage:
- The prepared dip should be stored in an airtight container in the refrigerator. It will keep for up to 3-4 days.
- It is not recommended to freeze the dip, as the sour cream may separate and become watery upon thawing.
- Do not leave the dip at room temperature for more than 2 hours, as this can promote bacterial growth.
Nutritional Information
Here’s an approximate nutritional breakdown per serving (based on using full-fat sour cream and dividing the 3 cups of dip into 12 servings):
| Nutrient | Amount per Serving | % Daily Value |
|---|---|---|
| Calories | 150 kcal | 8% |
| Total Fat | 13g | 20% |
| Saturated Fat | 8g | 40% |
| Cholesterol | 40mg | 13% |
| Sodium | 250mg | 11% |
| Total Carbohydrate | 3g | 1% |
| Dietary Fiber | 0g | 0% |
| Sugars | 2g | 4% |
| Protein | 2g | 4% |
Note: Nutritional information is an estimate and can vary based on specific ingredients and portion sizes.
Variations & Substitutions
- Vegan Dip: Substitute the sour cream with a plant-based alternative like cashew cream, vegan sour cream (Tofutti or Follow Your Heart), or blended silken tofu. You may need to adjust the seasoning to taste, as vegan alternatives can have a different flavor profile.
- Greek Yogurt Dip: For a tangier and slightly healthier option, use Greek yogurt instead of sour cream.
- Spicy Dip: Add a pinch of red pepper flakes or a dash of hot sauce to the dry mix for a kick of heat.
- Herbaceous Dip: Incorporate other dried herbs like dill, parsley, or basil for a more complex flavor.
- Lemon-Garlic Dip: Add a teaspoon of lemon zest and a squeeze of lemon juice to the prepared dip for a bright and zesty twist.
- French Onion Dip Variation: Add caramelized onions to the mix. This works best with fresh caramelized onions that have been thoroughly drained of excess oil.
FAQs (Frequently Asked Questions)
Q: Can I use fresh chives and garlic instead of dried?
A: While you can, dried herbs and spices work best in this mix as they have a longer shelf life and create a more consistent flavor. If using fresh, finely mince them and use about 1 tablespoon of fresh chives and 1 clove of minced garlic, and use immediately rather than storing. You would also want to use regular salt rather than garlic salt.
Q: How long will the dry mix last?
A: The dry mix can last for several months (up to 6) if stored in an airtight container in a cool, dark place.
Q: Can I use light sour cream to make the dip?
A: Yes, you can use light sour cream to reduce the fat content of the dip. However, keep in mind that it may result in a slightly thinner consistency.
Q: What can I do if my dip is too thick?
A: Add a tablespoon or two of milk, cream, or even water to thin the dip to your desired consistency. Stir well to combine.
Q: Can I add other ingredients to the prepared dip?
A: Absolutely! Feel free to add other ingredients like chopped vegetables, crumbled bacon, or shredded cheese to customize the dip to your liking.
Final Thoughts
This Chive and Garlic Dip Mix is a simple yet incredibly flavorful way to elevate your snacking game. Whether you’re hosting a party, packing a picnic, or simply looking for a delicious and easy dip to enjoy at home, this recipe is sure to become a new favorite. Don’t be afraid to experiment with different variations and substitutions to create a dip that perfectly suits your taste. I encourage you to try this recipe and share your feedback. Pair it with your favorite crunchy snacks and enjoy the delightful flavors!