
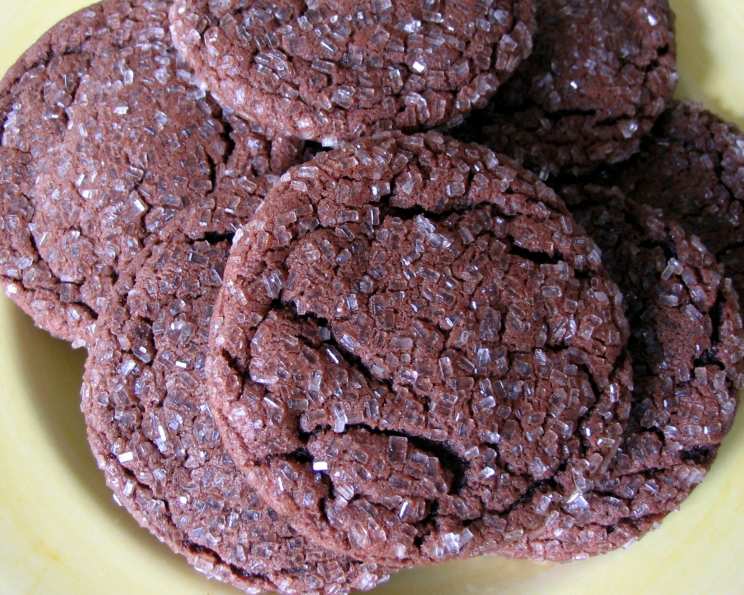
Choco-Mint Snaps: A Holiday Classic with a Twist
The aroma of peppermint always transports me back to my grandmother’s kitchen during the holidays. Her cookie jar was legendary, overflowing with an assortment of festive treats. But it was her Choco-Mint Snaps that I truly coveted. The crisp edges, the subtle minty coolness, and the rich chocolate undertones created a symphony of flavors that danced on my tongue. These cookies weren’t just a dessert; they were a warm hug on a cold winter day, a symbol of family and love baked into every bite.
Recipe Overview
- Prep Time: 20 minutes
- Cook Time: 9-11 minutes per tray
- Total Time: Approximately 1 hour (including cooling)
- Servings: Approximately 72 cookies
- Yield: 6 dozen cookies
- Dietary Type: Vegetarian
Ingredients
- 4 ounces unsweetened chocolate
- 4 cups flour
- 2 teaspoons baking soda
- 1/2 teaspoon salt
- 1 1/4 cups shortening
- 2 cups sugar
- 2 eggs
- 1/3 cup light corn syrup
- 2 1/2 tablespoons water
- 2 teaspoons peppermint extract
- 1 teaspoon vanilla extract
- Additional sugar, for rolling (granulated or decorating sugar)
Equipment Needed
- Baking sheets
- Parchment paper or silicone baking mats (optional)
- Mixing bowls
- Electric mixer
- Whisk
- Measuring cups and spoons
- Wire racks
Instructions
-
Begin by melting the unsweetened chocolate. You can use a double boiler or a microwave. If using a microwave, melt the chocolate in 30-second intervals, stirring in between, until completely smooth. Be careful not to overheat it. Once melted, remove from the heat and allow it to cool slightly.
-
Preheat your oven to 350°F (175°C). Prepare your baking sheets by lightly greasing them. Alternatively, line them with parchment paper or silicone baking mats for easy removal and cleanup.
-
In a small bowl, whisk together the flour, baking soda, and salt. This ensures that the baking soda is evenly distributed throughout the flour, which is crucial for the cookies to rise properly. Set this dry ingredient mixture aside.
-
In a large mixing bowl, using an electric mixer at medium speed, cream together the shortening and 2 cups of sugar until the mixture is light and fluffy. This step is essential for creating a tender cookie. Creaming the shortening and sugar incorporates air into the mixture, which helps to leaven the cookies.
-
Add the eggs to the creamed mixture, one at a time, and blend well after each addition. Make sure the eggs are fully incorporated before adding the next one.
-
Add the cooled, melted chocolate, corn syrup, water, peppermint extract, and vanilla extract to the mixture. Blend until everything is well combined. The corn syrup helps to keep the cookies soft and chewy, while the peppermint and vanilla extracts enhance the flavor profile.
-
Gradually add the dry ingredient mixture (the flour, baking soda, and salt) to the wet ingredients, stirring until just blended. Be careful not to overmix the dough, as this can result in tough cookies. Mix only until the flour is just incorporated.
-
Shape the dough into 1-inch balls. The easiest way to do this is using a small cookie scoop or a tablespoon.
-
Pour the additional sugar into a small bowl. Roll each dough ball in the sugar, coating it completely. This adds a touch of sweetness and a delightful crunch to the finished cookies.
-
Place the sugared dough balls about 2 inches apart onto the prepared baking sheets. This spacing allows the cookies to spread evenly as they bake.
-
Bake for 9 to 11 minutes. The baking time may vary depending on your oven, so keep a close eye on the cookies. They are done when the edges are lightly golden brown and the centers are set. Remember the cooking time is per tray, so account for this when planning!
-
Remove the baking sheets from the oven and let the cookies cool for a few minutes on the baking sheet before transferring them to wire racks to cool completely. This prevents them from breaking apart while still warm and soft.
Expert Tips & Tricks
- For a more intense mint flavor, add a few drops of peppermint oil to the dough along with the peppermint extract. Be careful not to add too much, as peppermint oil is very potent.
- If your dough is too soft to handle, chill it in the refrigerator for 30 minutes before shaping the cookies.
- To prevent the cookies from spreading too much, make sure your baking sheets are cool before placing the dough balls on them.
- For festive holiday cookies, tint the rolling sugar with red and green food coloring. Simply place the sugar in separate bowls and add a few drops of food coloring, mixing until the color is evenly distributed.
- Store the dough balls in the freezer for up to a month, and bake them directly from frozen, adding a minute or two to the baking time.
Serving & Storage Suggestions
These Choco-Mint Snaps are perfect served with a glass of cold milk, a warm cup of cocoa, or even alongside a scoop of vanilla ice cream. Arrange them artfully on a platter for a holiday gathering, or package them in decorative tins as gifts for friends and family.
Store the cooled cookies in an airtight container at room temperature for up to a week. For longer storage, freeze them in a freezer-safe container for up to two months. Thaw them at room temperature before serving.
Nutritional Information
Please note that these values are estimates and may vary based on specific ingredients and portion sizes.
| Nutrient | Amount per Serving | % Daily Value |
|---|---|---|
| Calories | 93 kcal | N/A |
| Calories from Fat | 41 kcal | N/A |
| Total Fat | 4.6 g | 7% |
| Saturated Fat | 1.4 g | 7% |
| Cholesterol | 5.9 mg | 1% |
| Sodium | 54.6 mg | 2% |
| Total Carbohydrate | 12.6 g | 4% |
| Dietary Fiber | 0.5 g | 1% |
| Sugars | 6 g | N/A |
| Protein | 1.1 g | 2% |
Variations & Substitutions
- For a gluten-free version, substitute the all-purpose flour with a gluten-free all-purpose flour blend. You may need to adjust the liquid slightly to achieve the right consistency.
- If you don’t have shortening on hand, you can use butter or margarine as a substitute. The texture of the cookies may be slightly different, but the flavor will still be delicious.
- Experiment with different extracts to create unique flavor combinations. Try using almond extract, orange extract, or even a hint of espresso extract.
- Add chocolate chips or chopped nuts to the dough for extra texture and flavor.
FAQs (Frequently Asked Questions)
Q: Can I use dark chocolate instead of unsweetened chocolate?
A: Yes, you can substitute dark chocolate, but keep in mind that it will make the cookies sweeter. You may want to reduce the amount of sugar in the recipe slightly.
Q: What can I do if my cookies are too dry?
A: Overbaking is the most common cause of dry cookies. Be sure to bake them only until the edges are lightly golden brown and the centers are set. Also, make sure you are measuring your flour accurately.
Q: Can I make the dough ahead of time?
A: Absolutely! The dough can be made ahead of time and stored in the refrigerator for up to 2 days. Allow it to come to room temperature slightly before shaping the cookies.
Q: Why are my cookies spreading too much?
A: This can be caused by using too much shortening or butter, or by not chilling the dough enough. Make sure to measure your ingredients accurately and chill the dough for at least 30 minutes before baking.
Q: How do I keep my cookies from sticking to the baking sheet?
A: Greasing your baking sheets thoroughly or using parchment paper or silicone baking mats will prevent the cookies from sticking.
Final Thoughts
These Choco-Mint Snaps are more than just cookies; they’re a celebration of flavor and tradition. Whether you’re baking them for a holiday party, a cozy night in, or simply to satisfy a sweet craving, I hope this recipe brings you as much joy as it has brought me over the years. Don’t be afraid to experiment with variations and make them your own. I would love to hear about your baking adventures and any creative twists you add to this classic recipe. So, gather your ingredients, preheat your oven, and let the magic of baking fill your kitchen!