
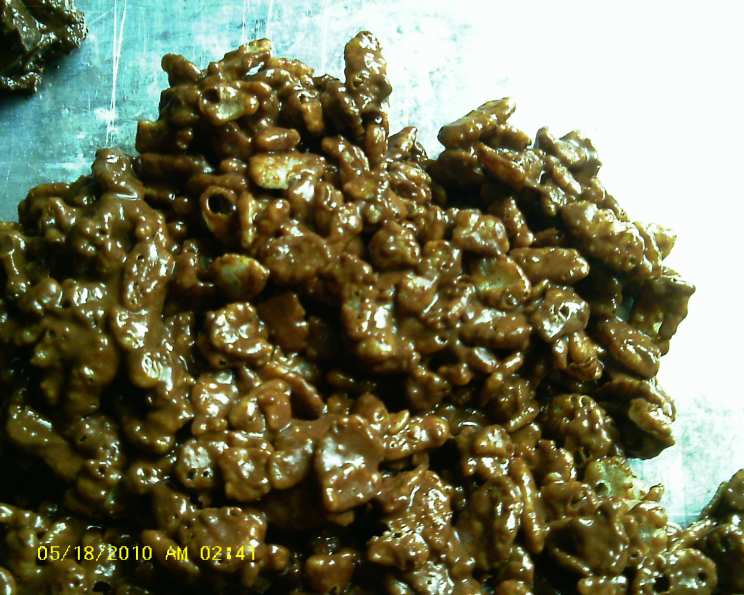
Choco-Scotch Clusters: A Nostalgic Treat
The scent of melting chocolate and butterscotch instantly transports me back to my childhood kitchen. My grandmother, a whirlwind of flour and sugar, would always have a batch of these no-bake cookies cooling on a sheet of waxed paper. Their craggy, irregular shapes were perfectly imperfect, and that sweet, crunchy bite – oh, that was pure joy. I remember eagerly waiting, hovering near the counter, for the “official” taste test, knowing that meant I could finally grab one (or two!) of these delightful little clusters.
Recipe Overview
- Prep Time: 5 minutes
- Cook Time: 5 minutes
- Total Time: 10 minutes
- Yields: 4 dozen
- Dietary Type: Vegetarian
Ingredients
- 1 cup semi-sweet chocolate chips
- 1 cup butterscotch chips
- ¼ cup peanut butter (or almond butter)
- 4 cups Rice Krispies
Equipment Needed
- Microwave-safe bowl
- Spoon
- Wax paper or parchment paper
Instructions
- In a microwave-safe bowl, combine the semi-sweet chocolate chips, butterscotch chips, and peanut butter (or almond butter).
- Microwave the mixture in 30-second intervals, stirring after each interval, until completely melted and smooth. This usually takes about 1 to 2 minutes total. Be careful not to overheat the chocolate, as it can seize and become grainy. If you prefer, you can melt the ingredients in a double boiler over simmering water, stirring constantly until smooth.
- Remove the melted chocolate mixture from the microwave and immediately add the Rice Krispies.
- Stir gently but thoroughly until the Rice Krispies are evenly coated with the chocolate mixture. Make sure to scrape the bottom of the bowl to incorporate all the chocolate.
- Using a spoon or a small cookie scoop, drop rounded spoonfuls of the mixture onto wax paper or parchment paper. Aim for clusters about 1-2 inches in diameter.
- Let the Choco-Scotch Clusters stand at room temperature until firm. This usually takes about 30 minutes to an hour, depending on the temperature of your kitchen. You can speed up the process by placing them in the refrigerator for about 15-20 minutes.
Expert Tips & Tricks
- Melting Chocolate Perfectly: The key to smooth, glossy chocolate is gentle heat. Microwave in short bursts and stir frequently. If using a double boiler, make sure the bottom of the bowl doesn’t touch the simmering water. A touch of vegetable oil or shortening can also help to prevent seizing.
- Nut Butter Variations: Feel free to experiment with different nut butters. Almond butter adds a slightly nutty flavor, while cashew butter lends a creamy sweetness.
- Boosting the Flavor: A pinch of sea salt sprinkled on top of the clusters before they set enhances the sweetness and adds a lovely contrast.
- Creating Consistent Clusters: For uniform clusters, use a small cookie scoop or a measuring spoon. This will ensure that each cluster is the same size, resulting in even cooling and a more consistent texture.
- Preventing Sticking: Make sure your wax paper or parchment paper is smooth and free of wrinkles. If the clusters are sticking, lightly grease the paper with butter or cooking spray.
Serving & Storage Suggestions
Serve the Choco-Scotch Clusters as a delightful treat for kids and adults alike. They are perfect for parties, bake sales, or simply as a sweet snack.
- Storage: Store the clusters in an airtight container at room temperature for up to a week. For longer storage, they can be refrigerated for up to two weeks or frozen for up to two months.
- Serving Ideas: Arrange the clusters on a platter for an elegant presentation. Dust them with powdered sugar or cocoa powder for a festive touch. They also make a great addition to a dessert buffet or a gift basket.
- Reheating (if frozen): If frozen, let the clusters thaw at room temperature before serving. They may lose some of their crispness, but the flavor will remain delicious.
Nutritional Information
| Nutrient | Amount per Serving | % Daily Value |
|---|---|---|
| Calories | 158 kcal | 8% |
| Total Fat | 9g | 14% |
| Saturated Fat | 5g | 25% |
| Cholesterol | 0mg | 0% |
| Sodium | 68mg | 3% |
| Total Carbohydrate | 18g | 6% |
| Dietary Fiber | 0.5g | 2% |
| Sugars | 12g | N/A |
| Protein | 1g | 2% |
Note: Nutritional information is an estimate and may vary based on specific ingredients and portion sizes.
Variations & Substitutions
- Chocolate Choices: Experiment with different types of chocolate chips, such as dark chocolate, milk chocolate, or white chocolate. You can even use a combination of different chocolates for a more complex flavor.
- Mix-Ins: Add other ingredients to the mixture, such as chopped nuts (pecans, walnuts, almonds), dried fruit (raisins, cranberries), or mini marshmallows.
- Spice It Up: A dash of cinnamon or cayenne pepper can add a warm, spicy note to the clusters.
- Vegan Option: Use vegan chocolate chips, vegan butterscotch chips, and a plant-based butter substitute for the peanut butter to make these clusters vegan-friendly.
FAQs (Frequently Asked Questions)
Q: Can I use a different type of cereal instead of Rice Krispies?
A: Yes, you can substitute other crispy rice cereals or even corn flakes for a slightly different texture and flavor.
Q: My chocolate mixture is seizing. What should I do?
A: Try adding a teaspoon of vegetable oil or shortening to the mixture and stirring until smooth. Avoid overheating the chocolate.
Q: How long do these clusters stay fresh?
A: They stay fresh for up to a week at room temperature in an airtight container, or up to two weeks in the refrigerator.
Q: Can I make these into bars instead of clusters?
A: Yes, you can press the mixture into a greased 8×8 inch pan and let it set to make bars.
Q: What if I don’t have wax paper or parchment paper?
A: You can use a lightly greased baking sheet instead.
Final Thoughts
These Choco-Scotch Clusters are more than just a simple treat; they’re a nostalgic journey back to simpler times. Whether you’re sharing them with family and friends or enjoying a quiet moment alone, I hope they bring you as much joy as they’ve brought me over the years. Don’t be afraid to experiment with variations and make them your own. And most importantly, have fun in the kitchen! I’d love to hear about your creations and any tips you discover along the way. Happy baking!