
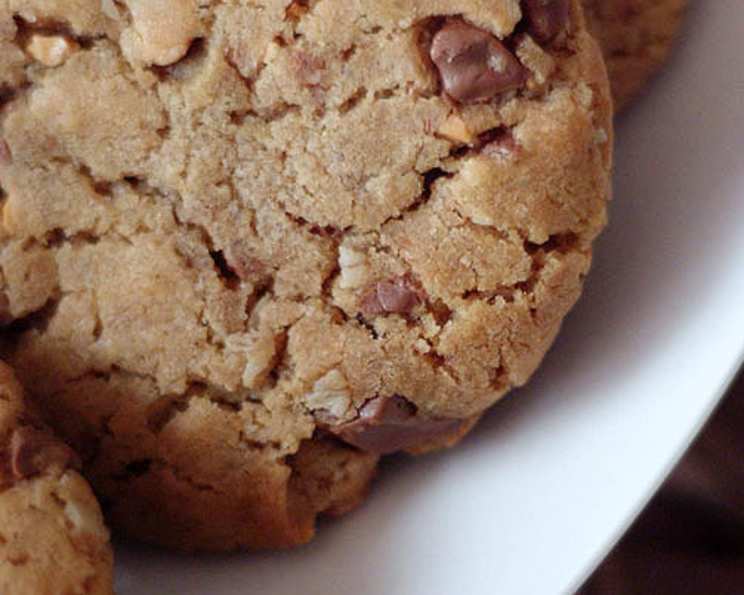
The Unexpected Joy of Chocochip Peanut Butter Cookies (Made with Oil!)
There’s something deeply comforting about the aroma of freshly baked cookies wafting through the house. My grandmother, bless her heart, was a margarine devotee through and through. The taste of those cookies, though full of love, always had a certain…off note. So, when I first stumbled upon this recipe using oil instead, promising a richer, cleaner flavor, I was skeptical. One bite, however, transported me back to childhood, but with a sophisticated, delicious twist I never knew was possible. It’s a recipe that proves you can create incredibly satisfying treats without relying on traditional, and sometimes less-than-ideal, ingredients.
Recipe Overview
- Prep Time: 7 minutes
- Cook Time: 10-12 minutes
- Total Time: 17-19 minutes
- Servings: 32 cookies
- Dietary Type: Dairy-Free
Ingredients
- 1/3 cup canola oil
- 3 tablespoons peanut butter, any kind
- 1/2 cup brown sugar
- 1/2 cup white sugar
- 1 egg
- 1 1/4 cups flour (can use a mix of white and whole wheat)
- 1/2 teaspoon baking powder
- 1/2 teaspoon baking soda
- 1/2 cup oatmeal
- 1/2 cup chocolate chips
Equipment Needed
- Mixing bowl
- Measuring cups and spoons
- Cookie sheet
- Parchment paper
- Fork
Instructions
-
Preheat your oven to 180 degrees C (350 F). Ensure your oven rack is in the center position for even baking.
-
In a mixing bowl, combine the canola oil, peanut butter, brown sugar, and white sugar. Mix these wet ingredients thoroughly until they are well combined and form a smooth, consistent mixture.
-
Add the egg to the mixture and continue mixing until the egg is fully incorporated and the batter is light and creamy. This step is important for achieving the right texture in your cookies.
-
In a separate bowl, whisk together the flour, baking powder, and baking soda. This ensures that the leavening agents are evenly distributed throughout the flour, resulting in cookies that rise properly and have a light, airy texture.
-
Gradually add the dry ingredients to the wet ingredients, mixing until just combined. Be careful not to overmix, as this can lead to tough cookies.
-
Fold in the oatmeal and chocolate chips. Ensure they are evenly distributed throughout the dough.
-
Form the dough into small balls, about 1 inch in diameter. You can use a spoon or your hands to shape the cookies.
-
Place the cookie dough balls onto a cookie sheet lined with parchment paper, leaving some space between each cookie to allow for spreading during baking.
-
Use a fork to gently press down on each cookie, creating a criss-cross pattern on top. This not only makes the cookies look appealing but also helps them bake evenly.
-
Bake in the preheated oven for 10-12 minutes, or until the edges of the cookies are golden brown and the centers are set. Keep a close eye on them, as baking times can vary depending on your oven.
-
Remove the cookies from the oven and let them cool on the cookie sheet for a few minutes before transferring them to a wire rack to cool completely. This prevents them from sticking to the sheet and allows them to crisp up nicely.
Expert Tips & Tricks
- Don’t overmix the dough: Overmixing develops the gluten in the flour, resulting in tough cookies. Mix until just combined.
- Use room temperature ingredients: This helps the ingredients blend together more easily and creates a smoother batter.
- Chill the dough (optional): For thicker, chewier cookies, chill the dough for at least 30 minutes before baking. This allows the fats to solidify, which prevents the cookies from spreading too much in the oven.
- Adjust the sugar: If you prefer less sweet cookies, reduce the amount of white sugar slightly.
- Baking time is key: Watch the cookies carefully during baking. They should be golden brown around the edges and slightly soft in the center. They will continue to firm up as they cool.
- For perfectly round cookies: Use a round cookie cutter or a knife to gently nudge the edges of the cookies into a perfect circle as soon as they come out of the oven.
Serving & Storage Suggestions
These cookies are delicious served warm with a glass of milk or a cup of coffee. They also make a great addition to lunchboxes or as a sweet treat any time of day. Store the cooled cookies in an airtight container at room temperature for up to 3-4 days. For longer storage, you can freeze them for up to 2 months. To freeze, place the cooled cookies in a single layer on a baking sheet and freeze until solid. Then, transfer them to a freezer-safe bag or container. To thaw, simply let them sit at room temperature for a few minutes.
Nutritional Information
| Nutrient | Amount per Serving | % Daily Value |
|---|---|---|
| Calories | 91.5 kcal | N/A |
| Calories from Fat | 36 kcal | 40% |
| Total Fat | 4.1 g | 6% |
| Saturated Fat | 0.9 g | 4% |
| Cholesterol | 5.8 mg | 1% |
| Sodium | 35.9 mg | 1% |
| Total Carbohydrate | 13.1 g | 4% |
| Dietary Fiber | 0.5 g | 2% |
| Sugars | 8.1 g | N/A |
| Protein | 1.4 g | 2% |
Note: Nutritional information is an estimate and may vary based on specific ingredients and serving sizes.
Variations & Substitutions
- Gluten-Free: Use a gluten-free all-purpose flour blend instead of regular flour. Be sure to check the label to ensure it contains xanthan gum for binding.
- Nut-Free: Substitute the peanut butter with sunflower seed butter or tahini.
- Vegan: Replace the egg with a flax egg (1 tablespoon ground flaxseed mixed with 3 tablespoons water, let sit for 5 minutes to thicken). Ensure your chocolate chips are dairy-free.
- Add-ins: Get creative with your add-ins! Try adding chopped nuts, dried fruit, or different types of chocolate chips.
- Spices: A pinch of cinnamon or nutmeg can add warmth and depth to the flavor of these cookies.
FAQs (Frequently Asked Questions)
Q: Can I use a different type of oil instead of canola oil?
A: Yes, you can substitute with other neutral-flavored oils like vegetable oil, grapeseed oil, or even light olive oil. Avoid strong-flavored oils like extra virgin olive oil, as they can affect the taste of the cookies.
Q: My cookies spread too much while baking. What did I do wrong?
A: There are a few reasons why your cookies might have spread too much. Overmixing the dough, using too much oil, or not chilling the dough sufficiently can all contribute to excessive spreading. Try chilling the dough for at least 30 minutes before baking to help prevent this.
Q: Can I freeze the cookie dough instead of the baked cookies?
A: Absolutely! Form the dough into balls, place them on a baking sheet lined with parchment paper, and freeze until solid. Then, transfer the frozen dough balls to a freezer-safe bag or container. When you’re ready to bake, simply bake the frozen dough balls for a few extra minutes.
Q: My cookies are too dry. How can I fix this?
A: Make sure you’re not overbaking the cookies. They should be golden brown around the edges and slightly soft in the center. Also, ensure you’re using the correct amount of oil and not overmeasuring the flour.
Q: Can I use natural peanut butter for this recipe?
A: Yes, you can use natural peanut butter, but be sure to stir it well before measuring, as the oil tends to separate. Also, keep in mind that natural peanut butter may result in a slightly drier cookie, so you may need to add a tablespoon or two of extra oil to the batter.
Final Thoughts
This recipe offers a delightful twist on the classic peanut butter chocolate chip cookie, proving that deliciousness can be achieved without traditional fats. The canola oil imparts a lightness and clarity of flavor that allows the peanut butter and chocolate to truly shine. So, go ahead, preheat your oven, gather your ingredients, and experience the unexpected joy of these fantastic cookies. Share them with loved ones, experiment with variations, and most importantly, enjoy the process of creating something truly special. Don’t hesitate to leave your feedback and share your own culinary adventures with this delightful recipe!