
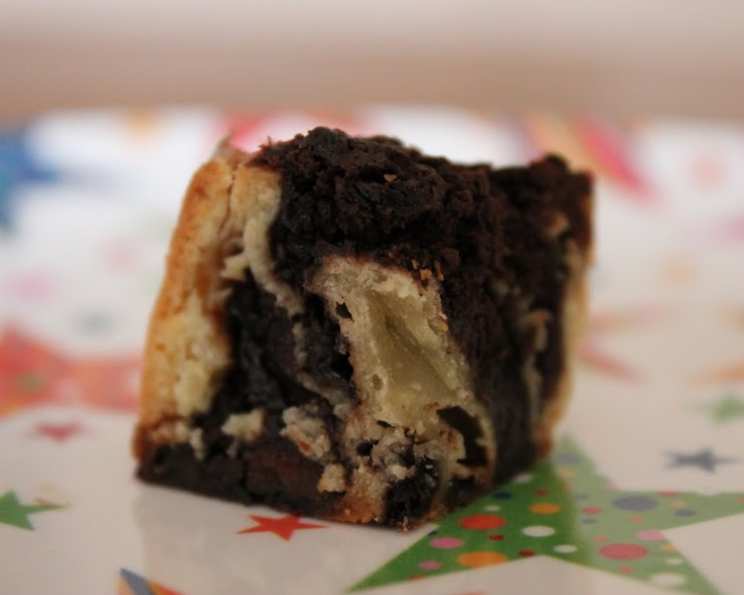
Chocolate Babka Bites: A Nostalgic Twist
The aroma of yeasty dough and melting chocolate takes me straight back to my grandmother’s tiny Brooklyn kitchen. Bubbe Rose, as we called her, always had something baking, and while her rugelach was legendary, it was her babka that held a special place in my heart. The way she’d carefully braid the dough, the intense chocolate filling that oozed with every bite – it was pure love made edible. These Chocolate Babka Bites are my attempt to capture that magic, scaled down for modern snacking but bursting with the same comforting flavors.
Recipe Overview
- Prep Time: 30 minutes
- Cook Time: 20 minutes
- Total Time: 1 hour 50 minutes (includes proofing time)
- Servings: 12-16
- Yield: 12-16 bites
- Dietary Type: Vegetarian
Ingredients
- 1/2 cup milk
- 1/4 cup granulated sugar
- 1 1/2 teaspoons active dry yeast
- 1 egg
- 3 cups bread flour, plus more for work surface (sifted)
- 1/2 teaspoon table salt
- 3 tablespoons unsalted butter, softened
- 3 tablespoons salted butter, softened
- 3 tablespoons sugar
- 3/4 cup dark chocolate chips
- 1/4 cup dried apricot, finely diced
- 1 pinch salt
- 1/2 teaspoon cinnamon
- Additional butter, for greasing the bowl
Optional:
- 1/4 cup dried fruit (such as diced prunes), finely chopped
Equipment Needed
- Saucepan
- Thermometer (optional)
- Small bowl
- Stand mixer
- Large bowl
- Cling wrap or towel
- Food processor
- Muffin tin
- Patty pans (optional)
- Rolling pin
- Serrated knife
Instructions
- In a saucepan on the stove, heat milk and pinch of salt to 120°F (~48°C). If you don’t have a thermometer, the milk should feel warm to the touch, but not scalding.
- Sprinkle yeast over the warm milk; let it set for 5 minutes. The yeast should start to foam, indicating that it’s active. If it doesn’t foam, your yeast may be old, and you should start with a fresh batch.
- In a small bowl, whisk together the egg and remaining 1/4 cup sugar, then slowly whisk in the yeast mixture. Ensure everything is well combined.
- In a stand mixer fitted with the paddle attachment, combine the flour and salt. Sifting the flour will help create a lighter, more tender crumb.
- With the mixer on low speed, gradually add the egg mixture to the flour mixture until just combined. Be careful not to overmix at this stage.
- Add the softened unsalted butter and salted butter to the dough; mix until thoroughly combined.
- Switch to the dough hook attachment and let the mixer knead the dough for 10 minutes. The dough should be sticky and stringy, which might seem worrisome, but it will firm up a bit after it rises. Trust the process!
- Butter a large bowl and place the dough in it; cover with cling wrap or a towel. This prevents the dough from drying out as it rises.
- Let the dough rise in a warm place for an hour, or until it has doubled in size. This step is crucial for developing the babka’s light and airy texture.
- While the dough is rising, prepare the filling. In a food processor, add the dark chocolate chips, salt, and sugar; pulse until the chocolate is finely chopped and almost powder-like. This ensures an even distribution of chocolate flavor throughout the babka bites.
- Add the finely diced dried apricots and any other optional dried fruit, like diced prunes, to the food processor. Pulse until the dried fruit is finely chopped and incorporated into the chocolate mixture. Set the filling aside.
- If using, line your muffin tin with patty pans. This makes cleanup much easier.
- Once the dough is ready (doubled in size), turn it out onto a well-floured surface; gently deflate it with your hands. This releases some of the gas that has built up during proofing. Let the dough rest for 5 minutes. This allows the gluten to relax, making it easier to roll out.
- After resting, roll the dough into a large rectangle. The longer you make the rectangle, the more dramatic the swirl will be in the finished babka bites.
- Sprinkle the filling evenly over the surface of the dough. The filling will be hard and clumpy, making it difficult to spread. Do your best to distribute it evenly, being careful not to push too hard, as the filling will go through the very soft dough.
- Tightly roll the dough back over the filling, forming a log. Make sure the roll is tight to prevent air pockets.
- Trim the ends of the log to remove any areas without filling. Use a sharp serrated knife to gently saw 1-inch segments off the log.
- Place the babka bites into the prepared muffin tin. Cover the tin with a towel and let the bites rise for 30 minutes. This second proofing ensures a light and fluffy texture.
- Preheat your oven to 350°F (180°C). Bake for 20 minutes, or until the babka bites are puffed and golden brown. Keep a close eye on them, as baking times may vary depending on your oven.
Expert Tips & Tricks
- For an extra shiny finish, brush the baked babka bites with a simple syrup (equal parts sugar and water, heated until the sugar dissolves) immediately after removing them from the oven.
- If the dough seems too sticky during kneading, add a tablespoon of flour at a time until it becomes more manageable.
- Don’t be afraid to experiment with different fillings! Try using Nutella, peanut butter, or even a savory filling like pesto and sun-dried tomatoes.
- To ensure even baking, rotate the muffin tin halfway through the baking time.
- If the tops of the babka bites are browning too quickly, tent the muffin tin with foil.
Serving & Storage Suggestions
Serve the Chocolate Babka Bites warm or at room temperature. They are delicious on their own, or paired with a cup of coffee or tea. Store any leftover babka bites in an airtight container at room temperature for up to 2 days, or in the refrigerator for up to 5 days. To freeze, wrap the babka bites individually in plastic wrap and store in a freezer bag for up to 2 months. Reheat in a preheated oven at 350°F (180°C) for 5-10 minutes, or until warmed through.
Nutritional Information
| Nutrient | Amount per Serving | % Daily Value |
|---|---|---|
| Calories | 150.5 kcal | N/A |
| Calories from Fat | 87 g | 58% |
| Total Fat | 9.7 g | 14% |
| Saturated Fat | 5.9 g | 29% |
| Cholesterol | 32.2 mg | 10% |
| Sodium | 148.2 mg | 6% |
| Total Carbohydrate | 16.5 g | 5% |
| Dietary Fiber | 1 g | 4% |
| Sugars | 14.5 g | 57% |
| Protein | 1.7 g | 3% |
Note: Nutritional information is an estimate and may vary based on specific ingredients and portion sizes.
Variations & Substitutions
- Vegan Babka Bites: Substitute the milk with almond or soy milk, the butter with vegan butter, and the egg with a flax egg (1 tablespoon ground flaxseed mixed with 3 tablespoons water, let sit for 5 minutes).
- Gluten-Free Babka Bites: Use a gluten-free flour blend designed for baking, and add a teaspoon of xanthan gum to help bind the dough.
- Spice it up: Add a pinch of cayenne pepper to the chocolate filling for a hint of heat.
- Citrus Zest: Add the zest of an orange or lemon to the dough for a brighter flavor.
FAQs (Frequently Asked Questions)
Q: Why is my dough so sticky?
A: Babka dough is naturally sticky due to its high butter content. Resist the urge to add too much flour, as this can result in a dry babka. Instead, use a bench scraper or lightly floured hands to handle the dough.
Q: How do I prevent the filling from leaking out during baking?
A: Ensure that the dough is tightly rolled around the filling, and crimp the edges to seal. You can also chill the rolled log for 15-20 minutes before slicing to help firm up the filling.
Q: Can I make the dough ahead of time?
A: Yes! You can prepare the dough through step 9, then refrigerate it overnight. Let it come to room temperature for about 30 minutes before continuing with the recipe.
Q: My babka bites are browning too quickly. What should I do?
A: Tent the muffin tin with aluminum foil to prevent the tops from burning.
Q: Can I use different types of chocolate?
A: Absolutely! Feel free to experiment with milk chocolate, white chocolate, or a combination of different chocolates.
Final Thoughts
These Chocolate Babka Bites are more than just a recipe; they’re a little piece of history, a taste of home, and a reminder of the simple joys in life. Whether you’re a seasoned baker or just starting out, I encourage you to give this recipe a try. Don’t be intimidated by the yeast or the braiding; it’s all part of the fun! And most importantly, don’t forget to share your creations with loved ones. After all, the best part of baking is sharing the love, one bite at a time.