
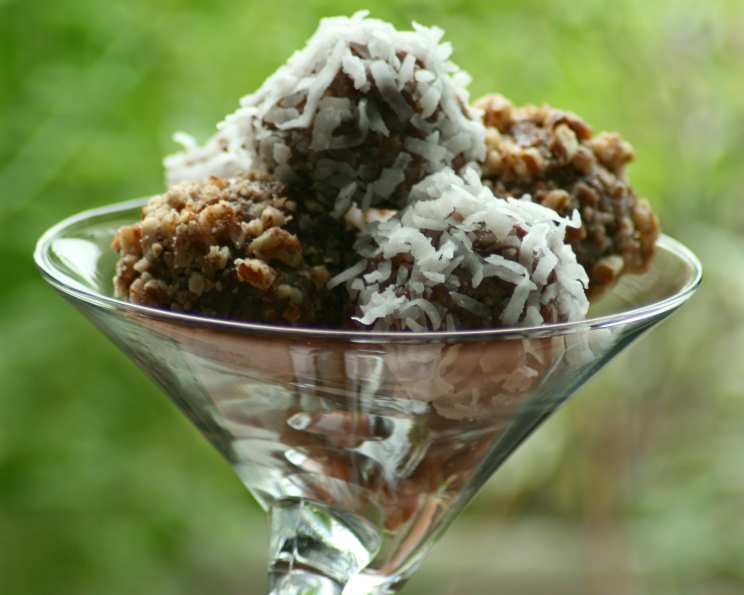
The Easiest Chocolate Balls You’ll Ever Make
I can still remember the sticky, sweet anticipation that would fill me as my grandmother pulled out the ingredients for these chocolate balls. They weren’t fancy, but they were pure, unadulterated joy on a plate. The slightly rough, coconut-covered exterior hid a soft, intensely chocolatey interior that would melt in your mouth. It was the perfect treat for a kid after a long day of playing, and now, decades later, it still brings me right back to her sun-drenched kitchen.
Recipe Overview
- Prep Time: 5 minutes
- Cook Time: 0 minutes
- Total Time: 5 minutes + chilling time
- Servings: Varies based on ball size
- Yields: Approximately 24 small balls
- Dietary Type: Vegetarian (can be made vegan with substitutions)
Ingredients
- 1 (250 g) packet plain sweet biscuits (I use Marie biscuits)
- 1 (375 ml) can condensed milk (You can make your own!)
- 1 cup coconut, for the mixture
- Extra coconut, for rolling the balls in
- 2 tablespoons cocoa powder
Equipment Needed
- Food processor or rolling pin and zip-lock bag
- Large mixing bowl
- Measuring cups and spoons
- Baking sheet or plate
- Refrigerator
Instructions
-
The first step is to crush the biscuits into a very fine crumb. You can do this using a food processor, pulsing until they resemble sand. If you don’t have a food processor, place the biscuits in a zip-lock bag and use a rolling pin to crush them as finely as possible. The finer the crumbs, the better the texture of the final chocolate balls.
-
In a large mixing bowl, combine the crushed Marie biscuits, coconut (1 cup), and cocoa powder. Make sure to distribute the cocoa evenly throughout the biscuit crumbs. This will ensure a consistent chocolate flavor in every bite.
-
Add the condensed milk to the dry ingredients. This is where the magic happens! The condensed milk acts as a binder, bringing all the ingredients together into a cohesive mixture.
-
Stir all the ingredients together until they are very well combined. You might need to use your hands towards the end to ensure everything is thoroughly mixed. The mixture should be moist and sticky, but not overly wet.
-
Using slightly wet hands, roll the mixture into small balls. The size is entirely up to you, but I find that small, bite-sized balls are perfect. Wetting your hands prevents the mixture from sticking to them and makes the rolling process much easier.
-
Roll each ball in coconut until it is completely coated. The coconut not only adds a lovely texture but also enhances the flavor of the chocolate balls.
-
Place the coconut-covered balls on a baking sheet or plate and refrigerate them for at least an hour to harden. This chilling time is crucial for the balls to firm up and hold their shape.
Expert Tips & Tricks
- For a richer chocolate flavor, use dark cocoa powder instead of regular cocoa powder.
- If the mixture is too dry, add a tablespoon of condensed milk at a time until it reaches the desired consistency.
- If the mixture is too wet, add a little more crushed biscuit crumbs or coconut to absorb the excess moisture.
- To make these ahead of time, you can store the unrolled mixture in the refrigerator for up to 2 days before rolling into balls.
- Try adding a drop of vanilla extract to the mixture for an extra layer of flavor.
- For a boozy kick, add a tablespoon of rum or your favorite liqueur to the mixture.
Serving & Storage Suggestions
These chocolate balls are best served chilled. They make a delightful treat on their own or can be served alongside a cup of coffee or tea.
- Storage: Store the chocolate balls in an airtight container in the refrigerator. They will keep for up to a week.
- Freezing: You can also freeze the chocolate balls for longer storage. Place them in a freezer-safe container and they will keep for up to 2 months. Thaw them in the refrigerator before serving.
- These chocolate balls are perfect for parties, potlucks, or simply as a sweet treat to enjoy at home.
Nutritional Information
Please note that these values are estimates and may vary based on specific ingredients and serving size.
| Nutrient | Amount per Serving | % Daily Value |
|---|---|---|
| Calories | 150 kcal | 8% |
| Total Fat | 7g | 11% |
| Saturated Fat | 5g | 25% |
| Cholesterol | 2mg | 1% |
| Sodium | 50mg | 2% |
| Total Carbs | 20g | 7% |
| Dietary Fiber | 1g | 4% |
| Sugars | 15g | N/A |
| Protein | 2g | 4% |
Variations & Substitutions
- Vegan Chocolate Balls: Substitute the condensed milk with a vegan condensed milk alternative, readily available in most supermarkets. Ensure your biscuits are also vegan-friendly.
- Gluten-Free Chocolate Balls: Use gluten-free biscuits instead of regular Marie biscuits.
- Nutty Chocolate Balls: Add chopped nuts such as almonds, walnuts, or pecans to the mixture for added crunch and flavor.
- Citrus Chocolate Balls: Add the zest of an orange or lemon to the mixture for a refreshing citrus twist.
- Spiced Chocolate Balls: Add a pinch of cinnamon, nutmeg, or cardamom to the mixture for a warm and cozy flavor.
FAQs (Frequently Asked Questions)
Q: Can I use a different type of biscuit?
A: Yes, you can use other plain sweet biscuits, but Marie biscuits work best due to their neutral flavor and fine texture.
Q: Do I have to use condensed milk?
A: Condensed milk is essential for the recipe as it acts as a binder and adds sweetness. A vegan substitute can be used for a vegan version.
Q: Can I make these without coconut?
A: While the coconut adds a signature texture and flavor, you can try rolling them in cocoa powder, crushed nuts, or sprinkles instead.
Q: How long do these chocolate balls last?
A: Stored properly in the refrigerator, these chocolate balls will last for up to a week. They can also be frozen for longer storage.
Q: The mixture is too crumbly. What should I do?
A: Add a tablespoon of condensed milk at a time until the mixture comes together.
Final Thoughts
These chocolate balls are a testament to the fact that simple ingredients and straightforward methods can create truly delightful treats. I encourage you to give this recipe a try and experience the joy of these little balls of chocolatey goodness for yourself. Don’t hesitate to experiment with variations and substitutions to create your own unique version. And most importantly, have fun in the kitchen! These are perfect with a scoop of vanilla ice cream! I’d love to hear about your experiences and any creative twists you come up with!