
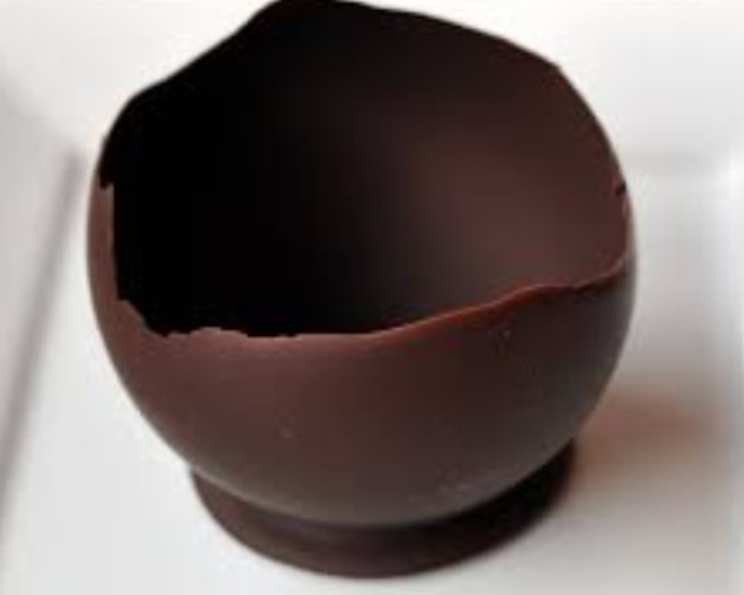
Edible Chocolate Bowls: A Deliciously Unique Dessert Experience
The first time I saw a chocolate bowl, it was at a fancy restaurant during my culinary school days. I remember being utterly mesmerized as the waiter placed a delicate, glistening dark chocolate shell filled with fresh raspberry sorbet in front of me. The contrast of textures and temperatures was divine, and the sheer artistry of the bowl itself sparked my imagination. I knew right then that I had to learn how to make these edible masterpieces myself. They’re surprisingly simple, endlessly customizable, and always guaranteed to impress.
Recipe Overview
- Prep Time: 15 minutes
- Cook Time: 5 minutes (melting chocolate)
- Total Time: 20 minutes (plus chilling time)
- Servings: 4
- Yield: 4 bowls
- Dietary Type: Vegetarian (check chocolate ingredients for vegan)
Ingredients
- 4 standard-size Hershey’s Milk Chocolate Bars (or equivalent chocolate of your choice)
- 4 small balloons
Equipment Needed
- Small microwave-safe bowl
- Wax paper or parchment paper
- Baking sheet or tray
- Refrigerator
Instructions
- Begin by preparing your workspace. Line a baking sheet or tray with wax paper or parchment paper. This will serve as the base for your chocolate bowls while they set.
- Unwrap the Hershey’s chocolate bars and break them into smaller pieces. Place the chocolate pieces in a small, microwave-safe bowl.
- Melt the chocolate in the microwave using 30-second intervals, stirring in between each interval to prevent burning. Be patient and continue until the chocolate is completely smooth and melted. Alternatively, you can melt the chocolate in a double boiler over simmering water, stirring constantly.
- Once the chocolate is melted and smooth, take a spoonful and pour a small amount onto the prepared wax paper for each bowl. This will create a sturdy base for the chocolate-covered balloons to rest on. Make sure the base is large enough to comfortably support the balloon. A circle about 2-3 inches in diameter should suffice.
- Now, it’s time to prepare the balloons. Blow up the balloons to the desired size for your bowls. Keep in mind that the size of the balloon will determine the size of your chocolate bowl. Smaller balloons are generally easier to work with.
- Holding a balloon by the knot, carefully dip the bottom half of the balloon into the melted chocolate, coating it generously. Rotate the balloon to ensure an even coating.
- Gently place the chocolate-covered balloon onto one of the chocolate bases you created earlier on the wax paper. This will help stabilize the balloon while the chocolate hardens.
- Repeat steps 6 and 7 for the remaining balloons.
- Place the baking sheet with the chocolate-covered balloons in the refrigerator to harden. This will take approximately 30 minutes to 1 hour, depending on the thickness of the chocolate and the temperature of your refrigerator.
- Once the chocolate has completely hardened, carefully remove the baking sheet from the refrigerator.
- Now for the fun part! Carefully pop each balloon using a pin or the tip of a knife. Gently peel away the balloon from the inside of the chocolate bowl. Be careful not to break the delicate chocolate shell.
- Your chocolate bowls are now ready to be filled with your favorite desserts!
Expert Tips & Tricks
- Tempering Chocolate: For an extra glossy and stable finish, consider tempering the chocolate before melting it. Tempering involves heating and cooling the chocolate to specific temperatures to align the cocoa butter crystals, resulting in a smoother, shinier, and more snap-able chocolate. This is especially important if you’re making these bowls on a warm day.
- Adding Flavor: You can enhance the flavor of your chocolate bowls by adding a pinch of sea salt, a drop of peppermint extract, or a sprinkle of cocoa powder to the melted chocolate.
- Creating a Decorative Edge: Before the chocolate sets completely, you can sprinkle chopped nuts, sprinkles, or crushed cookies around the rim for a decorative touch.
- Troubleshooting: If your chocolate bowl cracks when you pop the balloon, don’t worry! You can easily patch it up by reheating a small amount of chocolate and using it to “glue” the broken pieces back together.
- Chocolate Type: While Hershey’s bars work fine, using a higher quality chocolate like dark chocolate or semi-sweet chocolate can improve the taste and the structural integrity of the bowls.
Serving & Storage Suggestions
Serve your chocolate bowls immediately after filling them to prevent the chocolate from softening. They are perfect for holding ice cream, fresh berries, mousse, pudding, whipped cream, or any other dessert you desire.
Store leftover chocolate bowls in an airtight container in a cool, dry place for up to 2-3 days. Avoid storing them in the refrigerator, as the moisture can cause the chocolate to bloom (develop a white film). However, if the bowls are already filled with a dessert that needs refrigeration, that is fine!
Nutritional Information
(Note: This is an estimate and will vary based on the specific chocolate used and serving size.)
| Nutrient | Amount per Serving | % Daily Value |
|---|---|---|
| Calories | 300 kcal | 15% |
| Total Fat | 18g | 28% |
| Saturated Fat | 11g | 55% |
| Cholesterol | 10mg | 3% |
| Sodium | 50mg | 2% |
| Total Carbohydrate | 32g | 11% |
| Dietary Fiber | 2g | 8% |
| Sugars | 28g | |
| Protein | 4g | 8% |
Variations & Substitutions
- Vegan Chocolate Bowls: Use vegan chocolate bars instead of milk chocolate. Ensure all other ingredients used to fill the bowls are also vegan.
- Dark Chocolate Bowls: Use dark chocolate for a richer, more intense flavor.
- White Chocolate Bowls: Use white chocolate for a sweeter and visually appealing option.
- Peanut Butter Chocolate Bowls: Swirl peanut butter into the melted chocolate for a delicious combination.
- Mint Chocolate Bowls: Add a few drops of peppermint extract to the melted chocolate for a refreshing twist.
- Seasonal Variations: For the holidays, add crushed candy canes or gingerbread spices to the chocolate.
FAQs (Frequently Asked Questions)
Q: Can I use different types of chocolate?
A: Absolutely! Feel free to experiment with dark, white, or even flavored chocolates to create unique and delicious bowls.
Q: How do I prevent the chocolate from cracking when I pop the balloon?
A: Ensure the chocolate is completely hardened before popping the balloon. If it still cracks, you can patch it up with melted chocolate.
Q: Can I make these bowls ahead of time?
A: Yes, you can make the bowls a day or two in advance and store them in an airtight container in a cool, dry place.
Q: What is the best way to melt the chocolate?
A: The microwave method is quick and easy, but be sure to use short intervals and stir frequently to prevent burning. A double boiler is another great option for more even melting.
Q: Can I reuse the balloons?
A: No, you cannot reuse the balloons after popping them and peeling them away from the chocolate.
Final Thoughts
Creating edible chocolate bowls is a fun and rewarding experience that adds a touch of elegance to any dessert. Don’t be intimidated – with a little patience and practice, you’ll be crafting these delightful treats in no time. I encourage you to try this recipe and experiment with different flavors and fillings to create your own unique chocolate bowl creations. Share your culinary masterpieces with friends and family, and don’t forget to let me know how they turn out! Consider pairing these bowls with a rich coffee or a light dessert wine for a truly memorable experience. Happy cooking!