
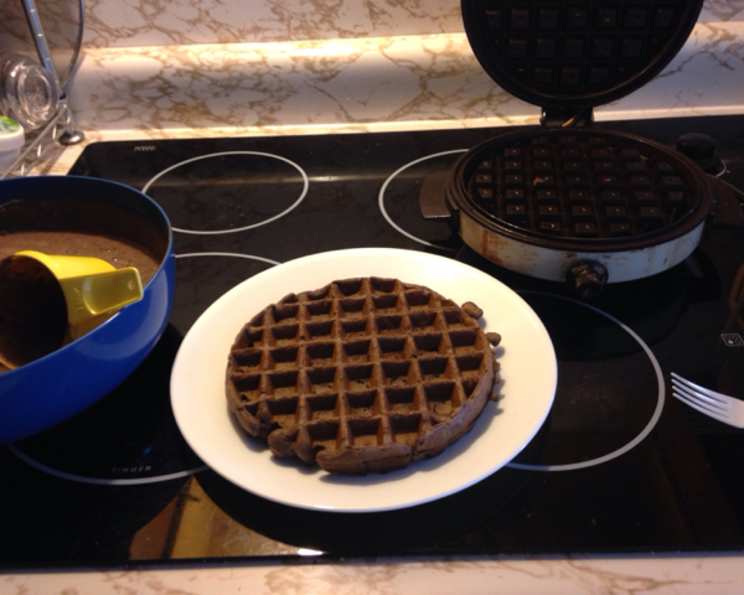
Chocolate Brownie Waffles: A Decadent Twist on Breakfast
My earliest memory of brownies involves sneaking into the kitchen after my mom had baked a batch, lured by the intoxicating aroma of chocolate and warm vanilla. The corners, always my favorite, were slightly crisp, giving way to a fudgy, intensely chocolatey interior. These brownie waffles take that cherished memory and elevates it, transforming the classic dessert into a breakfast (or anytime) treat that’s both comforting and surprisingly elegant. The waffle iron creates those desirable crispy edges, and the fluffy interior holds pockets perfect for pools of syrup, whipped cream, or even a scoop of ice cream. Get ready for a chocolate experience unlike any other!
Recipe Overview
- Prep Time: 15 minutes
- Cook Time: 10-15 minutes
- Total Time: 25-30 minutes
- Servings: 2-4
- Yields: 3-6 waffles, depending on size
- Dietary Type: Vegetarian (can be made dairy-free with substitutions, see variations)
Ingredients
- 1 ¾ cups all-purpose flour
- 1 tablespoon baking powder
- ¼ teaspoon salt
- 2 tablespoons sugar
- 2 eggs, separated
- 1 ¾ cups milk
- ½ cup cooking oil
- ¼ cup semi-sweet chocolate chips
- 3 tablespoons unsweetened cocoa
- ⅓ cup chopped walnuts
Equipment Needed
- Waffle iron
- Two mixing bowls
- Whisk
- Electric mixer (optional, for egg whites)
- Measuring cups and spoons
- Spatula or spoon
- Liquid measuring cup
Instructions
-
Begin by greasing and preheating your waffle iron. This is a crucial step to prevent sticking and ensure evenly cooked waffles. The ideal temperature will depend on your waffle iron, so consult the manufacturer’s instructions. A medium setting is usually a good starting point.
-
In a large mixing bowl, combine the dry ingredients: flour, baking powder, salt, sugar, chocolate chips, cocoa, and walnuts. Whisk these ingredients together thoroughly to ensure they are evenly distributed. This will help prevent clumps and guarantee a consistent flavor and texture in your brownie waffles.
-
In a separate, smaller mixing bowl, combine the wet ingredients: egg yolks, milk, and cooking oil. Whisk these ingredients together until they are well blended. Ensure the egg yolks are fully incorporated for a smooth and uniform mixture.
-
Add the liquid mixture to the dry mixture. Stir until just combined, but don’t overmix. The batter should still be slightly lumpy. Overmixing can develop the gluten in the flour, resulting in tough waffles. A few lumps are perfectly fine and will disappear during cooking.
-
In a clean, small bowl, beat the egg whites until stiff peaks form. You can use an electric mixer or a whisk for this step. Stiff peaks are achieved when the egg whites hold their shape and stand upright when the whisk or beaters are lifted. This step is essential for creating light and fluffy waffles. Be careful not to overwhip the egg whites, as they can become dry and difficult to fold into the batter.
-
Gently fold the beaten egg whites into the lumpy batter. This is a delicate process. Use a spatula or spoon and fold the egg whites in using a light, upward motion, being careful not to deflate them. The goal is to incorporate the egg whites without losing the air that you just whipped into them. A few streaks of egg white are okay; just ensure the batter is mostly uniform.
-
Pour the batter onto the preheated waffle iron, using the manufacturer’s instructions for the amount of batter to use. The amount will depend on the size and shape of your waffle iron. Be careful not to overfill the iron, as the batter will expand during cooking.
-
Bake until the waffles are done. The cooking time will vary depending on your waffle iron. Generally, it takes about 3-5 minutes per waffle. The waffles are done when they are golden brown and crisp on the outside and cooked through on the inside. You can check for doneness by gently lifting a corner of the waffle with a fork.
-
Carefully remove the waffles from the iron and allow to cool slightly before serving.
-
For an even more decadent treat, top with whipped cream, fresh strawberries or raspberries, chocolate sauce, and chopped nuts.
Expert Tips & Tricks
- For a richer chocolate flavor, use dark chocolate chips instead of semi-sweet.
- If you want a slightly tangier flavor, you can substitute buttermilk for the milk.
- Don’t have walnuts? Pecans or almonds also work well.
- To prevent the waffles from becoming soggy, serve them immediately after cooking.
- If you’re making a large batch, keep the cooked waffles warm in a preheated oven (200°F) until ready to serve.
Serving & Storage Suggestions
Serve these brownie waffles immediately while they are warm and crisp. They are delicious on their own, but they are even better with toppings like whipped cream, fresh fruit, chocolate sauce, or a dusting of powdered sugar.
Leftover waffles can be stored in an airtight container in the refrigerator for up to 3 days. To reheat, toast them in a toaster oven or place them in a preheated oven at 350°F for a few minutes until heated through and crispy. You can also freeze the waffles for longer storage. Wrap them individually in plastic wrap and then place them in a freezer bag. They can be frozen for up to 2 months. To reheat from frozen, toast them in a toaster oven or bake them in a preheated oven until heated through.
Nutritional Information
(Estimated per serving, without toppings)
| Nutrient | Amount per Serving | % Daily Value |
|---|---|---|
| Calories | 450 kcal | 23% |
| Total Fat | 25g | 38% |
| Saturated Fat | 8g | 40% |
| Cholesterol | 80mg | 27% |
| Sodium | 300mg | 13% |
| Total Carbohydrate | 50g | 17% |
| Dietary Fiber | 3g | 12% |
| Sugars | 15g | N/A |
| Protein | 10g | 20% |
Variations & Substitutions
- Dairy-Free: Substitute the milk with almond milk, soy milk, or oat milk.
- Gluten-Free: Use a gluten-free all-purpose flour blend.
- Vegan: Substitute the eggs with flax eggs (1 tablespoon ground flaxseed mixed with 3 tablespoons of water per egg). Use a plant-based milk alternative. Ensure the chocolate chips are dairy-free.
- Spice it up: Add a pinch of cinnamon or cayenne pepper to the batter for a little kick.
- Nut-Free: Omit the walnuts or substitute with sunflower seeds or pumpkin seeds.
FAQs (Frequently Asked Questions)
Q: Why is my waffle batter so lumpy?
A: A slightly lumpy batter is perfectly fine! It’s important not to overmix the batter, as this can lead to tough waffles. The lumps will disappear during cooking.
Q: Can I make the batter ahead of time?
A: It’s best to make the batter fresh for the best results. However, you can prepare the dry and wet ingredients separately and combine them just before cooking.
Q: My waffles are sticking to the iron, what am I doing wrong?
A: Ensure your waffle iron is properly preheated and greased. You may need to use a non-stick cooking spray.
Q: How do I keep the waffles warm while I’m making a large batch?
A: Preheat your oven to 200°F (93°C) and place the cooked waffles on a baking sheet in the oven to keep them warm until ready to serve.
Q: Can I add fruit to the batter?
A: Yes, you can add blueberries, raspberries, or chopped bananas to the batter for added flavor and texture. Gently fold them in after adding the egg whites.
Final Thoughts
These Chocolate Brownie Waffles are more than just a breakfast item; they’re a delightful indulgence that can brighten any day. The combination of crispy edges, fudgy interior, and rich chocolate flavor is simply irresistible. Don’t be afraid to experiment with different toppings and variations to create your own signature brownie waffle creation. Share your waffle adventures with friends and family, and let me know what you think! These waffles pair perfectly with a cup of hot coffee or a cold glass of milk. Enjoy!