
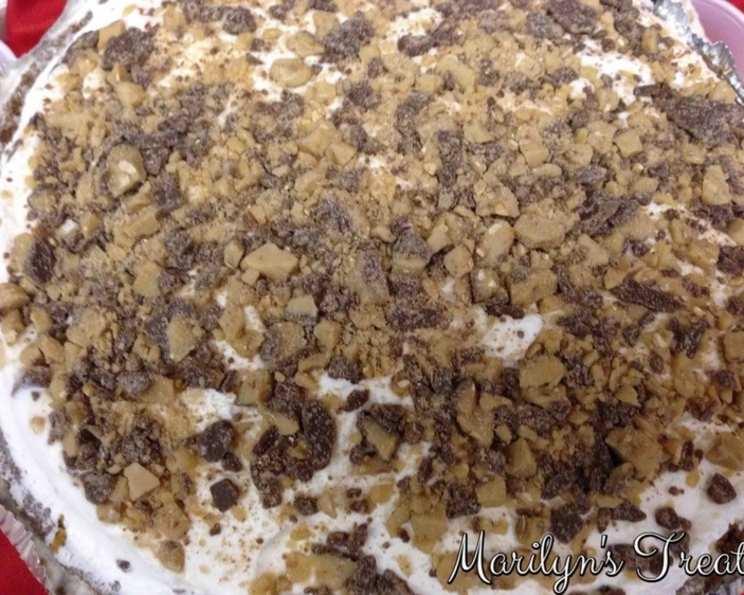
Chocolate Butterscotch Pie: A Symphony of Sweetness
I’ll never forget the first time I tasted a chocolate butterscotch pie. It was at my grandmother’s house, during a particularly blustery autumn evening. The aroma alone, a heady mix of toasted coconut, rich chocolate, and warm butterscotch, was enough to chase away the chill. But the taste? Pure magic. Each bite was a velvety dance of textures and flavors – the crisp, nutty crust giving way to the smooth, decadent filling. It wasn’t just dessert; it was a hug from Grandma in pie form.
Recipe Overview
- Prep Time: 20 minutes
- Cook Time: 8-10 minutes
- Total Time: At least 2 hours (includes cooling)
- Servings: 8
- Yield: 1 pie
- Dietary Type: Not specified
Ingredients
-
For the Crust:
- 1 1⁄4 cups coconut macaroons, crumbs
- 1⁄4 cup finely chopped walnuts
- 1⁄4 cup butter, melted
-
For the Filling:
- 2⁄3 cup brown sugar
- 3 tablespoons flour
- 2 tablespoons cornstarch
- 1⁄2 teaspoon salt
- 2 1⁄4 cups milk
- 1 (5 1/2 ounce) can chocolate syrup
- 3 egg yolks, well beaten
- 2 tablespoons butter, additional
- 1 teaspoon vanilla
-
Topping:
- Sweetened whipped cream
Equipment Needed
- 9-inch pie dish
- Mixing bowls
- Saucepan
- Whisk
- Measuring cups and spoons
- Plastic wrap
Instructions
- Prepare the Crust: In a mixing bowl, combine the coconut macaroon crumbs, finely chopped walnuts, and melted butter. Ensure all ingredients are evenly distributed to create a cohesive mixture.
- Press the Crust: Press the crumb mixture firmly and evenly into the bottom and up the sides of a 9-inch pie pan. Be sure to create a uniform thickness for even baking.
- Bake the Crust: Bake the crust in a preheated oven at 350°F (175°C) for 8-10 minutes. This step is crucial for setting the crust and enhancing its nutty flavor. Watch carefully to prevent burning. The crust should be lightly golden when done.
- Prepare the Filling Base: While the crust is baking, in a medium saucepan, combine the brown sugar, flour, cornstarch, and salt. Whisk these dry ingredients together thoroughly to eliminate any lumps, which could affect the filling’s texture.
- Add Liquid Ingredients: Add the milk and chocolate syrup to the saucepan with the dry ingredients. Whisk continuously to incorporate everything smoothly, ensuring there are no clumps of flour or cornstarch.
- Incorporate the Egg Yolks: In a separate small bowl, beat the egg yolks until they are well combined and slightly pale. This ensures they will incorporate smoothly into the filling without curdling. Slowly drizzle the beaten egg yolks into the saucepan with the milk and chocolate mixture, whisking constantly to temper the eggs and prevent them from scrambling.
- Cook the Filling: Place the saucepan over medium heat. Cook, stirring constantly with a whisk or spatula, until the mixture comes to a boil. Continue stirring for about 1 minute after it boils, allowing the filling to thicken considerably. Constant stirring is key to preventing scorching and ensuring a smooth, creamy texture.
- Finish the Filling: Remove the saucepan from the heat. Stir in the 2 tablespoons of butter until melted and fully incorporated, adding richness and shine to the filling. Then, stir in the vanilla extract, which enhances the overall flavor profile of the pie.
- Pour and Cool: Pour the hot filling into the baked pie shell, spreading it evenly. Immediately cover the surface of the filling with plastic wrap, pressing it directly onto the filling to prevent a skin from forming as it cools. This step is important for maintaining a smooth, appealing texture.
- Chill: Cool the pie completely at room temperature before refrigerating for at least 2 hours to allow the filling to set fully. This chilling time is essential for achieving the desired consistency.
- Serve: Just before serving, top the pie generously with sweetened whipped cream. You can decorate with chocolate shavings or extra chopped walnuts for an elegant presentation.
Expert Tips & Tricks
- For a richer, more intense chocolate flavor, use dark chocolate syrup instead of regular.
- If you don’t have macaroons, you can use graham cracker crumbs mixed with shredded coconut for the crust.
- To ensure a perfectly smooth filling, use a fine-mesh sieve to strain it after cooking and before pouring it into the crust. This will remove any small lumps that may have formed.
- For a beautifully browned crust, brush it with a beaten egg white before baking.
- If your crust starts to brown too quickly while baking, you can tent it with aluminum foil.
Serving & Storage Suggestions
Serve the chocolate butterscotch pie chilled, garnished with a generous dollop of sweetened whipped cream. For an extra touch, sprinkle with grated chocolate or chopped nuts. Leftover pie should be stored in the refrigerator, tightly covered, for up to 3 days. While freezing is not recommended due to potential changes in texture, the pie can be kept in the freezer for up to a month. Thaw overnight in the refrigerator before serving. It’s best enjoyed cold.
Nutritional Information
| Nutrient | Amount per Serving | % Daily Value |
|---|---|---|
| Calories | 320 kcal | N/A |
| Calories from Fat | 151 g | 47% |
| Total Fat | 16.8 g | 25% |
| Saturated Fat | 8.6 g | 42% |
| Cholesterol | 103.7 mg | 34% |
| Sodium | 318.5 mg | 13% |
| Total Carbohydrate | 38.2 g | 12% |
| Dietary Fiber | 0.9 g | 3% |
| Sugars | 24.4 g | N/A |
| Protein | 5 g | 10% |
Note: Nutritional information is an estimate and may vary based on specific ingredients and portion sizes.
Variations & Substitutions
- Gluten-Free: Use gluten-free macaroon crumbs or a gluten-free graham cracker crust. Ensure the flour in the filling is replaced with a gluten-free blend.
- Dairy-Free: Substitute the milk with coconut milk or another plant-based milk alternative. Use a dairy-free butter substitute.
- Nut-Free: Omit the walnuts from the crust or substitute them with sunflower seeds. Ensure all ingredients are processed in a nut-free facility.
- Peanut Butter Variation: Swirl in a couple of tablespoons of peanut butter at the same time as the butter and vanilla extract, and top with crushed peanut butter cups.
FAQs (Frequently Asked Questions)
Q: Can I make the crust ahead of time?
A: Yes, you can bake the crust a day ahead of time. Store it in an airtight container at room temperature until you’re ready to fill it.
Q: How do I prevent the crust from getting soggy?
A: Blind baking the crust and allowing it to cool completely before adding the filling helps prevent sogginess. Also, ensure the filling is not too hot when pouring it into the crust.
Q: Can I use a store-bought pie crust?
A: Yes, a store-bought graham cracker crust can be used for convenience. Adjust baking time accordingly.
Q: How do I know when the filling is thick enough?
A: The filling should be thick enough to coat the back of a spoon. Continue stirring until it reaches this consistency.
Q: What can I use instead of whipped cream for topping?
A: You can use meringue, ice cream, or a chocolate ganache as an alternative topping.
Final Thoughts
I hope this recipe brings as much joy to your kitchen as it has to mine. The combination of chocolate and butterscotch is truly irresistible, and I encourage you to give this pie a try. Feel free to experiment with the variations and substitutions to make it your own. And please, share your creations and feedback – I’d love to hear how it turns out! Pair it with a scoop of vanilla ice cream or a strong cup of coffee for the perfect ending to any meal. Happy baking!