
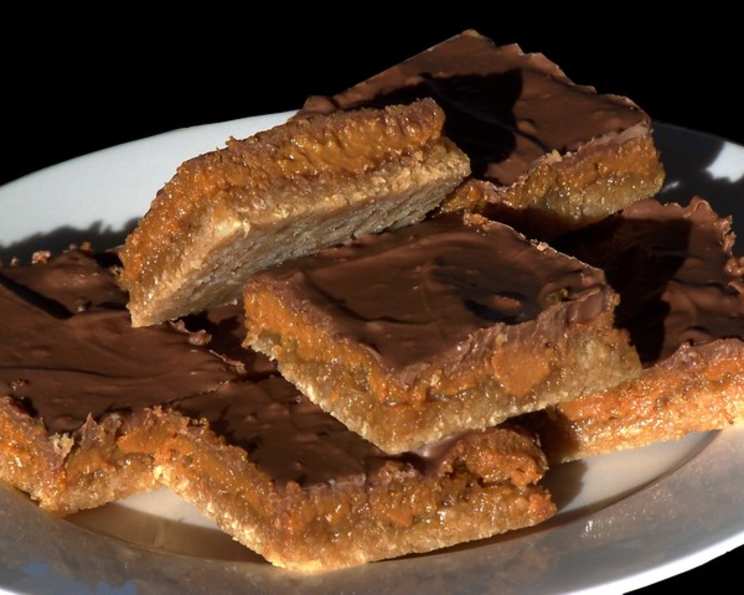
Decadent Chocolate Caramel Slice: A Taste of Down Under
I can still remember the first time I tasted a chocolate caramel slice. It was at a bustling little cafe during a food festival, nestled amongst a dizzying array of sweets. One bite, and I was hooked! The perfect balance of crunchy, chewy, and melt-in-your-mouth chocolate created a symphony of textures and flavors. This isn’t just a slice; it’s a journey for your tastebuds, a comforting indulgence that I’m excited to share with you.
Recipe Overview
- Prep Time: 20 minutes
- Cook Time: 22-24 minutes
- Total Time: 1 hour 30 minutes (including cooling and setting)
- Servings: 12
- Yield: 1 slice
- Dietary Type: Not Gluten-Free
Ingredients
For the Base:
- ½ cup brown sugar, firmly packed
- ⅔ cup desiccated coconut
- ⅔ cup self-raising flour
- 3 ounces (85 gr) butter, melted
For the Caramel Filling:
- 1 ounce (30 gr) butter
- 2 tablespoons golden syrup
- 1 (14 ounce) can (395 gr) sweetened condensed milk
For the Chocolate Topping:
- 6 ounces (150 gr) milk chocolate or 6 ounces (150 gr) dark chocolate chips
- 1 tablespoon butter
Equipment Needed
- 8-inch square baking pan
- Wax paper or parchment paper
- Medium saucepan
- Small saucepan
- Mixing bowls
- Whisk
- Spatula
- Sharp knife
Instructions
-
Preheat your oven to 375°F (180°C). Grease an 8-inch baking pan, then line the bottom and sides with wax paper or parchment paper, leaving an overhang for easy removal. This prevents sticking and allows you to lift the finished slice out cleanly.
-
In a mixing bowl, stir together the brown sugar, desiccated coconut, and self-raising flour until evenly distributed. Make sure there are no lumps of brown sugar.
-
Add the melted butter to the dry ingredients and mix until well combined. The mixture should resemble damp sand.
-
Firmly press the mixture into the prepared pan using the back of a tablespoon or the bottom of a measuring cup. Ensure it’s evenly distributed and compacted to create a solid base.
-
Bake for 10-12 minutes, or until the base is lightly golden-brown and slightly risen. Keep a close eye on it to prevent burning. The edges should be just beginning to color.
-
While the base is baking, start making the caramel filling. In a medium saucepan, place the butter and golden syrup over medium heat, stirring occasionally until the butter has completely melted.
-
Add the sweetened condensed milk to the saucepan. Cook, stirring constantly, for approximately 9-12 minutes, or until the caramel thickens and becomes a rich golden-brown color. It should be thick enough to coat the back of a spoon. Constant stirring is essential to prevent the caramel from burning or sticking to the bottom of the pan.
-
Once the base is baked, remove it from the oven. Gently spread the caramel evenly over the warm base, ensuring it reaches all the edges.
-
Return the pan to the oven for a further 10-12 minutes. Watch closely – a border of lightly browned caramel will form around the edges of the slice, indicating that it’s ready. The center might still appear slightly soft, but it will firm up as it cools.
-
Allow the slice to cool to room temperature completely before adding the chocolate topping. This helps prevent the chocolate from melting unevenly.
-
For the chocolate topping, melt the chocolate and butter in a small saucepan over very low heat. Alternatively, you can melt them in the microwave in 30-second intervals, stirring in between, until smooth.
-
Whisk the melted chocolate and butter well to fully incorporate the butter, creating a smooth and glossy chocolate sauce.
-
Spread the chocolate evenly over the cooled caramel slice.
-
Refrigerate the slice until the chocolate is fully set, about 30 minutes to an hour. This will make it easier to cut.
-
Once the chocolate is set, hold onto the wax paper overhang and remove the slice from the baking pan.
-
Cut the slice into 12 squares (or bars, depending on your preference) using a hot, dry knife. You may need to dip your knife into very hot water (and dry it thoroughly) before making each cut to ensure clean, neat slices.
Expert Tips & Tricks
- Perfecting the Caramel: The key to a great caramel slice is achieving the right consistency for the caramel. Don’t be afraid to cook it for the full 12 minutes (or even a little longer), stirring constantly, until it’s thick enough. A soft ball candy thermometer could be useful here, but keep in mind these caramel’s are difficult to measure with thermometers.
- Even Chocolate Layer: To achieve a perfectly smooth and even chocolate layer, tap the baking pan gently on the counter after spreading the chocolate. This helps to release any air bubbles.
- Preventing Cracks: To prevent the chocolate from cracking when cutting, let the slice sit at room temperature for about 10-15 minutes after it has set in the refrigerator.
- Salted Caramel Variation: For a salted caramel twist, sprinkle a pinch of sea salt flakes over the caramel layer before adding the chocolate topping. The salt enhances the sweetness and adds a delightful complexity to the flavor.
Serving & Storage Suggestions
Serve the chocolate caramel slice chilled or at room temperature. For an elegant presentation, dust with cocoa powder or drizzle with melted white chocolate.
Store leftover slice in an airtight container in the refrigerator for up to 5 days. The base may soften slightly over time, but the flavor will remain delicious. You can also freeze the slice for up to 2 months. Thaw it in the refrigerator overnight before serving.
Nutritional Information
Please note that this is an estimate and can vary depending on specific ingredient brands and portion sizes.
| Nutrient | Amount per Serving | % Daily Value |
|---|---|---|
| Calories | 347 kcal | 17% |
| Total Fat | 17.1g | 26% |
| Saturated Fat | 10.5g | 53% |
| Cholesterol | 37.4mg | 12% |
| Sodium | 219.1mg | 9% |
| Total Carbohydrate | 45.3g | 15% |
| Dietary Fiber | 0.8g | 3% |
| Sugars | 36.9g | 74% |
| Protein | 4.6g | 9% |
Variations & Substitutions
- Gluten-Free: Substitute the self-raising flour with a gluten-free all-purpose flour blend. You may need to add a binder like xanthan gum to help with the texture.
- Dark Chocolate: Use dark chocolate instead of milk chocolate for a richer, more intense flavor.
- Nutty Base: Add chopped nuts like pecans or walnuts to the base mixture for added texture and flavor.
- Espresso Infusion: Add a teaspoon of espresso powder to the chocolate topping for a mocha-inspired slice.
FAQs (Frequently Asked Questions)
Q: Can I use regular flour instead of self-raising flour for the base?
A: Yes, but you’ll need to add about 1 teaspoon of baking powder to the flour to help the base rise properly.
Q: How do I prevent the caramel from being too sticky?
A: Ensure you cook the caramel for the recommended time, stirring constantly, until it reaches a thick consistency. Overcooking can also lead to a hard caramel, so watch it closely.
Q: What’s the best way to cut the slice neatly?
A: Use a hot, dry knife and wipe it clean between each cut. This will prevent the chocolate from cracking and give you clean slices.
Q: Can I make this slice ahead of time?
A: Absolutely! The chocolate caramel slice can be made a day or two in advance and stored in the refrigerator. This actually allows the flavors to meld together even more.
Q: Can I freeze the chocolate caramel slice?
A: Yes, wrap it tightly in plastic wrap and then aluminum foil before freezing. Thaw in the refrigerator overnight before serving.
Final Thoughts
This Chocolate Caramel Slice is more than just a dessert; it’s a little piece of happiness on a plate. The combination of textures and flavors is simply irresistible. Whether you’re a seasoned baker or just starting out, I encourage you to give this recipe a try. Don’t be intimidated by the multiple steps; each one is straightforward, and the results are well worth the effort. Feel free to experiment with variations to suit your taste preferences. Enjoy baking, and don’t forget to share your creations and feedback with me!