
Indulgent Chocolate Cheesecake Slice: A Taste of Childhood Memories
The aroma of melting chocolate still instantly transports me back to my childhood kitchen. My mum, a culinary wizard in her own right, often whipped up this decadent chocolate cheesecake slice while I was at school. The anticipation of that first bite, the creamy filling, the rich chocolate swirl – it was pure magic. My brother, DD, and I would relentlessly badger her to make it again and again, each slice a little piece of heaven. This recipe, passed down through generations, is more than just dessert; it’s a tangible piece of my history, a sweet reminder of family and home.
Recipe Overview
- Prep Time: 20 minutes
- Cook Time: 0 minutes (Refrigeration time is required, but no baking)
- Total Time: 4 hours 20 minutes (including chilling)
- Servings: 24
- Yield: 24 slices
- Dietary Type: Not specified
Ingredients
For the Crust:
- 250g chocolate biscuits, crushed
- 90g melted butter
For the Filling:
- 250g cream cheese
- 395g sweetened condensed milk
- 1/3 cup lemon juice
- 3 teaspoons gelatin
- 2 tablespoons hot water
- 1/2 cup cream, whipped
- 125g dark chocolate melts, melted and cooled
Equipment Needed
- 18 x 28cm slab tin
- Foil
- Mixing bowls
- Electric mixer
- Fork
- Knife
Instructions
- Begin by preparing the crust. In a medium bowl, thoroughly mix the crushed chocolate biscuits and melted butter until well combined. Ensure all the biscuit crumbs are coated evenly with the butter to create a cohesive base.
- Line an 18 x 28cm slab tin with foil. This will make it easier to remove the cheesecake later.
- Press the biscuit mixture firmly into the prepared tin, creating an even layer across the bottom. Use the back of a spoon or a flat-bottomed measuring cup to ensure the crust is compacted and smooth.
- Refrigerate the crust while you prepare the filling. This will allow it to firm up and prevent it from crumbling when the filling is added.
- Now, prepare the filling. In a large bowl, using an electric mixer, beat the cream cheese until smooth and creamy. This is a crucial step to ensure a lump-free filling.
- Gradually add the sweetened condensed milk to the cream cheese, beating constantly until well combined. Make sure to incorporate the condensed milk slowly to prevent the mixture from becoming too liquidy.
- Beat in the lemon juice, scraping down the mixture from the sides of the bowl as you beat, until the mixture thickens. The lemon juice not only adds a tangy flavor but also helps to set the cheesecake.
- In a small bowl, whisk the gelatin into the hot water with a fork until completely dissolved. Ensure there are no lumps of gelatin remaining.
- Allow the gelatin mixture to cool slightly. This prevents the hot gelatin from melting the cream cheese and affecting the texture of the filling.
- Beat the cooled gelatin mixture into the cream cheese mixture until well incorporated.
- Gently fold in the whipped cream. This will lighten the texture of the filling and add a luxurious smoothness. Be careful not to overmix, as this can deflate the whipped cream.
- Pour the prepared filling over the chilled biscuit base, spreading it evenly.
- Pour the melted and cooled dark chocolate melts evenly over the filling.
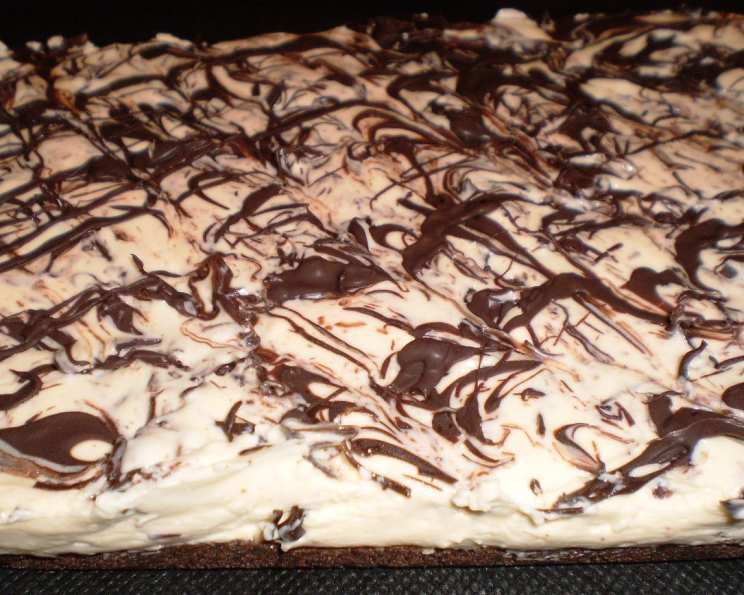
- Using the point of a knife, swirl the melted chocolate through the filling, creating a marbled effect. Be creative with your swirls, but avoid overmixing, as this can muddy the colors.
- Refrigerate the cheesecake until firm, ideally for at least 4 hours, or preferably overnight. This allows the filling to set completely and the flavors to meld together.
- Once firm, cut the cheesecake into squares to serve.
Expert Tips & Tricks
- Crust Perfection: For an extra chocolatey crust, use chocolate sandwich cookies (like Oreos) and scrape out the filling before crushing.
- Cream Cheese Consistency: Ensure your cream cheese is at room temperature for easier mixing and a smoother filling.
- Gelatin Know-How: If you’re new to working with gelatin, bloom it in cold water first for 5 minutes before adding hot water. This ensures it dissolves properly and prevents grainy textures.
- Whipped Cream Stability: To stabilize your whipped cream, add a teaspoon of powdered sugar before whipping.
- Clean Cuts: To get neat slices, dip your knife in hot water and wipe it clean between each cut.
- Don’t Overbake (Because There’s No Baking!): Since this is a no-bake cheesecake, the chilling process is crucial for setting it properly. Avoid the temptation to cut into it too soon.
Serving & Storage Suggestions
This chocolate cheesecake slice is best served chilled. Garnish with fresh berries, a dusting of cocoa powder, or a drizzle of chocolate sauce for an extra touch of elegance.
To store leftovers, cover tightly with plastic wrap or place in an airtight container and refrigerate for up to 3-4 days. While it can be frozen, the texture may change slightly upon thawing; it’s best enjoyed fresh. If freezing, wrap individual slices tightly in plastic wrap and then place them in a freezer-safe container for up to 1 month. Thaw in the refrigerator overnight before serving.
It’s best not to leave the cheesecake at room temperature for more than 2 hours, as the cream cheese can spoil.
Nutritional Information
| Nutrient | Amount per Serving | % Daily Value |
|---|---|---|
| Calories | 200 kcal | N/A |
| Calories from Fat | N/A | 55% |
| Total Fat | 12g | 18% |
| Saturated Fat | 7g | 35% |
| Cholesterol | 29mg | 9% |
| Sodium | 137mg | 5% |
| Total Carbohydrate | 20g | 6% |
| Dietary Fiber | 1g | 2% |
| Sugars | 15g | N/A |
| Protein | 4g | 6% |
Note: Nutritional information is an estimate and may vary based on specific ingredients used.
Variations & Substitutions
- Gluten-Free: Use gluten-free chocolate biscuits for the crust to make this recipe gluten-free.
- Dairy-Free: Substitute the cream cheese with a dairy-free cream cheese alternative and use coconut cream instead of whipped cream. Ensure the chocolate melts are also dairy-free.
- Different Chocolate: Experiment with different types of chocolate for the swirl. White chocolate, milk chocolate, or even flavored chocolate can add a unique twist.
- Nutty Crunch: Add chopped nuts to the crust or sprinkle them on top for added texture and flavor.
- Coffee Infusion: Add a teaspoon of instant coffee powder to the gelatin mixture for a mocha-flavored cheesecake.
FAQs (Frequently Asked Questions)
Q: Can I use a different size tin?
A: While the recipe is designed for an 18 x 28cm slab tin, you can use a slightly different size. Keep in mind that the thickness of the cheesecake will vary accordingly.
Q: Can I skip the gelatin?
A: The gelatin helps to set the cheesecake, so skipping it is not recommended. Without gelatin, the filling may not firm up properly. If you want to avoid gelatin, consider using a vegetarian alternative like agar-agar, following the instructions on the package for proper substitution.
Q: How can I prevent the chocolate from cracking when I cut the cheesecake?
A: Dipping your knife in hot water and wiping it clean between each cut will help prevent the chocolate from cracking. Also, ensure the cheesecake is well-chilled before cutting.
Q: The filling is too soft. What did I do wrong?
A: Ensure you’ve used the correct amount of gelatin and that it has been properly dissolved. Also, make sure the cheesecake is refrigerated for at least 4 hours, preferably overnight, to allow it to set completely.
Q: Can I make this ahead of time?
A: Absolutely! This chocolate cheesecake slice is perfect for making ahead of time. It can be stored in the refrigerator for up to 3-4 days, allowing the flavors to meld together even more.
Final Thoughts
Now it’s your turn to create your own delicious memories with this incredible Chocolate Cheesecake Slice. This recipe is a testament to the simple joys of baking, the love of family, and the magic of sharing a sweet treat. Don’t be afraid to experiment with variations, put your own creative spin on it, and most importantly, enjoy the process. I’d love to hear your feedback and see your creations – please share your experiences and photos! This cheesecake pairs perfectly with a cup of freshly brewed coffee or a glass of chilled dessert wine. Happy baking!