
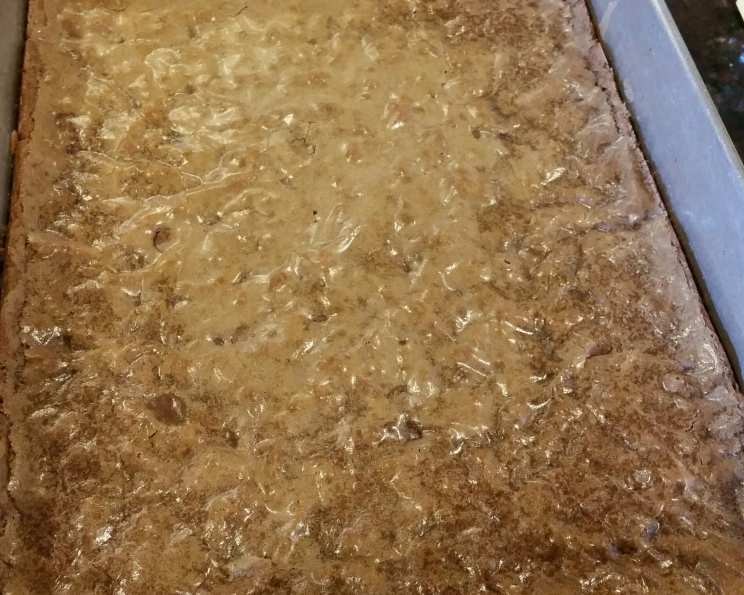
Chocolate Chip Brownies: A Timeless Classic
My grandmother, Nana Rose, always had a pan of these brownies cooling on her counter. The intoxicating aroma of chocolate and vanilla would waft through her cozy kitchen, beckoning us grandkids to sneak a warm, gooey corner piece. More than just a dessert, these brownies are a direct portal to those cherished memories – laughter, love, and the simple joy of being together. Her recipe was a closely guarded secret, but after years of subtle inquiries and careful observation, I finally cracked the code. This is my version, a tribute to Nana Rose and her legendary chocolate chip brownies.
Recipe Overview
- Prep Time: 15 minutes
- Cook Time: 25-30 minutes
- Total Time: 40-45 minutes
- Servings: 15 brownies
- Yield: 1 9×11 inch pan
- Dietary Type: Not Gluten-Free
Ingredients
- 1 (12 ounce) package semi-sweet chocolate chips, divided
- 1 cup butter or margarine (2 sticks)
- 1 cup walnuts, toasted and chopped (optional)
- 4 eggs
- 1 1/2 cups sugar
- 2 teaspoons vanilla
- 1 1/4 cups all-purpose flour
- 1/2 teaspoon salt
Equipment Needed
- Saucepan
- Large mixing bowl
- Baking sheet (if toasting walnuts)
- 9×11-inch baking pan
- Wire rack
Instructions
- Begin by melting 3/4 cup of the chocolate chips and the butter in a saucepan over very low heat. Stir continuously until completely melted and smooth, being extremely careful not to scorch the chocolate. Scorched chocolate will impart a bitter taste to your brownies.
- Remove the melted chocolate from the heat and allow it to cool to room temperature. This is crucial! Adding hot chocolate to the eggs will cook them and ruin the batter’s texture.
- Preheat your oven to 325 degrees F (160 degrees C). This lower temperature ensures that the brownies bake evenly and remain fudgy.
- If using walnuts, spread them on a baking sheet and bake in the preheated oven for 10 minutes. This toasting process intensifies their flavor and adds a delightful crunch. Remove the pan from the oven and allow the walnuts to cool completely before chopping them coarsely. If you’re using pre-toasted walnuts, you can skip this step.
- In a large mixing bowl, combine the eggs and sugar. Use a whisk or an electric mixer to blend them until light and slightly frothy. This will help create a tender crumb.
- Add the vanilla and salt to the egg mixture and stir well to combine.
- Sift the flour to remove any lumps and make it lighter. This will prevent overmixing, which can lead to tough brownies.
- Gradually add the flour to the egg mixture, in small portions, mixing well after each addition. Continue until the flour is thoroughly blended. Be careful not to overmix at this stage; just combine until the flour disappears.
- Gently stir in the cooled melted chocolate mixture until everything is well combined.
- If using walnuts, fold them into the batter until they are evenly distributed.
- Add the remaining chocolate chips (about 1 1/4 cups) to the batter and stir well.
- Grease a 9×11-inch baking pan. You can also line the pan with parchment paper, leaving an overhang on the sides, for easy removal of the brownies once they are cooled.
- Pour the brownie batter into the prepared pan and spread it evenly.
- Bake at 325 degrees F (160 degrees C) for approximately 25-30 minutes. To check for doneness, insert a toothpick into the center of the brownies. It should come out with moist crumbs clinging to it, but not wet batter. Remember that carryover cooking will continue after you remove the brownies from the oven, so they will firm up a bit more as they cool.
- Once baked, allow the brownies to cool completely in the pan on a wire rack. This is essential for achieving the perfect fudgy texture. Trying to cut them while they’re still warm will result in a messy, gooey disaster.
Expert Tips & Tricks
- For extra fudgy brownies, reduce the baking time by a few minutes.
- Don’t overbake the brownies! They should be slightly underbaked in the center for the best texture.
- Bloom your cocoa powder (if using, see variations below). Add 1/4 cup cocoa powder to the melted butter and chocolate. Whisk it for 1 minute, then let it sit for 5 minutes before continuing the recipe. This helps intensify the chocolate flavor.
- Use high-quality chocolate chips. The better the chocolate, the better the brownies!
- To easily cut clean brownies, chill them in the refrigerator for about 30 minutes before slicing. Use a warm knife, wiping it clean between cuts.
Serving & Storage Suggestions
Serve these delectable brownies slightly warm or at room temperature. They are wonderful on their own, or you can elevate the experience by pairing them with a scoop of vanilla ice cream, a drizzle of chocolate sauce, or a sprinkle of powdered sugar. Leftover brownies can be stored in an airtight container at room temperature for up to 3 days. For longer storage, keep them in the refrigerator for up to a week, or freeze them for up to 2 months. To reheat, microwave individual brownies for a few seconds until warmed through.
Nutritional Information
| Nutrient | Amount per Serving | % Daily Value |
|---|---|---|
| Calories | 353.6 kcal | N/A |
| Calories from Fat | 184 g | 52% |
| Total Fat | 20.5 g | 31% |
| Saturated Fat | 12.2 g | 61% |
| Cholesterol | 82.1 mg | 27% |
| Sodium | 207.5 mg | 8% |
| Total Carbohydrate | 42.6 g | 14% |
| Dietary Fiber | 1.6 g | 6% |
| Sugars | 32.5 g | N/A |
| Protein | 3.8 g | 7% |
Note: Nutritional information is an estimate and may vary based on specific ingredients and serving sizes.
Variations & Substitutions
- Double Chocolate Brownies: Add 1/4 cup unsweetened cocoa powder to the dry ingredients for a richer chocolate flavor.
- Peanut Butter Swirl Brownies: Drizzle melted peanut butter over the batter before baking and swirl it with a knife.
- Mint Chocolate Chip Brownies: Substitute mint chocolate chips for the regular semi-sweet chocolate chips. Add 1/2 teaspoon of peppermint extract to the batter.
- Gluten-Free Brownies: Use a gluten-free flour blend in place of all-purpose flour. Be sure to choose a blend that is designed for baking. You may also need to add a binder like xanthan gum to help hold the brownies together.
- Espresso Brownies: Add 1-2 teaspoons of instant espresso powder to the dry ingredients to enhance the chocolate flavor.
- Salted Caramel Brownies: Drizzle caramel sauce over the baked brownies and sprinkle with sea salt.
FAQs (Frequently Asked Questions)
Q: Why are my brownies dry and cakey?
A: Overbaking is the most common cause of dry brownies. Be sure to check for doneness using a toothpick and remove the brownies from the oven when it comes out with moist crumbs.
Q: Can I use oil instead of butter?
A: While you can substitute oil for butter, it will affect the texture of the brownies. Butter contributes to a richer, fudgier texture.
Q: Can I freeze these brownies?
A: Yes! Brownies freeze very well. Wrap them tightly in plastic wrap and then place them in a freezer-safe bag or container. They can be frozen for up to 2 months.
Q: My chocolate chips melted into the batter. What did I do wrong?
A: Make sure your melted chocolate mixture is completely cooled before adding it to the eggs. If it’s too warm, it will melt the chocolate chips you add later.
Q: How do I get chewy edges on my brownies?
A: Using a metal baking pan and greasing it well can help promote chewy edges. Also, avoid overmixing the batter.
Final Thoughts
These chocolate chip brownies are a true testament to the power of simple ingredients and time-honored techniques. Whether you’re a seasoned baker or a novice in the kitchen, this recipe is sure to deliver a batch of irresistibly gooey, fudgy, and chocolatey brownies that will delight your taste buds and evoke fond memories. So gather your ingredients, preheat your oven, and prepare to indulge in a classic treat that is guaranteed to bring a smile to your face. I encourage you to experiment with the variations and make this recipe your own. And don’t forget to share your creations and feedback – I’d love to hear how they turned out! Pair these brownies with a cold glass of milk or a warm cup of coffee for the ultimate comforting experience. Happy baking!