
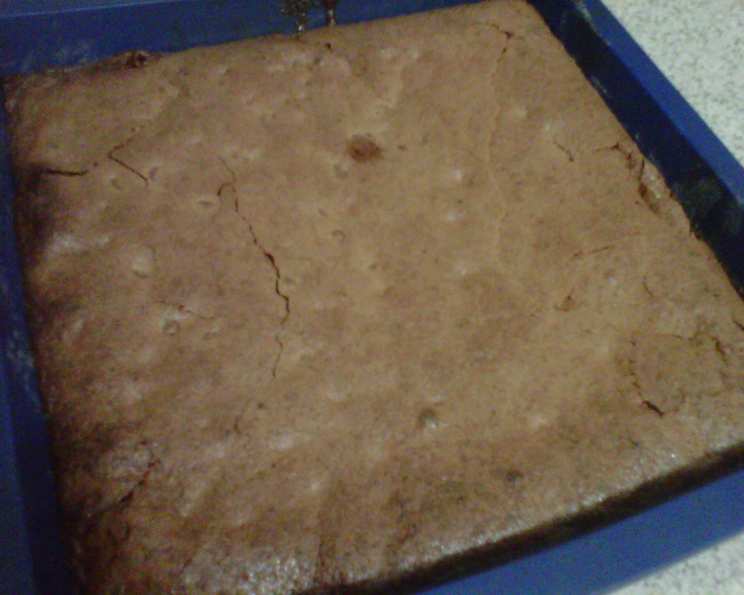
Chocolate Chip Butter Tart Squares: A Modern Twist on a Classic Comfort
My grandmother, bless her heart, was the undisputed queen of butter tarts. Every holiday, her kitchen would be filled with the sweet, caramel-y aroma, and the little tarts, each meticulously filled, were gone within minutes. While I loved the tradition, the process always seemed a bit…fussy. That’s where these Chocolate Chip Butter Tart Squares come in – all the comforting flavor of grandma’s tarts, but in a much more approachable, family-friendly form. Plus, the chocolate chips add a touch of modern indulgence that even she would have appreciated.
Recipe Overview
- Prep Time: 20 minutes
- Cook Time: 35 minutes
- Total Time: 55 minutes
- Servings: 10-16 squares (depending on size)
- Yield: One 9×9 inch pan
- Dietary Type: Not specified (contains dairy and gluten)
Ingredients
For the Crust:
- ½ cup (1 stick) butter, softened
- 2 tablespoons white sugar
- 1 cup all-purpose flour
For the Topping:
- 1 ½ cups brown sugar, packed
- 2 large eggs
- ½ teaspoon vanilla extract
- 1 cup chocolate chips (semi-sweet or milk chocolate, your preference)
- 3 tablespoons all-purpose flour
Equipment Needed
- 9×9 inch baking pan
- Mixing bowls
- Electric mixer (optional, but recommended)
- Measuring cups and spoons
- Rubber spatula or wooden spoon
Instructions
- Preheat your oven to 350°F (175°C). Make sure your oven rack is in the center position.
- Prepare the crust: In a mixing bowl, cream together the softened butter and white sugar until light and fluffy. An electric mixer makes this step easier, but you can also do it by hand.
- Add the flour: Gradually add the all-purpose flour to the butter and sugar mixture, mixing until just combined. Be careful not to overmix. The dough will be crumbly.
- Press the crust into the pan: Press the dough evenly into the bottom of the 9×9 inch baking pan. You can use your fingers or the back of a spoon to create a smooth, even surface.
- Pre-bake the crust: Bake the crust in the preheated oven for 15 minutes, or until it is lightly golden brown. This pre-baking step helps prevent a soggy crust.
- Prepare the topping: While the crust is baking, prepare the topping. In a separate mixing bowl, mix together the brown sugar, eggs, and vanilla extract until well combined.
- Add the flour: Stir in the all-purpose flour to the wet ingredients until no lumps remain.
- Add the chocolate chips: Stir in the chocolate chips until they are evenly distributed throughout the topping mixture.
- Pour the topping over the crust: Once the crust is pre-baked, remove it from the oven and pour the topping evenly over the warm crust. Spread the topping to ensure it reaches all edges of the pan.
- Bake the squares: Bake the squares in the preheated oven for 20 minutes more, or until the topping is set and golden brown around the edges. The center should still be slightly soft to the touch.
- Cool completely: Remove the baking pan from the oven and let the squares cool completely in the pan before cutting them into squares. This is important, as the topping needs time to set properly.
- Cut and serve: Once cooled, cut the squares into your desired size. Smaller squares are great for serving a larger crowd, while larger squares make for a more decadent treat.
Expert Tips & Tricks
- Don’t overmix the crust: Overmixing the crust dough can result in a tough crust. Mix only until the ingredients are just combined.
- Use room temperature ingredients: Using room temperature butter and eggs will help the ingredients combine more easily and create a smoother batter.
- Adjust baking time: Oven temperatures can vary, so keep an eye on the squares while they are baking. If the topping is browning too quickly, you can tent the pan with aluminum foil.
- For a chewier texture: Underbaking slightly will result in a chewier, gooier texture.
- Add a pinch of salt: A pinch of salt to the topping can enhance the sweetness and balance the flavors.
- Customize your chocolate: Experiment with different types of chocolate chips, such as dark chocolate, white chocolate, or even chopped chocolate bars.
Serving & Storage Suggestions
These Chocolate Chip Butter Tart Squares are best served at room temperature. They are perfect as an afternoon treat, a dessert after dinner, or a sweet addition to a brunch spread.
To store leftovers, place the squares in an airtight container at room temperature for up to 3 days, or in the refrigerator for up to a week. For longer storage, you can freeze the squares for up to 2 months. Thaw them in the refrigerator before serving.
To reheat the squares, you can warm them gently in the microwave for a few seconds or in a low oven until heated through.
Nutritional Information
| Nutrient | Amount per Serving (approximate) | % Daily Value (approximate) |
|---|---|---|
| Calories | 380 kcal | 19% |
| Total Fat | 18g | 28% |
| Saturated Fat | 11g | 55% |
| Cholesterol | 70mg | 23% |
| Sodium | 120mg | 5% |
| Total Carbohydrate | 58g | 19% |
| Dietary Fiber | 1.5g | 6% |
| Sugars | 45g | – |
| Protein | 4g | 8% |
Nutritional information is an estimate and may vary based on specific ingredients and portion sizes.
Variations & Substitutions
- Raisin Butter Tart Squares: Substitute the chocolate chips with 1 cup of raisins for a more traditional butter tart flavor. You can also use a combination of raisins and chocolate chips.
- Nutty Butter Tart Squares: Add ½ cup of chopped nuts, such as walnuts, pecans, or almonds, to the topping mixture for added texture and flavor.
- Gluten-Free Butter Tart Squares: Substitute the all-purpose flour in both the crust and topping with a gluten-free all-purpose flour blend. Be sure to use a blend that contains xanthan gum for best results.
- Spiced Butter Tart Squares: Add ½ teaspoon of ground cinnamon or nutmeg to the topping mixture for a warm, spiced flavor.
- Maple Butter Tart Squares: Replace some of the brown sugar in the topping with maple syrup for a richer, more complex flavor.
- Caramel Butter Tart Squares: Drizzle caramel sauce over the baked squares for an extra layer of sweetness and indulgence.
- Chocolate Drizzle: After the squares have cooled and been cut, drizzle melted chocolate over the top for an extra decadent touch.
FAQs (Frequently Asked Questions)
Q: Can I use a different size baking pan?
A: Yes, you can use a slightly larger or smaller baking pan, but the baking time may need to be adjusted accordingly. If using a larger pan, the squares will be thinner and may bake faster. If using a smaller pan, the squares will be thicker and may require a longer baking time.
Q: Can I make the crust ahead of time?
A: Yes, you can make the crust ahead of time and store it in the refrigerator for up to 2 days. Be sure to wrap it tightly in plastic wrap to prevent it from drying out.
Q: How do I know when the squares are done baking?
A: The squares are done baking when the topping is set and golden brown around the edges. The center should still be slightly soft to the touch.
Q: Can I freeze these squares?
A: Yes, these squares freeze well. Wrap them individually in plastic wrap and then place them in an airtight container or freezer bag. They can be frozen for up to 2 months.
Q: What if my crust is too crumbly to press into the pan?
A: If your crust is too crumbly, try adding a tablespoon or two of cold water to the dough and mixing until it comes together. You can also use your hands to press the dough into the pan.
Final Thoughts
These Chocolate Chip Butter Tart Squares are a delightful twist on a classic Canadian treat. They are easy to make, incredibly delicious, and perfect for sharing with family and friends. Whether you’re a seasoned baker or just starting out, I encourage you to give this recipe a try. Don’t be afraid to experiment with different variations and substitutions to create your own unique version. I’d love to hear about your baking adventures and any creative twists you come up with – happy baking!