
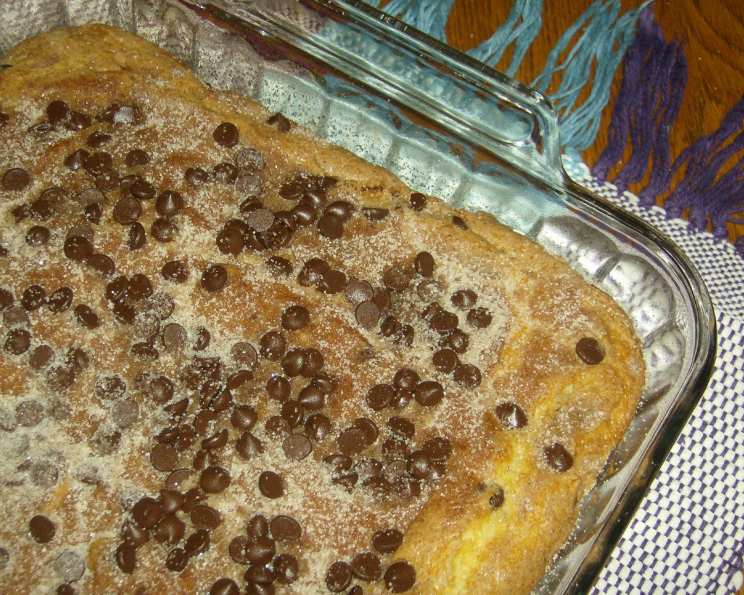
Chocolate Chip Cake: A Slice of Nostalgia
The aroma of cinnamon and melting chocolate chips baking in the oven instantly transports me back to my childhood kitchen. My mom wasn’t a fancy baker, but she had a knack for whipping up simple, comforting treats that filled our home with warmth. This particular chocolate chip cake was a regular after-school delight, perfect with a glass of cold milk, and the ultimate way to turn an ordinary day into something special. The slightly crunchy top, the soft, cakey interior, and that burst of chocolate in every bite – it’s a recipe I’ve cherished and tweaked over the years, and I’m excited to share it with you.
Recipe Overview
- Prep Time: 15 minutes
- Cook Time: 20-30 minutes
- Total Time: 35-45 minutes
- Servings: 12
- Yield: 1 9×13 pan of cake
- Dietary Type: Not specified
Ingredients
- 1/2 cup (1 stick) butter, softened
- 1 cup sugar
- 2 eggs
- 2 cups flour
- 1 1/2 teaspoons baking powder
- 1 teaspoon baking soda
- 1 cup sour cream
- 1 teaspoon vanilla extract
Chocolate Chip Mixture:
- 1/2 cup sugar
- 1 teaspoon cinnamon
- 1 bag (approximately 12 oz) chocolate chips
Equipment Needed
- 9×13 inch baking pan
- Mixing bowl
- Small bowl
- Measuring cups and spoons
- Mixer (hand or stand mixer)
- Spatula
Instructions
-
Preheat your oven to 350 degrees Fahrenheit (175 degrees Celsius). Grease and flour a 9×13 inch baking pan. This ensures the cake releases easily after baking.
-
In a large mixing bowl, cream together the softened butter and 1 cup of sugar until light and fluffy. This step is crucial for creating a tender crumb, so don’t rush it! Use a hand mixer or stand mixer for best results.
-
Beat in the eggs one at a time, ensuring each egg is fully incorporated before adding the next. Adding the eggs gradually helps prevent the batter from curdling.
-
In a separate bowl, whisk together the flour, baking powder, and baking soda. This evenly distributes the leavening agents throughout the dry ingredients, resulting in a cake that rises beautifully.
-
Gradually add the dry ingredients to the wet ingredients, alternating with the sour cream. Begin and end with the dry ingredients. This method helps prevent overmixing, which can lead to a tough cake. Mix until just combined – don’t overmix!
-
Stir in the vanilla extract.
-
The batter will be quite thick, which is perfectly normal.
-
Spread half of the batter evenly into the prepared 9×13 inch baking pan. Use a spatula to smooth the surface.
-
In a separate small bowl, combine the 1/2 cup sugar and cinnamon. This creates a sweet and fragrant topping that adds a delightful crunch to the cake.
-
Sprinkle half of the cinnamon-sugar mixture evenly over the batter in the pan.
-
Sprinkle half of the chocolate chips over the cinnamon-sugar mixture.
-
Carefully spread the remaining batter over the chocolate chips. It might be a little tricky to spread evenly, but do your best to cover the chocolate chips.
-
Sprinkle the remaining cinnamon-sugar mixture over the top of the batter.
-
Top with the remaining chocolate chips.
-
Bake in the preheated oven for 20-30 minutes, or until a wooden skewer inserted into the center comes out clean or with a few moist crumbs attached. Be careful not to overbake, as this can result in a dry cake.
-
Let cool slightly before cutting into squares and serving. This allows the cake to set slightly and makes it easier to handle.
Expert Tips & Tricks
- For an extra moist cake, try adding a tablespoon or two of melted butter to the sour cream.
- If you don’t have sour cream on hand, plain Greek yogurt works as a great substitute.
- To prevent the chocolate chips from sinking to the bottom of the cake, toss them with a tablespoon of flour before adding them to the batter.
- For a more intense chocolate flavor, use dark chocolate chips or even chop up a chocolate bar.
- If the top of the cake starts to brown too quickly, tent it with aluminum foil for the last 10 minutes of baking.
- To easily cut even squares, use a plastic knife or a long serrated knife.
- This cake freezes well! Let it cool completely, then wrap it tightly in plastic wrap and foil before freezing.
Serving & Storage Suggestions
Serve the chocolate chip cake warm, either on its own or with a scoop of vanilla ice cream. It’s also delicious with a drizzle of chocolate sauce or a dusting of powdered sugar. Leftovers can be stored in an airtight container at room temperature for up to 3 days, or in the refrigerator for up to 5 days. To reheat, simply microwave individual slices for a few seconds or warm them in a low oven.
Nutritional Information
| Nutrient | Amount per Serving | % Daily Value |
|---|---|---|
| Calories | 425 kcal | 21% |
| Total Fat | 23g | 35% |
| Saturated Fat | 15g | 75% |
| Cholesterol | 61mg | 20% |
| Sodium | 249mg | 10% |
| Total Carbohydrate | 59g | 20% |
| Dietary Fiber | 2g | 8% |
| Sugars | 41g | – |
| Protein | 5g | 10% |
Note: Nutritional information is an estimate and may vary based on specific ingredients and serving sizes.
Variations & Substitutions
- Gluten-Free: Substitute the all-purpose flour with a gluten-free blend. Be sure to add a binding agent like xanthan gum for best results.
- Dairy-Free: Replace the butter with a plant-based butter alternative and the sour cream with a dairy-free sour cream or coconut cream.
- Nutty Delight: Add a handful of chopped walnuts or pecans to the batter for a nutty twist.
- Spice It Up: Incorporate a pinch of nutmeg or ginger along with the cinnamon for a warmer, spicier flavor.
- Citrus Zest: Add the zest of one orange or lemon to the batter for a bright and refreshing taste.
- Different Chocolate: Use white chocolate chips, peanut butter chips, or a mix of different chocolate chips to customize the flavor.
FAQs (Frequently Asked Questions):
Q: Can I use salted butter instead of unsalted butter?
A: Yes, you can, but you may want to reduce the amount of salt in the recipe slightly to avoid an overly salty cake.
Q: What if I don’t have sour cream?
A: Plain Greek yogurt or even full-fat plain yogurt can be used as a substitute for sour cream.
Q: Can I use a different size pan?
A: Yes, but keep in mind that the baking time may need to be adjusted. A smaller pan will require a longer baking time, while a larger pan will require a shorter baking time. Watch it carefully!
Q: How do I know when the cake is done?
A: Insert a wooden skewer or toothpick into the center of the cake. If it comes out clean or with a few moist crumbs attached, the cake is done.
Q: Can I freeze this cake?
A: Yes, this cake freezes very well. Let it cool completely, then wrap it tightly in plastic wrap and foil before freezing. It can be stored in the freezer for up to 2 months.
Final Thoughts
This chocolate chip cake is more than just a dessert; it’s a slice of happiness. It’s a reminder of simpler times, of warm kitchens filled with laughter and the comforting aroma of freshly baked goods. I hope this recipe brings as much joy to your home as it has to mine. Don’t be afraid to experiment with variations and make it your own. And most importantly, share it with the people you love. Happy baking!