
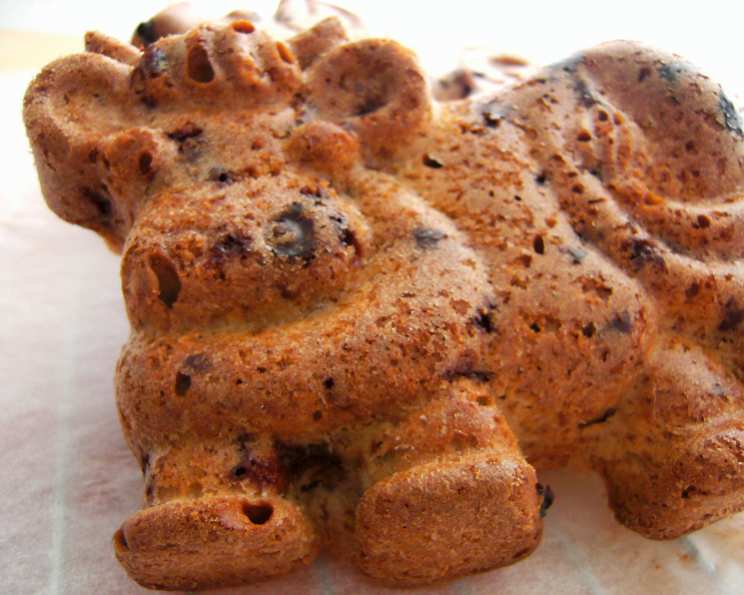
Chocolate Chip Coffee Cake (Gift Mix in a Jar)
My grandmother, bless her heart, had a knack for making simple moments feel incredibly special. I vividly remember one Christmas morning, the scent of coffee brewing battling with the sweet aroma of something baking in the oven. It turned out to be a coffee cake, studded with chocolate chips, that she’d prepared using a mix gifted to her by a neighbor. That cake, warm and comforting, became an instant family favorite, a symbol of community and shared joy. This recipe, inspired by that cherished memory, is a perfect way to spread that same warmth and deliciousness.
Recipe Overview
- Prep Time: 20 minutes
- Cook Time: 25-30 minutes
- Total Time: 45-50 minutes
- Servings: 12
- Yield: 1 coffee cake
- Dietary Type: Vegetarian
Ingredients
JAR Ingredients:
- 2 ½ cups flour
- 1 teaspoon cinnamon
- 1 teaspoon baking soda
- 1 ½ teaspoons baking powder
- 1 cup sugar
- 1 cup semi-sweet chocolate chips
ADDITIONAL INGREDIENTS (to be added by the recipient):
- 2 eggs
- 1 cup sour cream
- ½ cup butter, softened
- 1 teaspoon vanilla extract
Equipment Needed
- 1-quart wide-mouth canning jar
- Measuring cups and spoons
- 9 x 13 inch baking pan
- Electric mixer
- Large mixing bowl
- Wire rack
- Toothpick
Instructions
-
Begin by ensuring your 1-quart wide-mouth canning jar is impeccably clean and completely dry. This prevents any unwanted moisture from affecting the ingredients.
-
Now, it’s time to layer the dry ingredients. Start with the flour, carefully pouring it into the jar.
-
Add the cinnamon on top of the flour, creating a distinct layer.
-
Next, gently pour in the baking soda, followed by the baking powder.
-
Continue layering with the sugar, creating a sweet foundation for the chocolate chips.
-
Finish with the semi-sweet chocolate chips, creating the final, irresistible layer in the jar.
-
After adding each layer of ingredients, press firmly with a flat-bottomed object (like the bottom of a measuring cup) to compress the layer and ensure all ingredients fit neatly in the jar and the layers are as even as possible. This is crucial for creating a visually appealing gift.
-
Secure the lid tightly on the jar. You can decorate the jar with ribbons, fabric scraps, or a personalized label for a more festive presentation.
-
Attach a card with the following instructions for the recipient to complete the coffee cake.
Additional ingredients to be added by the recipient: 2 eggs, 1 cup sour cream, ½ cup butter, softened, and 1 teaspoon vanilla extract. -
Preheat your oven to 350°F (175°C). This ensures the cake bakes evenly.
-
In a large mixing bowl, combine the eggs, sour cream, softened butter, and vanilla extract.
-
Using an electric mixer set on low speed, blend these wet ingredients until they are well combined. Avoid overmixing at this stage.
-
Gradually add the contents of the jar to the wet ingredients.
-
Continue to blend with the electric mixer for approximately 2 minutes, or until the batter is smooth and well incorporated. Be sure to scrape down the sides of the bowl to ensure all the dry ingredients are fully mixed in.
-
Generously grease a 9 x 13 inch baking pan with butter or cooking spray. This will prevent the cake from sticking to the pan.
-
Pour the batter evenly into the prepared pan.
-
Bake in the preheated oven for 25-30 minutes, or until a toothpick inserted into the center of the cake comes out clean. This indicates that the cake is fully baked.
-
Once baked, allow the cake to cool in the pan for 10 minutes before attempting to remove it.
-
After 10 minutes, carefully remove the cake from the pan and place it on a wire rack to cool completely. This prevents the bottom of the cake from becoming soggy.
-
Once cooled, store the chocolate chip coffee cake in an airtight container for up to 1 week.
Expert Tips & Tricks
- For a richer flavor, use brown butter instead of softened butter in the wet ingredients. Simply melt the butter in a saucepan over medium heat, continuing to cook until the milk solids turn golden brown and the butter has a nutty aroma. Let it cool slightly before adding to the batter.
- If you prefer a more intense coffee flavor, add 1-2 teaspoons of instant espresso powder to the dry ingredients in the jar.
- To prevent the chocolate chips from sinking to the bottom of the cake, toss them with a tablespoon of flour before adding them to the jar.
- If the top of the cake is browning too quickly during baking, tent it loosely with aluminum foil.
- Make sure the butter is softened to room temperature for easy mixing.
Serving & Storage Suggestions
Serve the chocolate chip coffee cake warm or at room temperature. It pairs perfectly with a cup of coffee or tea. Dust the top with powdered sugar for an elegant presentation. To store, keep in an airtight container at room temperature for up to 3 days, or in the refrigerator for up to a week. You can also freeze the cake for up to 2 months. To reheat, thaw completely and warm in a low oven or microwave.
Nutritional Information
| Nutrient | Amount per Serving | % Daily Value |
|---|---|---|
| Calories | 345 kcal | N/A |
| Calories from Fat | N/A | 44% |
| Total Fat | 16.7g | 25% |
| Saturated Fat | 9.8g | 49% |
| Cholesterol | 61.3mg | 20% |
| Sodium | 247.2mg | 10% |
| Total Carbohydrate | 46.5g | 15% |
| Dietary Fiber | 1.6g | 6% |
| Sugars | 25.1g | N/A |
| Protein | 4.8g | 9% |
Note: Nutritional information is an estimate and may vary based on specific ingredients and preparation methods.
Variations & Substitutions
- Gluten-Free: Substitute the all-purpose flour with a gluten-free blend for a gluten-free version. Be sure to use a blend that contains xanthan gum for best results.
- Dairy-Free: Replace the sour cream with a dairy-free sour cream alternative, such as cashew cream or coconut yogurt. Use a dairy-free butter substitute.
- Nut-Free: Ensure the chocolate chips are nut-free, and be mindful of cross-contamination if someone has severe allergies.
- Spice It Up: Add a pinch of nutmeg or cardamom to the dry ingredients for a warmer, more complex flavor.
- Fruit Infusion: Mix in a half-cup of dried cranberries or chopped nuts into the batter for added texture and flavor.
FAQs (Frequently Asked Questions)
Q: Can I use a different size pan?
A: While a 9×13 inch pan is recommended, you can use a different size. Keep in mind that the baking time may vary. Deeper pans will require longer baking, shallower pans will cook more quickly.
Q: Do I need to sift the flour before putting it in the jar?
A: Sifting is not necessary, but it can help ensure a lighter and more evenly textured cake. If you do sift, make sure to measure the flour after sifting.
Q: Can I use milk chocolate chips instead of semi-sweet?
A: Absolutely! Feel free to use your favorite type of chocolate chip, whether it’s milk chocolate, dark chocolate, or even white chocolate.
Q: My coffee cake is dry. What did I do wrong?
A: Overbaking is the most common cause of a dry coffee cake. Make sure to check for doneness with a toothpick, and don’t overbake. Also, ensure accurate measurements of the wet ingredients, especially the sour cream and butter.
Q: How long will the gift mix in a jar last before it expires?
A: The mix should be good for up to 6 months, provided it’s stored in a cool, dry place. Check the expiration dates on your baking powder and baking soda for the best indication.
Final Thoughts
I sincerely hope you’re inspired to create this delightful chocolate chip coffee cake, whether it’s destined for a loved one as a thoughtful gift or for your own enjoyment. This recipe is more than just a list of ingredients and instructions; it’s an invitation to create a warm, comforting moment that can be shared and cherished. So go ahead, bake this delicious coffee cake, savor each bite, and share the joy with those around you. And if you happen to try any variations, please do share your experiences – I’d love to hear about them!