
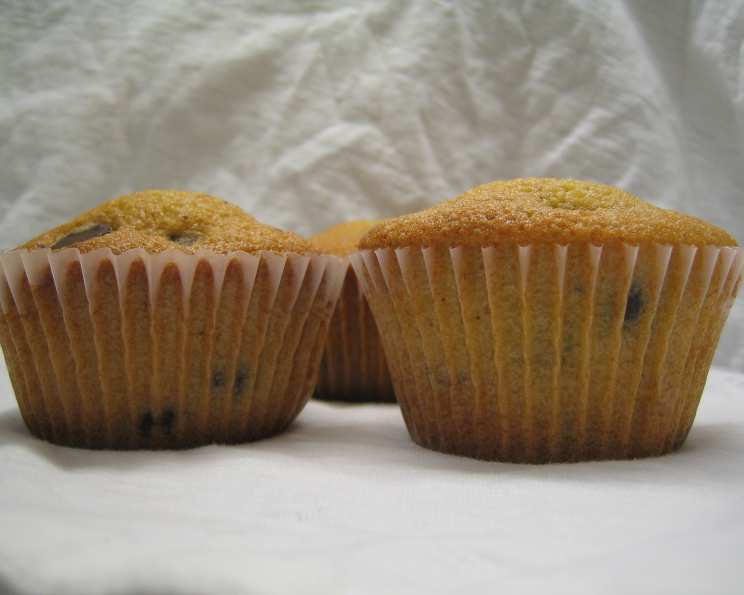
Chocolate Chip Cookie Cupcakes: A Gift From the Heart (and the Kitchen)
I can still remember the excitement of receiving a perfectly layered jar of ingredients, a promise of deliciousness contained within. It was a chocolate chip cookie mix, gifted by a neighbor during the holidays, and the anticipation of baking them was almost as enjoyable as the cookies themselves. The beautiful layers of flour, sugars, and chocolate chips looked like a work of art, a testament to the care and thought put into this homemade gift. That memory sparked my inspiration to create this equally charming and delicious recipe for Chocolate Chip Cookie Cupcakes in a Jar. It’s more than just a recipe; it’s an opportunity to share a moment of joy and a taste of home with someone special.
Recipe Overview
- Prep Time: 30 minutes
- Cook Time: 17-20 minutes
- Total Time: 47-50 minutes
- Servings: 20
- Yield: 20 cupcakes
- Dietary Type: Vegetarian
Ingredients
JAR Ingredients:
- 1 ½ cups all-purpose flour
- ½ teaspoon salt
- ¾ teaspoon baking powder
- ¾ cup granulated sugar
- ¾ cup packed brown sugar
- 1 cup semi-sweet chocolate chips
ADDITIONAL INGREDIENTS (to be added by the recipient):
- 1 cup butter, softened
- 3 large eggs
- ⅓ cup milk
- 1 teaspoon vanilla extract
Equipment Needed
- 1-quart wide-mouth canning jar
- Measuring cups and spoons
- Muffin tin
- Paper cupcake liners
- Large mixing bowl
- Electric mixer
- Wire rack
- Toothpick
Instructions
-
Begin by ensuring your 1-quart wide-mouth canning jar is thoroughly washed and dried. This is crucial for preserving the ingredients and preventing any unwanted moisture from affecting the mix.
-
Now, it’s time to layer the ingredients. In the jar, carefully add the flour, followed by the salt and baking powder. After each addition, use a flat-bottomed object (like a measuring cup) to gently press down firmly and create a level layer. This helps to prevent the ingredients from mixing prematurely and creates an attractive visual effect.
-
Next, add the granulated sugar, again pressing down firmly to create a distinct layer. Follow this with the packed brown sugar, ensuring it’s evenly distributed and well-compressed.
-
Finally, top the jar with the semi-sweet chocolate chips, pressing them down slightly to create a final, appealing layer.
-
Secure the lid tightly onto the jar. Now comes the fun part: decorating the jar! You can use ribbons, twine, fabric scraps, or handmade tags to personalize the gift. Be sure to attach a recipe card with the following instructions for making the cupcakes, as well as a list of the additional ingredients needed.
-
Recipe for the recipient: “Preheat your oven to 375°F (190°C). In a large bowl, combine 1 cup of softened butter, 3 eggs, ⅓ cup milk, and 1 teaspoon vanilla extract. Blend with an electric mixer on low speed until well combined.
-
Add the contents of the jar to the wet ingredients and continue to blend for 2 minutes, or until a smooth batter forms. Be sure to scrape down the sides of the bowl to ensure all ingredients are incorporated.
-
Line a muffin tin with paper cupcake liners. Spoon the batter into the liners, filling each one about halfway full. This will allow the cupcakes to rise properly without overflowing.
-
Bake for 17-20 minutes, or until a toothpick inserted into the center comes out clean. The cupcakes should be golden brown and spring back lightly when touched.
-
Cool for 5 minutes in the tin before transferring them to a wire rack to cool completely. This prevents the cupcakes from sticking to the pan and allows them to cool evenly.
-
Serve immediately or store in an airtight container for up to 5 days.
Expert Tips & Tricks
- For a richer, more intense chocolate flavor, use dark chocolate chips instead of semi-sweet.
- To prevent the chocolate chips from sinking to the bottom of the cupcakes, lightly toss them in a tablespoon of flour before adding them to the batter.
- If you want to add a touch of spice, consider adding a pinch of cinnamon or nutmeg to the flour mixture in the jar.
- Make sure the butter is truly softened, but not melted. It should be easy to cream with the sugars for the best cupcake texture.
- If the recipient has dietary restrictions, consider using gluten-free flour or dairy-free chocolate chips for a more inclusive gift.
Serving & Storage Suggestions
These Chocolate Chip Cookie Cupcakes are best served at room temperature. They make a delightful addition to any dessert table or a sweet treat to enjoy with a cup of coffee or tea.
To store, place the cooled cupcakes in an airtight container. They will keep at room temperature for up to 5 days. You can also freeze them for longer storage. Wrap each cupcake individually in plastic wrap and then place them in a freezer-safe bag or container. They can be frozen for up to 2 months. To thaw, simply remove the cupcakes from the freezer and let them sit at room temperature for a few hours.
Nutritional Information
(Estimates based on standard ingredients; may vary)
| Nutrient | Amount per Serving | % Daily Value |
|---|---|---|
| Calories | 230 kcal | 12% |
| Total Fat | 13g | 16% |
| Saturated Fat | 8g | 40% |
| Cholesterol | 57mg | 19% |
| Sodium | 154mg | 7% |
| Total Carbohydrate | 28g | 10% |
| Dietary Fiber | 1g | 4% |
| Sugars | 20g | 40% |
| Protein | 3g | 6% |
Variations & Substitutions
- Peanut Butter Chocolate Chip: Add ½ cup of peanut butter chips to the jar along with the chocolate chips for a delightful twist.
- Oatmeal Chocolate Chip: Replace ½ cup of flour with ½ cup of rolled oats for a chewier texture and added fiber.
- White Chocolate Macadamia: Substitute white chocolate chips for semi-sweet chocolate chips and add ½ cup of chopped macadamia nuts to the jar.
- Spiced Chocolate Chip: Add ½ teaspoon of ground cinnamon and ¼ teaspoon of ground nutmeg to the flour mixture for a warm, comforting flavor.
- Vegan Option: Substitute the butter with a vegan butter alternative, the eggs with flax eggs (3 tablespoons of water mixed with 3 tablespoons of ground flaxseed), and the milk with almond milk.
FAQs (Frequently Asked Questions)
Q: Can I use a different size jar?
A: While a 1-quart jar is ideal for the specified ingredient quantities, you could use a larger jar. However, make sure the recipient understands that they will need to use the entire contents of the jar for the recipe to work as intended.
Q: How do I make sure the brown sugar stays soft in the jar?
A: Packing the brown sugar tightly and ensuring the jar is sealed properly will help prevent it from drying out. You can also add a small marshmallow to the jar, as it will help retain moisture.
Q: Can I use self-rising flour instead of all-purpose flour and baking powder?
A: It’s best to stick with all-purpose flour and baking powder for this recipe, as using self-rising flour may result in a different texture and rise.
Q: What if the recipient doesn’t have an electric mixer?
A: The butter and wet ingredients can be mixed by hand with a whisk, but it may require a bit more effort to ensure everything is well combined.
Q: How do I know if the cupcakes are done without a toothpick?
A: If you don’t have a toothpick, you can gently press the center of a cupcake. If it springs back lightly, it’s likely done. You can also look for a golden brown color and slightly cracked tops.
Final Thoughts
These Chocolate Chip Cookie Cupcakes in a Jar are more than just a sweet treat; they are a heartfelt gesture, a way to share your love and creativity with someone special. The simple act of layering the ingredients transforms into a beautiful and thoughtful gift that’s sure to bring a smile to their face. Whether it’s for a holiday, a birthday, or just because, this gift is a reminder that the best things in life are often homemade and shared with love. So, gather your ingredients, grab a jar, and start spreading some sweetness! I encourage you to try out this recipe, share your creations with friends and family, and let me know how it turns out. Perhaps you’ll discover your own special twist to make it even more unique. Happy baking!