
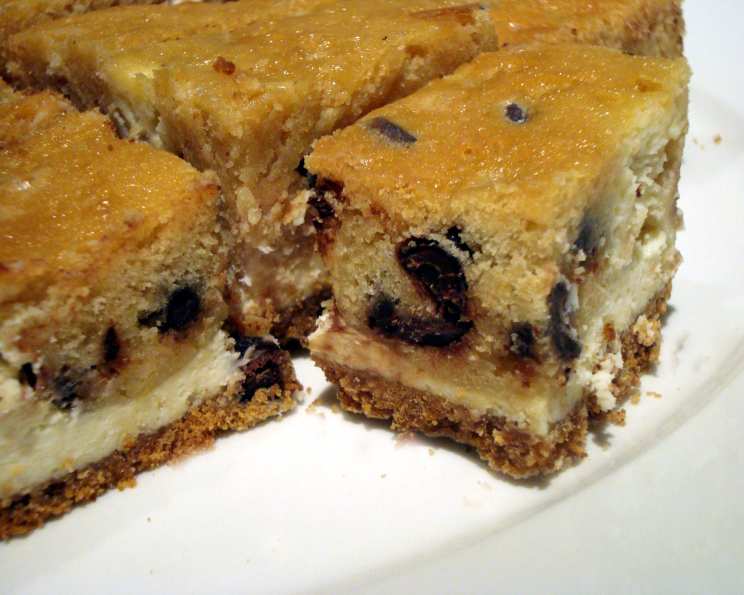
Chocolate Chip Cookie Dough Cheesecake Bars
The scent of freshly baked cookies has always been synonymous with warmth and comfort in my kitchen. As a child, I remember eagerly awaiting the moment the timer dinged, signaling that a batch of chocolate chip cookies was ready to be devoured. But sometimes, I craved something more, something that combined the comforting simplicity of cookies with the rich decadence of cheesecake. That’s what led me to these Chocolate Chip Cookie Dough Cheesecake Bars – a symphony of textures and flavors that always brings a smile to my face.
Recipe Overview
- Prep Time: 20 minutes
- Cook Time: 36 minutes
- Total Time: 1 hour, 36 minutes (includes cooling time)
- Yields: 16 bars
- Dietary Type: Not specified
Ingredients
For the Crust:
- 1 1/2 cups graham cracker crumbs
- 5 tablespoons butter, melted
- 3/4 cup miniature semisweet chocolate chips
For the Filling:
- 10 ounces cream cheese, softened
- 1/4 cup sugar
- 1 egg, room temperature
- 1 teaspoon vanilla extract
For the Dough:
- 5 tablespoons butter, softened
- 1/4 cup brown sugar, packed
- 3 tablespoons sugar
- 1 teaspoon vanilla extract
- 1 dash salt
- 1/2 cup all-purpose flour
- 1 cup semisweet chocolate chips
For the Topping:
- 1/4 cup semisweet chocolate chips, melted
Equipment Needed
- 9×9-inch baking pan
- Foil
- Nonstick cooking spray
- Medium bowl
- Large bowl
- Electric mixer
- Wire rack
- Fork (for drizzling)
Instructions
- Preheat the oven to 350ºF (175°C).
- Line a 9×9-inch baking pan with foil, leaving extra foil extending over the edges to easily lift the bars out later.
- Spray the foil with nonstick cooking spray. This is crucial to prevent sticking!
- In a medium bowl, stir together the graham cracker crumbs and melted butter until the crumbs are evenly moistened.
- Stir in the miniature chocolate chips.
- Press the mixture firmly into the bottom and 1 inch up the sides of the prepared pan, creating a crust.
- Bake the crust for 6 minutes, or until it appears set.
- Cool the crust completely on a wire rack. This prevents the cheesecake filling from melting the crust.
- Decrease the oven temperature to 325ºF (160°C).
- In a large bowl, beat the softened cream cheese and 1/4 cup of sugar at low speed using an electric mixer until smooth and creamy. Over-beating can incorporate too much air, which can lead to cracks in the cheesecake.
- Beat in the egg and 1 teaspoon of vanilla extract until just blended. Be careful not to overmix at this stage.
- Pour the cheesecake filling into the cooled, prepared crust, spreading it evenly.
- In the same large bowl (no need to wash it!), beat the 5 tablespoons of softened butter, packed brown sugar, 3 tablespoons of sugar, 1 teaspoon of vanilla extract, and a dash of salt at medium speed for 1 minute, or until everything is well blended and creamy.
- Beat in the flour at low speed just until incorporated. Again, avoid overmixing.
- Stir in the 1 cup of semisweet chocolate chips by hand.
- Drop teaspoonfuls of the cookie dough evenly over the cheesecake filling.
- Bake for 30-35 minutes, or until the top feels dry and looks set when shaken gently. The center should have a slight jiggle.
- Cool the bars completely on a wire rack. This is essential for the cheesecake to set properly.
- Melt the 1/4 cup of semisweet chocolate chips. You can do this in the microwave in 30-second intervals, stirring in between, or over a double boiler.
- Dip a fork into the melted chocolate chips and drizzle it artistically over the top of the cooled bars.
- Let stand until the chocolate drizzle is set. This can be sped up by placing the bars in the refrigerator for a short time.
- Using the foil edges, lift the bars carefully from the pan and peel away the foil.
- Cut the bars into 16 pieces and serve at room temperature.
- Cover and refrigerate any leftovers.
Expert Tips & Tricks
- Room Temperature Matters: Ensure your cream cheese and egg are at room temperature. This helps them blend smoothly, creating a velvety cheesecake filling.
- Don’t Overmix: Overmixing the cheesecake batter can incorporate too much air, causing cracks during baking. Mix until just combined.
- Preventing Cracks: Baking at a lower temperature helps prevent cracks. Also, avoid opening the oven door frequently during baking.
- The Perfect Doneness: The cheesecake is done when the edges are set, and the center has a slight jiggle. It will continue to set as it cools.
- Easy Lifting: The foil lining is your best friend! It makes lifting the bars out of the pan effortless.
- Melting Chocolate: For a smooth and glossy chocolate drizzle, add a teaspoon of vegetable oil to the chocolate chips before melting.
- Make Ahead: The bars can be made a day ahead. Store them, covered, in the refrigerator.
- The cookie dough should be spread relatively thin when you are creating the dough “dollops” so that they cook properly with the cheesecake.
Serving & Storage Suggestions
These Chocolate Chip Cookie Dough Cheesecake Bars are best served chilled or at room temperature. They make a delightful dessert on their own or paired with a scoop of vanilla ice cream or a dollop of whipped cream. Store any leftover bars in an airtight container in the refrigerator for up to 3-4 days. They can also be frozen for longer storage (up to 2 months). To freeze, wrap the bars individually in plastic wrap and then place them in a freezer-safe container. Thaw in the refrigerator before serving. They are best served within 2-3 days, but will still taste great!
Nutritional Information
| Nutrient | Amount per Serving | % Daily Value |
|---|---|---|
| Calories | 314.1 | N/A |
| Calories from Fat | 187 | N/A |
| Total Fat | 20.8 g | 31% |
| Saturated Fat | 12 g | 59% |
| Cholesterol | 50.2 mg | 16% |
| Sodium | 175.5 mg | 7% |
| Total Carbohydrate | 32.3 g | 10% |
| Dietary Fiber | 1.6 g | 6% |
| Sugars | 23.5 g | 94% |
| Protein | 3.4 g | 6% |
Disclaimer: Nutritional information is an estimate and may vary based on specific ingredients and preparation methods.
Variations & Substitutions
- Gluten-Free: Use gluten-free graham crackers for the crust and substitute the all-purpose flour in the cookie dough with a gluten-free all-purpose flour blend.
- Lower Sugar: Reduce the amount of sugar in both the cheesecake filling and the cookie dough. You can also use a sugar substitute like stevia or erythritol.
- Different Chocolate: Experiment with different types of chocolate chips, such as dark chocolate, white chocolate, or even peanut butter chips.
- Nutty Variation: Add chopped nuts, such as walnuts or pecans, to the cookie dough for added flavor and texture.
- Seasonal Twist: For a fall-inspired version, add a teaspoon of cinnamon to the cookie dough and a pinch of nutmeg to the cheesecake filling. You could also use gingersnap cookies for the crust!
FAQs (Frequently Asked Questions)
Q: Can I use a different size baking pan?
A: While a 9×9-inch pan is recommended for the listed baking time and bar thickness, you can use an 8×8-inch pan for thicker bars, but you might need to increase the baking time slightly.
Q: How do I prevent the chocolate chips from sinking to the bottom of the cookie dough?
A: Tossing the chocolate chips with a tablespoon of flour before adding them to the cookie dough can help prevent them from sinking.
Q: Can I freeze these bars?
A: Yes, these bars freeze well. Wrap them individually in plastic wrap and store them in a freezer-safe container for up to 2 months.
Q: My cheesecake cracked. Is it still okay to eat?
A: Absolutely! A cracked cheesecake is still delicious. You can cover the cracks with the chocolate drizzle or whipped cream.
Q: Can I use pre-made cookie dough instead of making it from scratch?
A: While fresh cookie dough is preferred for its flavor and texture, you can use store-bought cookie dough in a pinch. Just make sure to break it into small pieces before dropping it over the cheesecake filling.
Final Thoughts
These Chocolate Chip Cookie Dough Cheesecake Bars are the perfect treat for any occasion. They’re easy to make, incredibly delicious, and sure to be a crowd-pleaser. So, gather your ingredients, preheat your oven, and get ready to embark on a baking adventure that will tantalize your taste buds and leave you craving more. Don’t be afraid to experiment with variations and substitutions to create your own signature version of this delightful dessert. And most importantly, have fun! Share your creations and feedback – happy baking!