
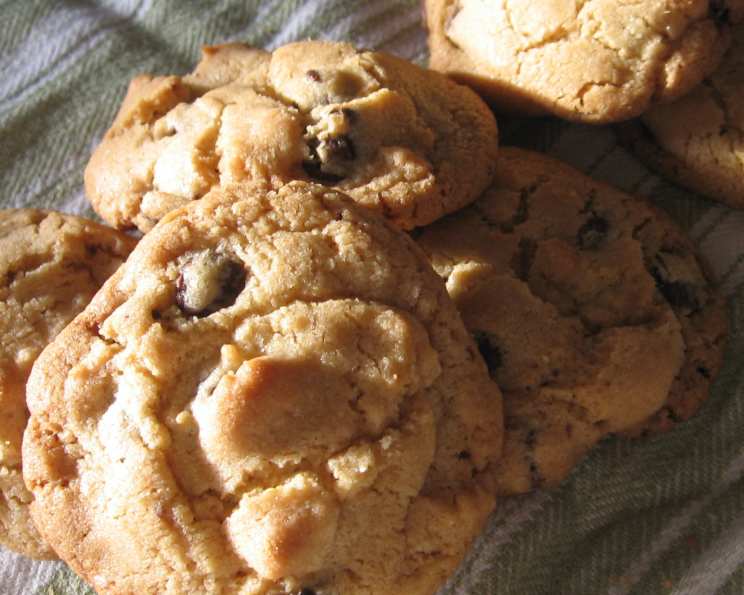
Chocolate Chip Cookies #10: The Thick and Chewy Delight
The scent of warm chocolate chip cookies baking in the oven is a sensory time machine, instantly transporting me back to my grandmother’s kitchen. I remember standing on a wobbly stool, mesmerized as she expertly creamed butter and sugar, her hands moving with a practiced grace that only years of baking can instill. The best part? The cookies never spread into flat, crispy discs but remained thick and satisfyingly chewy. After years of searching, this recipe comes closest to replicating that nostalgic magic.
Recipe Overview
- Prep Time: 20 minutes
- Cook Time: 15 minutes
- Total Time: 35 minutes
- Yields: 36 cookies
- Serves: 36
- Dietary Type: Not specified
Ingredients
- 2 1⁄4 cups all-purpose flour
- 1 teaspoon baking soda
- 1 teaspoon salt
- 3⁄4 cup granulated sugar
- 3⁄4 cup brown sugar
- 1 cup unsalted butter, melted and slightly cooled
- 2 large egg yolks, beaten
- 1 teaspoon vanilla extract
- 2 cups chocolate chips (one 12-oz bag)
Equipment Needed
- Mixing bowls
- Measuring cups and spoons
- Cookie sheets
- Parchment paper (optional)
- Cookie scoop (optional)
Instructions
-
Preheat your oven to 375 degrees Fahrenheit (190 degrees Celsius). Ensure your oven rack is positioned in the center for even baking.
-
In a medium-sized mixing bowl, whisk together the all-purpose flour, baking soda, and salt. This ensures the baking soda and salt are evenly distributed throughout the flour, which is crucial for the cookie’s texture and rise. Set this dry ingredient mixture aside.
-
In a separate, large mixing bowl, combine the granulated sugar, brown sugar, beaten egg yolks, and vanilla extract. Gradually pour in the melted and slightly cooled unsalted butter, mixing continuously until the mixture is smooth and well combined. Make sure the butter isn’t too hot, or it could cook the egg yolks.
-
Gradually add the dry ingredient mixture to the wet ingredient mixture, mixing on low speed until just combined. Be careful not to overmix, as this can lead to tough cookies. A few streaks of flour are perfectly acceptable at this stage.
-
Fold in the chocolate chips until they are evenly distributed throughout the dough. Don’t be shy with the chocolate chips! They are the star of the show.
-
Using a cookie scoop or tablespoon, scoop rounded balls of dough, approximately 1 ounce each (about 1 tablespoon), onto ungreased cookie sheets, or cookie sheets lined with parchment paper. Leaving about 2 inches between each cookie will allow them room to spread slightly during baking. This recipe should yield about 36 cookies.
-
Bake for 15 minutes, or until the edges are golden brown. Baking time may vary slightly depending on your oven. Keep a close eye on the cookies, and rotate the cookie sheets halfway through baking to ensure even browning.
-
Once baked, remove the cookies from the oven and let them cool on the cookie sheets for a few minutes before transferring them to a wire rack to cool completely. This helps prevent them from breaking apart while they are still soft.
Expert Tips & Tricks
-
Cool the butter, but not completely solidify it: Using melted but slightly cooled butter is key to achieving that chewy texture. If it’s too hot, it will melt the sugars too much and the cookies will spread.
-
Don’t overmix the dough: Overmixing develops the gluten in the flour, resulting in tough cookies. Mix until just combined.
-
Chill the dough (optional): For even thicker cookies, chill the dough for at least 30 minutes before baking. This allows the butter to firm up, preventing excessive spreading in the oven.
-
Use high-quality chocolate chips: The quality of your chocolate chips will significantly impact the flavor of the cookies. Opt for semi-sweet or dark chocolate chips for a richer, more complex flavor.
-
Salted Butter Variation: You can use salted butter instead of unsalted. Reduce the added salt to 1/2 teaspoon.
-
Brown Butter Upgrade: For a nutty, deeper flavor, brown the butter before melting it. Watch it carefully, as it can burn easily.
Serving & Storage Suggestions
Serve these delightful chocolate chip cookies warm, straight from the oven, or at room temperature. They are perfect with a cold glass of milk, a scoop of vanilla ice cream, or a steaming cup of coffee.
To store leftover cookies, place them in an airtight container at room temperature. They will stay fresh for up to 3-4 days. For longer storage, freeze the cookies in an airtight container or freezer bag for up to 2 months. Thaw at room temperature before serving. You can also briefly reheat them in a low oven or microwave for a warm, gooey treat.
Nutritional Information
| Nutrient | Amount per Serving | % Daily Value |
|---|---|---|
| Calories | 155 kcal | N/A |
| Calories from Fat | 74 kcal | N/A |
| Total Fat | 8.2 g | 12% |
| Saturated Fat | 5 g | 25% |
| Cholesterol | 25.2 mg | 8% |
| Sodium | 103.7 mg | 4% |
| Total Carbohydrate | 20.5 g | 6% |
| Dietary Fiber | 0.8 g | 3% |
| Sugars | 13.7 g | N/A |
| Protein | 1.4 g | 2% |
Note: Nutritional information is an estimate and may vary based on specific ingredients and serving sizes.
Variations & Substitutions
-
Nutty Addition: Add 1/2 cup of chopped nuts (walnuts, pecans, or almonds) to the dough along with the chocolate chips for added texture and flavor.
-
Oatmeal Chocolate Chip: Substitute 1/2 cup of the all-purpose flour with 1/2 cup of rolled oats for a chewier, heartier cookie.
-
Spiced Chocolate Chip: Add 1/2 teaspoon of ground cinnamon or nutmeg to the dry ingredients for a warm, comforting flavor.
-
Dark Chocolate Chunk: Replace the chocolate chips with chopped dark chocolate for a more intense chocolate experience.
-
Gluten-Free Option: Substitute a gluten-free all-purpose flour blend for the regular all-purpose flour. Be sure to choose a blend that contains xanthan gum, as it helps to bind the ingredients together.
FAQs (Frequently Asked Questions)
Q: Why are my cookies spreading too thin?
A: This could be due to several factors, including using butter that is too warm, overmixing the dough, or not using enough flour. Try chilling the dough before baking or adding a tablespoon or two of extra flour.
Q: Can I use a stand mixer instead of mixing by hand?
A: Yes, you can use a stand mixer fitted with a paddle attachment. Just be careful not to overmix the dough.
Q: How do I prevent my cookies from burning on the bottom?
A: Make sure your oven rack is positioned in the center and use parchment paper to line your baking sheets. This will help distribute the heat evenly and prevent burning.
Q: Can I freeze the cookie dough for later?
A: Absolutely! Scoop the dough into balls and place them on a baking sheet lined with parchment paper. Freeze until solid, then transfer the frozen dough balls to a freezer bag. Bake from frozen, adding a few extra minutes to the baking time.
Q: What is the best way to store these cookies to keep them soft?
A: Store the cooled cookies in an airtight container with a slice of bread. The bread will help to absorb moisture and keep the cookies soft.
Final Thoughts
These Chocolate Chip Cookies #10 are more than just a recipe; they are an invitation to create warm, comforting memories in your own kitchen. Don’t be afraid to experiment with variations and substitutions to make them your own signature treat. Whether you’re baking for a special occasion or simply craving a sweet indulgence, these cookies are sure to bring a smile to your face. So, gather your ingredients, preheat your oven, and get ready to experience the pure joy of homemade chocolate chip cookies! Share your creations and any fun variations with friends and family, and don’t forget to leave a comment with your feedback – happy baking!