
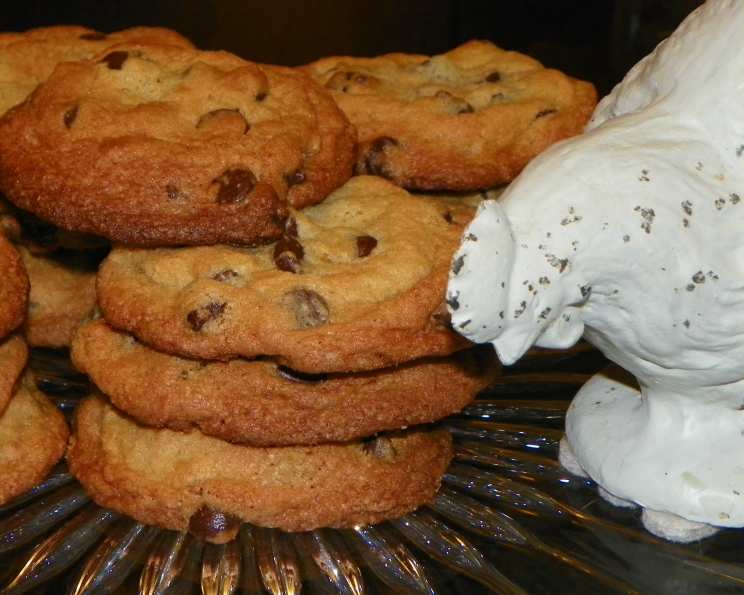
The Ultimate Nostalgic Chocolate Chip Cookies
The aroma of chocolate chip cookies baking is a time machine. One whiff, and I’m instantly transported back to my grandmother’s kitchen, a haven of warmth and love. She always had a batch cooling on the counter, their golden edges calling to me like a siren song. Each bite was pure happiness, a simple pleasure that shaped my earliest culinary memories and ignited my lifelong passion for baking. Those cookies weren’t just food; they were a symbol of home.
Recipe Overview
- Prep Time: 15 minutes
- Cook Time: 11-12 minutes
- Total Time: 26-27 minutes
- Yields: 3 dozen
- Dietary Type: Vegetarian
Ingredients
- ¾ cup Butter Flavor Crisco
- 1 ¼ cups light brown sugar
- 2 tablespoons milk
- 1 tablespoon vanilla extract
- 1 large egg
- 1 ¾ cups all-purpose flour
- ¾ teaspoon baking soda
- 1 teaspoon salt
- 1 ½ cups semi-sweet chocolate chips (or more, to taste!)
Equipment Needed
- Mixing bowls
- Measuring cups and spoons
- Cookie sheets
- Cooling rack
- Mixer (hand or stand)
Instructions
-
Preheat your oven to 375°F (190°C). This is crucial for even baking and that perfect golden-brown color.
-
In a large mixing bowl, combine the Butter Flavor Crisco, light brown sugar, milk, and vanilla extract. Beat these ingredients together until they are light and creamy. The Crisco provides a delightful tenderness and subtle buttery flavor, essential for the cookie’s texture.
-
Add the egg to the creamed mixture. Beat well until fully incorporated. Make sure there are no streaks of egg yolk remaining.
-
In a separate, medium-sized bowl, whisk together the all-purpose flour, baking soda, and salt. This ensures even distribution of the leavening agent and seasoning, contributing to a consistently perfect cookie.
-
Gradually add the dry ingredients to the wet ingredients, mixing on low speed until just combined. Be careful not to overmix, as this can lead to tough cookies. Mix until the flour disappears, then stop.
-
Stir in the semi-sweet chocolate chips. Feel free to add even more than the recipe calls for – after all, who doesn’t love extra chocolate?
-
Drop the cookie dough by teaspoonfuls onto ungreased cookie sheets. Leaving about an inch of space between each cookie is important to prevent them from merging during baking.
-
Bake for 11-12 minutes, or until the edges are golden brown and the centers are set. Keep a close eye on them during the last few minutes of baking, as ovens can vary. For a softer cookie, err on the side of 11 minutes; for a crispier cookie, go for 12.
-
Remove the cookie sheets from the oven and let the cookies cool on the sheets for a couple of minutes before transferring them to a wire rack to cool completely. This prevents them from sticking and allows them to firm up slightly.
Expert Tips & Tricks
- Creaming the Crisco and sugar is the most crucial step. Don’t rush it! Spend a good 3-5 minutes beating them together until the mixture is light and fluffy. This incorporates air, which helps create a tender crumb.
- Measure your flour accurately. Spoon the flour into your measuring cup and level it off with a knife. Scooping directly from the bag can pack the flour, resulting in dry cookies.
- For a richer, more complex flavor, brown the butter flavor Crisco slightly before creaming it with the sugar. This adds a nutty, caramel-like note to the cookies. Just be sure to let it cool slightly before adding the other ingredients.
- Chill the dough for at least 30 minutes before baking. This helps prevent the cookies from spreading too much in the oven and results in a thicker, chewier cookie.
- If you want extra-soft cookies, you can add a tablespoon of cornstarch to the dry ingredients.
- For even baking, rotate the cookie sheets halfway through the baking time.
Serving & Storage Suggestions
These cookies are best served warm, fresh from the oven, with a cold glass of milk or a scoop of vanilla ice cream. To store, place them in an airtight container at room temperature. They will stay fresh for up to 3 days. For longer storage, you can freeze the baked cookies for up to 2 months. Let them thaw completely at room temperature before serving. You can also freeze the cookie dough. Scoop the dough into balls and freeze them on a baking sheet. Once frozen, transfer them to a freezer bag. When you’re ready to bake, simply place the frozen dough balls on a baking sheet and bake as directed, adding a minute or two to the baking time.
Nutritional Information
| Nutrient | Amount per Serving | % Daily Value |
|---|---|---|
| Calories | 1521 kcal | N/A |
| Calories from Fat | 712 kcal | N/A |
| Total Fat | 79.1 g | 121% |
| Saturated Fat | 36.4 g | 182% |
| Cholesterol | 92.1 mg | 30% |
| Sodium | 1155.2 mg | 48% |
| Total Carbohydrate | 200.4 g | 66% |
| Dietary Fiber | 6.9 g | 27% |
| Sugars | 135.5 g | N/A |
| Protein | 13.6 g | 27% |
Note: Nutritional information is an estimate and may vary based on specific ingredients and portion sizes.
Variations & Substitutions
- For a festive twist: Replace half of the chocolate chips with red and green M&Ms for Christmas!
- Nutty Delight: Add ½ cup of chopped walnuts or pecans to the dough for a nutty crunch.
- Oatmeal Chocolate Chip: Substitute ½ cup of the flour with ½ cup of rolled oats for a chewier texture and added fiber.
- Double Chocolate: Add ¼ cup of cocoa powder to the dry ingredients for an intensely chocolatey cookie.
- Butterscotch Bliss: Replace the semi-sweet chocolate chips with butterscotch chips for a sweet and buttery flavor.
- White Chocolate Macadamia: Substitute the semi-sweet chocolate chips with white chocolate chips and add ½ cup of chopped macadamia nuts.
- Gluten-Free: Use a 1:1 gluten-free flour blend in place of the all-purpose flour.
FAQs (Frequently Asked Questions)
Q: Can I use regular butter instead of Butter Flavor Crisco?
A: Yes, you can, but the texture will be slightly different. Butter will give the cookies a richer flavor and a slightly crispier edge, while Butter Flavor Crisco makes them exceptionally soft and chewy.
Q: Why are my cookies flat and spread out?
A: This could be due to several factors: the oven temperature being too low, the dough being too warm, or using too much butter. Try chilling the dough before baking and ensuring your oven is properly preheated.
Q: Can I make the dough ahead of time?
A: Absolutely! The dough can be stored in the refrigerator for up to 3 days or frozen for up to 2 months. Just be sure to wrap it tightly in plastic wrap.
Q: How do I keep my cookies soft after baking?
A: Store them in an airtight container with a slice of bread. The bread will absorb moisture and help keep the cookies soft.
Q: My cookies are burning on the bottom. What can I do?
A: This could be due to your oven’s heating element being too close to the bottom rack. Try placing a second cookie sheet underneath the first one to insulate the cookies.
Final Thoughts
These nostalgic chocolate chip cookies are more than just a recipe; they’re a hug in cookie form. Simple, comforting, and endlessly adaptable, they’re perfect for any occasion. So, preheat your oven, gather your ingredients, and prepare to create a batch of memories. Don’t be afraid to experiment with variations and make them your own. And most importantly, share them with loved ones – because nothing tastes better than a homemade cookie shared with good company. I hope you enjoy this recipe as much as my family and I do! I’d love to hear about your baking adventures and any tweaks you make to the recipe, so please share your experiences!