
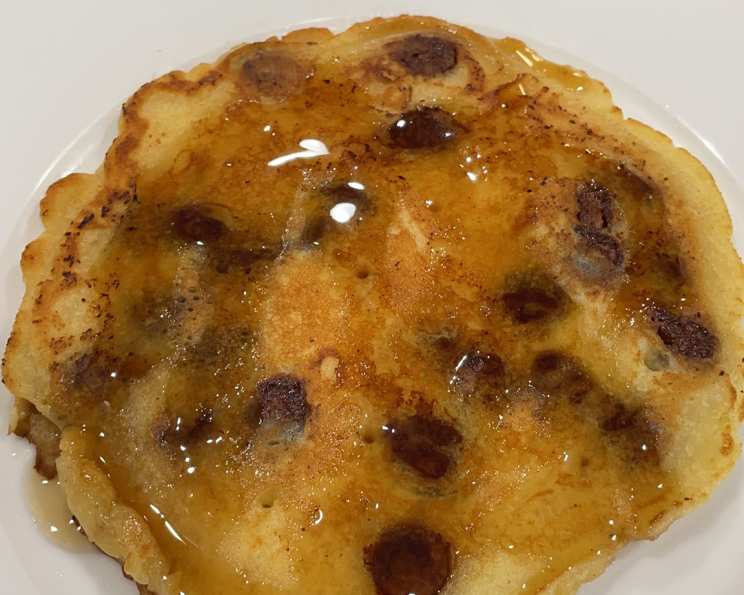
Chocolate Chip Pancakes: A Morning Masterpiece
The scent of chocolate chip pancakes sizzling on a griddle…it’s a memory etched into my childhood. Every Saturday morning, my dad would transform into a pancake maestro. The kitchen would fill with the sweet aroma, and the anticipation was almost unbearable. He’d let me drop the chocolate chips onto each pancake, a crucial task that I took with the utmost seriousness. Those pancakes weren’t just breakfast; they were a symbol of family, love, and simple joys. Today, I carry on that tradition, and this recipe is a tribute to those cherished moments.
Recipe Overview
- Prep Time: 10 minutes
- Cook Time: 25 minutes
- Total Time: 35 minutes
- Yields: 12 pancakes
- Serves: 4
- Dietary Type: Vegetarian
Ingredients
- 4 tablespoons unsalted butter (1/2 stick)
- 1 cup milk (whole, 1%, or 2%)
- 1 1/4 cups flour
- 1 tablespoon sugar
- 4 teaspoons baking powder
- 3/4 teaspoon salt
- 2 eggs
- 6 ounces semi-sweet chocolate chips (more or less to taste)
- Butter for cooking
Equipment Needed
- Small saucepan
- Mixing bowls (large and small)
- Whisk
- Griddle or large skillet
- Ladle or large spoon
Instructions
- First, in a small saucepan, combine the butter and milk. Place the saucepan over low heat, just until the butter is melted and the milk is warm to the touch. Be careful not to scald the milk. Remove from the heat and let cool slightly.
- In a bowl, whisk together the flour, sugar, baking powder, and salt. Ensure all ingredients are well combined. This step distributes the baking powder evenly, which is crucial for fluffy pancakes.
- In a separate, large bowl, whisk the eggs lightly with a fork. You don’t need to beat them vigorously, just enough to break the yolks and combine them with the whites.
- Now, whisk in the milk mixture (from step 1) into the eggs. This process will temper the eggs, preventing them from cooking when added to the warmer ingredients.
- Add the dry ingredients (flour mixture) to the wet ingredients (egg and milk mixture) and mix gently, just until barely blended. It’s important not to overmix the batter at this stage. Lumps are okay! Overmixing develops gluten, which results in tough pancakes.
- Fold in the chocolate chips. Again, mix gently to avoid overmixing. The batter will be quite thick at this point, which is perfectly normal.
- Heat a griddle or large skillet over medium heat. The correct temperature is important: too high, and the pancakes will burn on the outside while remaining raw inside; too low, and they will be pale and flat.
- Add about 1 teaspoon of butter to the heated griddle or skillet. Let the butter melt and spread evenly, until it becomes bubbly. This prevents the pancakes from sticking and adds a delicious buttery flavor.
- Ladle approximately 3 tablespoons of batter for each pancake onto the hot surface. Leave some space between each pancake so they don’t run together.
- Cook until bubbles start to appear on the top surface of the pancakes and the bottoms are golden brown. This usually takes about 2-3 minutes.
- Carefully flip the pancakes with a spatula. Cook until the second side is golden brown, about 30 seconds more. The pancakes should be cooked through but still moist.
- Repeat the process until all the batter is used up, adding more butter to the griddle as needed. Serve the pancakes hot, immediately after cooking.
Expert Tips & Tricks
- Don’t overmix! This is the golden rule of pancake making. Overmixing develops the gluten in the flour, leading to tough, rubbery pancakes. A few lumps in the batter are perfectly fine and even desirable.
- Temperature control is key. A medium heat setting is ideal for cooking pancakes evenly. If your griddle is too hot, the pancakes will burn on the outside before they are cooked through. If it’s too cold, the pancakes will be flat and pale. Test the heat by dropping a small amount of batter onto the griddle. If it sizzles gently and browns evenly, the temperature is right.
- Use a preheated griddle. Allow the griddle to heat up completely before adding any batter. This ensures that the pancakes cook evenly and develop a nice golden-brown crust.
- For extra fluffy pancakes, separate the eggs. Whisk the egg whites until stiff peaks form, then gently fold them into the batter at the very end.
- If you want to add other mix-ins, such as blueberries or bananas, do so after you’ve poured the batter onto the griddle. This prevents the mix-ins from sinking to the bottom of the batter.
Serving & Storage Suggestions
Serve these chocolate chip pancakes hot, right off the griddle. They are delicious on their own, but you can also top them with:
- Maple syrup
- Fresh fruit (berries, bananas, sliced peaches)
- Whipped cream
- Chocolate sauce
- A dusting of powdered sugar
Leftover pancakes can be stored in an airtight container in the refrigerator for up to 3 days. To reheat, you can microwave them for a few seconds, toast them in a toaster, or warm them in a skillet or griddle. You can also freeze pancakes for longer storage. Wrap them individually in plastic wrap and store them in a freezer bag for up to 2 months. Thaw them in the refrigerator overnight before reheating.
Nutritional Information
Here’s an estimate of the nutritional information per serving (approximately 3 pancakes):
| Nutrient | Amount per Serving | % Daily Value |
|---|---|---|
| Calories | 538 kcal | 27% |
| Total Fat | 29 g | 45% |
| Saturated Fat | 17 g | 85% |
| Cholesterol | 132 mg | 44% |
| Sodium | 872 mg | 36% |
| Total Carbohydrate | 64 g | 21% |
| Dietary Fiber | 4 g | 16% |
| Sugars | 27 g | – |
| Protein | 11 g | 22% |
Nutritional information is an estimate and may vary based on specific ingredients and portion sizes.
Variations & Substitutions
- Gluten-Free Chocolate Chip Pancakes: Substitute the all-purpose flour with a gluten-free blend. Ensure the baking powder is also gluten-free.
- Dairy-Free Chocolate Chip Pancakes: Use your favorite non-dairy milk (almond, soy, oat) in place of the cow’s milk. Coconut oil can be substituted for the butter.
- Vegan Chocolate Chip Pancakes: In addition to the dairy-free substitutions, use a flax egg or other egg replacer.
- Spice it up: Add a pinch of cinnamon or nutmeg to the dry ingredients for a warm, comforting flavor.
- Different Chocolate: Experiment with dark chocolate chips, white chocolate chips, or even chopped chocolate bars.
- Peanut Butter Chocolate Chip: Add a tablespoon or two of peanut butter to the batter for a delicious twist.
FAQs (Frequently Asked Questions)
Q: Can I make the batter ahead of time?
A: Yes, you can make the batter up to 24 hours in advance. Store it in the refrigerator and give it a gentle stir before cooking. Be aware that the baking powder may lose some of its potency over time, so the pancakes might not be quite as fluffy.
Q: Why are my pancakes flat and dense?
A: This is usually caused by overmixing the batter. Remember to mix the wet and dry ingredients just until barely combined. Another possibility is that your baking powder is old and no longer effective.
Q: How do I know when the griddle is hot enough?
A: A good way to test the griddle temperature is to sprinkle a few drops of water onto the surface. If the water sizzles and evaporates quickly, the griddle is ready.
Q: Can I freeze the pancakes?
A: Yes, pancakes freeze very well. Let them cool completely, then wrap them individually in plastic wrap and store them in a freezer bag for up to 2 months.
Q: My chocolate chips are sinking to the bottom of the pancakes. What am I doing wrong?
A: This can happen if the batter is too thin or the chocolate chips are too heavy. Make sure the batter is thick enough to support the chocolate chips. You can also try tossing the chocolate chips in a little flour before adding them to the batter.
Final Thoughts
These chocolate chip pancakes are more than just a simple breakfast; they’re a delicious way to start your day and create lasting memories. Don’t be afraid to experiment with different variations and toppings to make them your own. I hope this recipe brings as much joy to your kitchen as it has to mine. Share your creations and feedback—I’d love to hear how they turn out! Enjoy!