
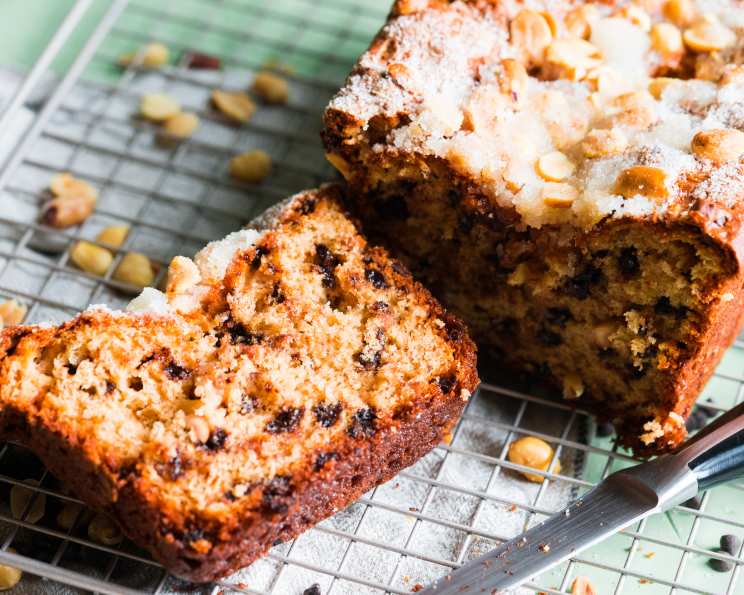
Chocolate Chip-Peanut Butter Bread: A Sweet Symphony of Flavors
The scent of freshly baked bread has always transported me back to my grandmother’s kitchen. I can almost feel the warmth radiating from her ancient oven as she pulled out loaves of all shapes and sizes. While she was a master of sourdough, my fondest memories involve her experimenting with quick breads – especially when she decided to swirl in peanut butter and chocolate chips. That aroma, the slightly nutty, deeply chocolatey aroma, is pure comfort. This recipe captures that same cozy feeling, melding those complementary flavors into a delightful treat that’s perfect for breakfast, brunch, or an afternoon snack.
Recipe Overview
- Prep Time: 20 minutes
- Cook Time: 50-55 minutes
- Total Time: 1 hour 10 minutes
- Servings: 8-10
- Yield: 1 loaf
- Dietary Type: Vegetarian
Ingredients
- 2 cups flour
- 2 teaspoons baking powder
- 1/4 teaspoon salt
- 1 cup semi-sweet chocolate chips (6 ounces)
- 1/4 cup peanut butter (smooth or chunky)
- 1 tablespoon sugar
- 1 egg, lightly beaten
- 1 cup milk
- 1 teaspoon vanilla
Crumb Topping
- 1/2 cup sugar
- 1/4 teaspoon unsweetened cocoa powder
- 3 tablespoons butter, in pieces
- 2 tablespoons dry roasted peanuts, chopped fine
Equipment Needed
- 9 x 5-inch loaf pan
- Large bowl
- Small bowl
- Electric mixer
- Fork
- Round bladed knife
- Cooling rack
Instructions
-
Preheat your oven to 350 degrees F (175 degrees C). Generously grease a 9 x 5-inch loaf pan to prevent sticking. I prefer to use baking spray with flour already included for best results.
-
In a large bowl, sift together the flour, baking powder, and salt. Sifting ensures that these dry ingredients are evenly distributed and prevents lumps in your batter.
-
Stir in the chocolate chips. This helps to coat the chips in flour, which prevents them from sinking to the bottom of the bread during baking.
-
Create a well in the center of the dry ingredients. A well is simply a hollow space in the middle of the flour mixture where you will pour in the wet ingredients.
-
In another bowl, using an electric mixer, beat together the peanut butter, sugar, egg, milk, and vanilla until smooth and well combined. Make sure your peanut butter is at room temperature for easier mixing.
-
Pour the wet ingredients into the well in the dry ingredients. Using a fork, lightly stir the wet and dry ingredients together until just combined. Be careful not to overmix, as this can result in a tough bread. A few streaks of flour are okay at this point.
-
In a small bowl, combine the crumb topping ingredients: sugar, unsweetened cocoa powder, and butter. Use your fingers or a pastry blender to cut the butter into the sugar and cocoa until the mixture resembles coarse crumbs. Finally, stir in the chopped peanuts.
-
Spoon half of the batter into the prepared loaf pan. Smooth the top evenly with a spatula.
-
Sprinkle half of the crumb mixture over the batter in the pan. Distribute the crumbs evenly across the surface.
-
Spoon the remaining batter over the crumb topping, and smooth the top once again.
-
Sprinkle the remaining crumb mixture over the second layer of batter.
-
Using a round bladed knife, gently draw through the batter to marbelize it lightly. Avoid over-mixing at this stage, as you want distinct swirls of peanut butter flavor, not a homogenous mixture.
-
Bake in the preheated oven for 50-55 minutes. To check for doneness, insert a wooden skewer or toothpick into the center of the bread. It should come out moist, but without any uncooked batter clinging to it. A few crumbs are fine.
-
Cool the bread in the pan on a wire rack for 25 minutes. This allows the bread to firm up slightly before removing it from the pan.
-
After 25 minutes, carefully turn the bread out of the pan onto the wire rack, top side up.
-
Allow the bread to cool completely on the wire rack before slicing and serving.
-
Once completely cool, wrap the bread tightly in foil or plastic wrap and let it sit for a day before serving. This allows the flavors to meld and the bread to become even more moist and delicious. I know it’s hard to wait, but trust me, it’s worth it!
Expert Tips & Tricks
- Room Temperature Ingredients: Using room temperature ingredients, especially the peanut butter and egg, ensures that the batter comes together smoothly and evenly.
- Don’t Overmix: Overmixing the batter develops the gluten in the flour, which can result in a tough bread. Mix just until the wet and dry ingredients are combined.
- Crumb Topping Secrets: For an extra crunchy crumb topping, chill the butter for 15 minutes before combining it with the other ingredients. You can also add a pinch of salt to the topping to enhance the sweetness.
- Preventing a Soggy Bottom: To prevent the bottom of the bread from becoming soggy, place a baking sheet underneath the loaf pan while baking. This will help to distribute the heat evenly.
- Creative Swirls: Get creative with your marbling technique! Try using a chopstick or the handle of a spoon to create different swirl patterns.
Serving & Storage Suggestions
This Chocolate Chip-Peanut Butter Bread is delicious served warm or at room temperature. Slice it thickly and enjoy it as is, or spread it with a little extra peanut butter or butter. It pairs perfectly with a cup of coffee or a glass of milk.
- Storage: Store the bread in an airtight container at room temperature for up to 3 days, in the refrigerator for up to a week, or in the freezer for up to 2 months.
- Reheating: To reheat, wrap a slice of bread in foil and bake in a preheated oven at 350 degrees F (175 degrees C) for 5-10 minutes, or until warmed through. You can also microwave it for a few seconds, but be careful not to overcook it.
- Freezing: To freeze, wrap the loaf tightly in plastic wrap and then in foil. Thaw overnight in the refrigerator before serving.
Nutritional Information
(Note: Values are approximate and may vary based on specific ingredients used.)
| Nutrient | Amount per Serving | % Daily Value |
|---|---|---|
| Calories | 468 kcal | 23% |
| Total Fat | 23.8 g | 36% |
| Saturated Fat | 9.2 g | 46% |
| Cholesterol | 39 mg | 12% |
| Sodium | 381 mg | 15% |
| Total Carbohydrate | 57.8 g | 19% |
| Dietary Fiber | 3.7 g | 14% |
| Sugars | 27 g | N/A |
| Protein | 11.3 g | 22% |
Variations & Substitutions
- Gluten-Free: Substitute the all-purpose flour with a gluten-free blend for a gluten-free version. Be sure to use a 1:1 replacement and add 1/2 teaspoon of xanthan gum for binding.
- Nut-Free: Substitute the peanut butter with sunflower seed butter (sunbutter) for a nut-free option.
- Chocolate Variations: Experiment with different types of chocolate chips, such as dark chocolate, white chocolate, or even peanut butter chips.
- Spice It Up: Add a pinch of cinnamon or nutmeg to the batter for a warm, spiced flavor.
- Add-Ins: Mix in chopped nuts, dried fruit, or shredded coconut for added texture and flavor.
FAQs (Frequently Asked Questions)
Q: Can I use natural peanut butter in this recipe?
A: Yes, but keep in mind that natural peanut butter tends to be runnier than processed peanut butter. You may need to add a tablespoon or two of flour to the batter to compensate for the extra liquid.
Q: Can I make this bread ahead of time?
A: Absolutely! In fact, this bread tastes even better the day after it’s baked, as the flavors have more time to meld.
Q: What if my crumb topping is too dry?
A: Add a teaspoon or two of melted butter to the crumb topping until it reaches the desired consistency.
Q: How do I prevent the chocolate chips from sinking to the bottom of the bread?
A: Toss the chocolate chips with a tablespoon of flour before adding them to the batter. This will help them stay suspended throughout the bread.
Q: My bread is browning too quickly. What should I do?
A: Tent the loaf pan with foil during the last 15-20 minutes of baking to prevent the top from burning.
Final Thoughts
This Chocolate Chip-Peanut Butter Bread is more than just a recipe; it’s an invitation to create a little bit of happiness in your kitchen. The aroma alone is enough to lift your spirits, and the combination of sweet chocolate and nutty peanut butter is simply irresistible. I encourage you to try this recipe and share it with your loved ones. Don’t be afraid to experiment with variations and make it your own! And if you do, please let me know how it turns out. Happy baking!