
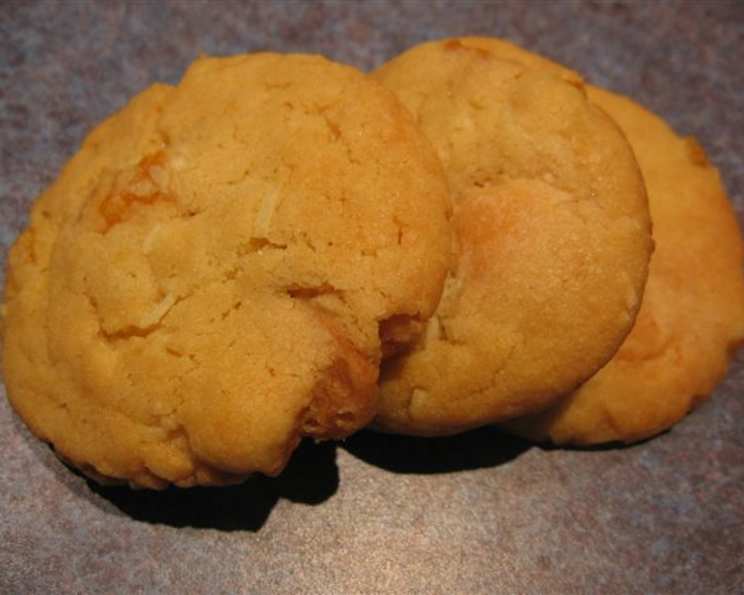
The Irresistible Charm of Homemade Chocolate Chippers
My grandmother, Nana Elsie, always had a stash of chocolate chippers ready for us grandkids. Her cookies weren’t fancy or perfect circles, but they were made with love and always tasted like home. The aroma alone, a warm blend of vanilla and melting chocolate, was enough to send us scrambling for the kitchen. Each bite was a little bit of sunshine, a reminder of simpler times spent with family. Now, decades later, I still chase that perfect, nostalgic chocolate chip cookie, and this recipe comes pretty darn close!
Recipe Overview
- Prep Time: 15 minutes
- Cook Time: 10-15 minutes
- Total Time: 35 minutes
- Yields: Approximately 48 cookies
- Dietary Type: Not specified
Ingredients
- 125g softened butter
- 100g brown sugar
- 100g caster sugar
- 1 egg
- 2 teaspoons vanilla essence
- 270g self-raising flour
- ½ teaspoon salt
- 200-250g miniature chocolate chips
- (Optional) 50-75g macadamia nuts, chopped
Equipment Needed
- Electric beater
- Large mixing bowl
- 2 large baking trays
- Baking paper
- Cooling rack
Instructions
-
Preheat your oven to 180°C (350°F). Make sure your oven rack is in the center position for even baking.
-
Line two large baking trays with baking paper. This will prevent the cookies from sticking and make cleanup a breeze.
-
In a large mixing bowl, cream together the softened butter, brown sugar, and caster sugar using an electric beater. Beat for approximately 3 minutes, or until the mixture is light and fluffy. This step is crucial for creating a tender cookie. Make sure your butter is truly softened, but not melted, for the best results.
-
Add the egg and vanilla essence to the creamed butter and sugar. Beat until well combined, ensuring there are no streaks of egg yolk visible.
-
In the same bowl, add the self-raising flour and salt. If you are using macadamia nuts, add them at this stage as well. Mix until just combined. Be careful not to overmix the dough, as this can result in tough cookies. A few streaks of flour are okay.
-
Gently fold in the miniature chocolate chips. Distribute them evenly throughout the dough.
-
Taking heaped teaspoonfuls of dough, roll them into balls. Flatten the balls slightly between the palms of your hands. They should be about 1-inch thick.
-
Place the flattened cookie dough balls on the prepared baking trays, spacing them approximately 5cm (2 inches) apart. This will give them enough room to spread during baking.
-
Bake for 10-15 minutes, or until the edges are golden brown. Keep a close eye on them, as baking times can vary depending on your oven.
-
Remove the baking trays from the oven and let the cookies cool for a few minutes on the tray before transferring them to a cooling rack. This will allow them to firm up slightly and prevent them from breaking.
Expert Tips & Tricks
- Creaming the Butter and Sugar: This is the most important step for achieving a light and airy cookie. Don’t rush it! Beat until the mixture is noticeably lighter in color and fluffy in texture.
- Chilling the Dough: For even thicker cookies, chill the dough in the refrigerator for at least 30 minutes before baking. This will prevent them from spreading too much in the oven.
- Baking Time is Key: Keep a close watch on the cookies during baking. Overbaking will result in dry, hard cookies. They are ready when the edges are golden brown and the centers are still slightly soft.
- Mini vs. Regular Chocolate Chips: This recipe calls for miniature chocolate chips, which distribute more evenly throughout the cookie. However, you can use regular-sized chocolate chips if that’s what you have on hand.
- Even Baking: If your oven has hot spots, rotate the baking trays halfway through the baking time to ensure even browning.
- Salt Enhancement: Don’t skip the salt! It helps to balance the sweetness of the cookies and enhance the flavor of the chocolate.
- Browning the Butter: For a richer, nuttier flavor, consider browning the butter before creaming it with the sugar. Just be sure to let it cool slightly before adding it to the other ingredients.
Serving & Storage Suggestions
Serve these chocolate chippers warm or at room temperature with a glass of cold milk, a cup of coffee, or a scoop of vanilla ice cream. They are perfect for afternoon tea, a sweet snack, or a homemade gift.
To store, place the cooled cookies in an airtight container at room temperature. They will stay fresh for up to 3-4 days. For longer storage, you can freeze the cookies in a freezer-safe container for up to 2 months. To thaw, simply let them sit at room temperature for a few hours.
To reheat, place the cookies in a preheated oven at 150°C (300°F) for 5-7 minutes, or until warmed through. You can also microwave them for a few seconds, but be careful not to overheat them.
Nutritional Information
Here is the estimated nutritional information per cookie. Please note that these values are approximate and may vary depending on the specific ingredients used.
| Nutrient | Amount per Serving | % Daily Value |
|---|---|---|
| Calories | 76 kcal | 4% |
| Total Fat | 3.5 g | 5% |
| Saturated Fat | 2.1 g | 10% |
| Cholesterol | 10 mg | 3% |
| Sodium | 113 mg | 4% |
| Total Carbohydrate | 11 g | 4% |
| Dietary Fiber | 0.4 g | 1% |
| Sugars | 6.4 g | 13% |
| Protein | 0.9 g | 2% |
Variations & Substitutions
- Nutty Delight: As the original recipe suggests, replace 50-75g of the chocolate chips with chopped macadamia nuts, walnuts, or pecans for a delicious nutty twist.
- Double Chocolate: For an even more intense chocolate flavor, add 2 tablespoons of unsweetened cocoa powder to the flour.
- Oatmeal Chocolate Chip: Substitute half of the self-raising flour with rolled oats for a chewier texture.
- Spice It Up: Add a pinch of cinnamon, nutmeg, or ginger to the dough for a warm and cozy flavor.
- Citrus Zest: Grate the zest of an orange or lemon into the dough for a bright and refreshing flavor.
- Vegan Chocolate Chippers: Substitute the butter with a vegan butter alternative, the egg with a flax egg (1 tablespoon ground flaxseed mixed with 3 tablespoons of water), and ensure your chocolate chips are dairy-free.
FAQs (Frequently Asked Questions)
Q: Why are my cookies flat?
A: Your butter may have been too warm. Make sure it’s softened, not melted. Also, chilling the dough before baking can help prevent excessive spreading.
Q: Why are my cookies hard?
A: Overbaking is the most common cause. Keep a close eye on the cookies and remove them from the oven as soon as the edges are golden brown.
Q: Can I use plain flour instead of self-raising flour?
A: Yes, but you’ll need to add a leavening agent. For every cup of plain flour, add 1 teaspoon of baking powder.
Q: Can I freeze the cookie dough?
A: Absolutely! Roll the dough into balls, place them on a baking sheet, and freeze until solid. Then, transfer the frozen dough balls to a freezer-safe container. When ready to bake, simply bake from frozen, adding a few extra minutes to the baking time.
Q: My chocolate chips melted and spread out during baking. What did I do wrong?
A: This can happen if your oven is too hot or if you used lower-quality chocolate chips. Try reducing the oven temperature slightly and using chocolate chips with a higher cocoa butter content.
Final Thoughts
These homemade chocolate chippers are more than just cookies; they are a taste of happiness, a connection to cherished memories, and a simple pleasure that can brighten any day. Whether you’re baking them for your family, friends, or yourself, I hope this recipe brings you as much joy as it has brought me over the years. Don’t be afraid to experiment with different variations and find your own perfect chocolate chip cookie. Happy baking!