
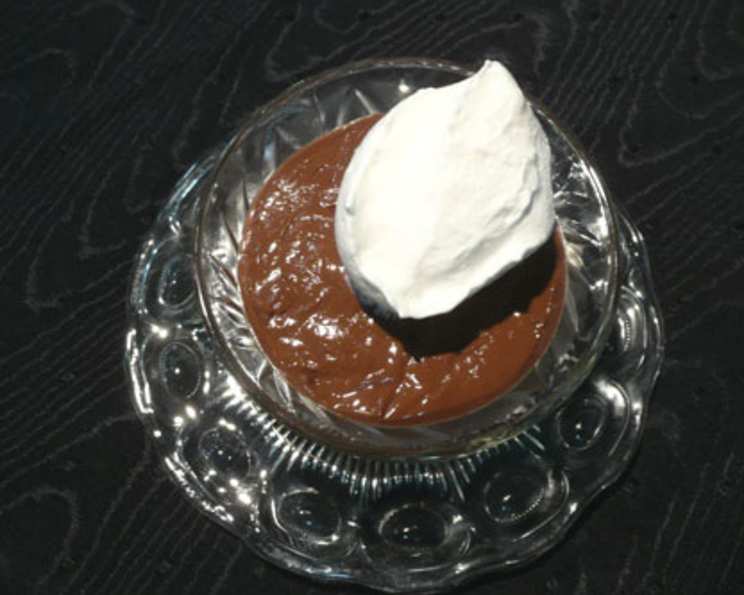
Chocolate Chocolate Pudding for Two: A Decadent Delight
There’s a certain magic to homemade pudding. My grandmother, bless her heart, always had a bowl of chocolate pudding waiting for me after school. It wasn’t fancy, just simple, creamy goodness made with love. The anticipation of that cool, chocolatey comfort, the way it coated my tongue…it’s a memory etched in my mind. This recipe brings back those cherished moments, but with an extra layer of rich, dark chocolate to satisfy my grown-up cravings.
Recipe Overview
- Prep Time: 5 minutes
- Cook Time: 5 minutes
- Total Time: 10 minutes
- Servings: 2
- Dietary Type: Vegetarian
Ingredients
- 1/3 cup sugar
- 2 tablespoons unsweetened cocoa powder
- 4 teaspoons cornstarch
- 1 pinch salt
- 1 cup milk (any kind works, but whole milk creates a richer pudding)
- 2 tablespoons semi-sweet chocolate chips
- 1 teaspoon vanilla extract
Equipment Needed
- Heavy-bottomed saucepan
- Whisk
- Two dessert dishes
- Plastic wrap
Instructions
- In a heavy-bottomed saucepan, thoroughly combine the sugar, cocoa powder, cornstarch, and salt. This step is crucial for preventing lumps, so don’t rush it.
- Gradually add half of the milk to the dry ingredients, whisking continuously until the mixture is smooth and there are no lumps. Ensure the cocoa powder is fully incorporated; otherwise, you’ll end up with little pockets of bitterness.
- Add the remaining milk to the saucepan, whisking to combine everything well.
- Place the saucepan over medium heat. Continue whisking constantly to prevent the mixture from sticking to the bottom and scorching. This constant whisking is your best friend – it guarantees a smooth, creamy pudding.
- Keep whisking until the pudding thickens and comes to a boil. This should take approximately 5 minutes. Be patient; it will happen.
- Once the pudding reaches a boil, allow it to boil for 1 minute longer, still whisking. This step is important to fully activate the cornstarch and ensure the pudding sets properly.
- Remove the saucepan from the heat. Immediately add the chocolate chips and vanilla extract.
- Whisk vigorously until the chocolate is completely melted and the pudding is smooth and glossy. The residual heat will melt the chocolate; keep whisking until everything is evenly incorporated.
- Divide the hot pudding between two dessert dishes.
- To prevent a skin from forming on the surface (which, let’s be honest, isn’t the most appealing texture), cover each dish with plastic wrap, pressing the plastic directly onto the surface of the pudding.
- Cool the pudding completely. For the best results, chill it in the refrigerator overnight. This allows the flavors to meld and the pudding to achieve its optimal texture.
- Serve chilled, optionally topped with whipped cream.
Expert Tips & Tricks
- For an even richer flavor, use dark chocolate chips instead of semi-sweet. You can even add a tablespoon of instant espresso powder to the dry ingredients for a mocha twist.
- If your pudding develops lumps, don’t despair! Immediately take it off the heat and whisk vigorously. If the lumps persist, you can try passing the pudding through a fine-mesh sieve to remove them.
- To prevent burning, keep the heat at medium and don’t stop whisking. A heavy-bottomed saucepan also helps distribute heat evenly.
- For a vegan version, use your favorite plant-based milk (almond, soy, or oat milk all work well) and vegan chocolate chips.
- Add a pinch of cayenne pepper to the dry ingredients for a subtle kick that complements the chocolate beautifully.
- If you want to add some texture, try sprinkling chopped nuts or mini chocolate chips on top before chilling.
Serving & Storage Suggestions
Serve the chilled chocolate pudding in your favorite dessert dishes. A dollop of whipped cream, a sprinkle of cocoa powder, or a few fresh berries make excellent toppings. This pudding is best enjoyed cold.
Leftover pudding can be stored in the refrigerator for up to 3 days, covered tightly with plastic wrap. Note that the surface of the pudding may darken slightly over time, but this doesn’t affect the flavor. I do not recommend freezing pudding as the texture can become grainy upon thawing.
Nutritional Information
| Nutrient | Amount per Serving | % Daily Value* |
|---|---|---|
| Calories | 250 kcal | 13% |
| Total Fat | 7g | 9% |
| Saturated Fat | 4g | 20% |
| Cholesterol | 10mg | 3% |
| Sodium | 80mg | 3% |
| Total Carbohydrate | 45g | 16% |
| Dietary Fiber | 2g | 7% |
| Sugars | 35g | N/A |
| Protein | 4g | 8% |
*Percent Daily Values are based on a 2,000 calorie diet.
Variations & Substitutions
- Mint Chocolate Pudding: Add 1/4 teaspoon of peppermint extract along with the vanilla extract. Garnish with fresh mint leaves.
- Salted Caramel Chocolate Pudding: Drizzle a tablespoon of salted caramel sauce over the top before serving.
- Mexican Chocolate Pudding: Add 1/4 teaspoon of cinnamon and a pinch of cayenne pepper to the dry ingredients.
- Peanut Butter Chocolate Pudding: Swirl a tablespoon of peanut butter into the pudding after it’s cooked.
- Dairy-Free Chocolate Pudding: Use almond milk, soy milk, or coconut milk in place of regular milk. Ensure the chocolate chips are also dairy-free.
- Lower Sugar Pudding: Use a sugar substitute appropriate for cooking, such as erythritol or stevia. Adjust the amount to your desired sweetness level.
FAQs (Frequently Asked Questions)
Q: Can I use a different type of chocolate?
A: Absolutely! Experiment with milk chocolate, white chocolate, or even flavored chocolate chips to create different variations of the pudding. Adjust the amount of sugar to taste based on the sweetness of the chocolate you choose.
Q: How do I prevent a skin from forming on the pudding?
A: Pressing plastic wrap directly onto the surface of the pudding while it cools is the most effective way to prevent a skin from forming. Alternatively, you can whisk the pudding vigorously every few minutes as it cools.
Q: Can I make this pudding ahead of time?
A: Yes, this pudding is ideal for making ahead of time. It can be stored in the refrigerator for up to 3 days. The flavors will actually meld and deepen as it sits.
Q: What if my pudding is too thick?
A: If your pudding is too thick, whisk in a tablespoon or two of milk until it reaches your desired consistency.
Q: Can I double or triple this recipe?
A: Yes, you can easily scale this recipe up to make a larger batch. Simply multiply all the ingredients by the desired factor. Be sure to use a larger saucepan to accommodate the increased volume.
Final Thoughts
This Chocolate Chocolate Pudding for Two is more than just a recipe; it’s a warm hug in a bowl. Whether you’re looking for a simple weeknight dessert or a comforting treat to share with a loved one, this pudding is sure to satisfy your chocolate cravings. So, gather your ingredients, put on some music, and get ready to indulge in a little bit of chocolatey bliss. I encourage you to try it and share your thoughts. Maybe add a twist of your own! Happy pudding making!