
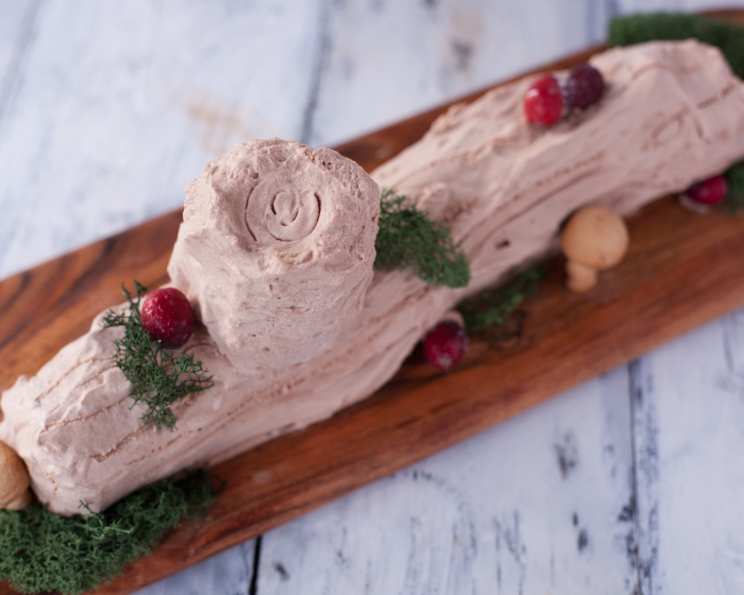
Chocolate Christmas Log (Cookie Cake)
The aroma of chocolate always brings me back to Christmas Eve at my grandmother’s house. While the adults chatted and sipped eggnog, my cousins and I would sneak into the kitchen, eyes fixed on the nearly finished Christmas log resting in the refrigerator. Its dark, swirling chocolate exterior, dusted with powdered sugar snow, looked like pure magic. One year, fueled by holiday excitement (and perhaps a little too much sugar), we tried to sneak a bite and ended up leaving a tiny, but tell-tale, finger-shaped indentation in the frosting. Needless to say, our escapade was quickly discovered, but even the slight scolding couldn’t diminish the joy and anticipation surrounding this simple, yet utterly delicious, Christmas treat.
Recipe Overview
- Prep Time: 20 minutes
- Refrigeration Time: 13 hours
- Total Time: 13 hours 20 minutes
- Servings: 10-12
- Yields: 1 log
- Dietary Type: Vegetarian
Ingredients
- 1 (8 ounce) package chocolate wafer cookies
- 2 cups whipping cream
- Sugar, to taste (approximately ¼ – ½ cup)
- Chocolate shavings, for decoration
- ⅓ cup no-sugar-added peanut butter (optional)
Equipment Needed
- Electric mixer or whisk
- Spatula or knife
- Flat rectangular serving dish or plate
- Plastic wrap
- Measuring cups
Instructions
- In a large bowl, pour 1 ½ cups of whipping cream. Using an electric mixer or a whisk, whip the cream until soft peaks form.
- Gradually add sugar to the whipped cream, tasting as you go, until it reaches your desired sweetness. A general guideline is between ¼ cup and ½ cup, depending on your preference. Remember, you can always add more, but you can’t take it away!
- Now, begin assembling the log. Place a teaspoonful of the sweetened whipped cream on one side of a chocolate wafer cookie.
- Top with another cookie, creating a sandwich.
- Add another teaspoonful of sweetened whipped cream to the exposed side of that second cookie, and then top with a third cookie.
- Repeat this process, layering whipped cream and cookies, until you have a small stack.
- Carefully place this stack vertically on one end of your flat rectangular serving dish or plate. This will be the starting point of your log.
- Continue assembling the log by adding a teaspoonful of whipped cream to the last cookie in the log, and attaching another cookie.
- Repeat this process until all the chocolate wafer cookies and the 1 ½ cups of whipped cream are used, forming a cohesive log shape. This might require some gentle coaxing and maneuvering to ensure the log remains relatively stable.
- Once the cookie log is formed, take the remaining whipped cream (from the initial 1 ½ cups) and evenly coat the entire log. Use a spatula or knife to smooth the cream, creating a smooth, even surface.
- Cover the coated log lightly with plastic wrap. Ensure the plastic wrap doesn’t stick to the whipped cream, as it can disrupt the smooth surface.
- Place the log in the refrigerator and refrigerate for at least overnight, or ideally for a full 12 hours. This allows the cookies to soften and the flavors to meld together, creating the perfect texture.
- When you are ready to serve, take the remaining ½ cup whipping cream and whip with a mixer until soft peaks form. Add sugar to taste.
- Remove the log from the refrigerator. Recoat the entire log with this freshly whipped cream, ensuring a smooth and even layer. This final coat of whipped cream will serve as the “frosting.”
- Decorate the log generously with chocolate shavings. You can use a vegetable peeler to create thin shavings from a block of good-quality chocolate or use store-bought chocolate shavings.
- To serve, cut the log on the diagonal, revealing the layers of cookies and cream. This creates an attractive presentation.
- If you desire a darker frosting color and a subtle peanut butter flavor, add ⅓ cup of no-sugar-added peanut butter to the whipped cream mixture in step 13. Be sure to whip well until fully incorporated.
Expert Tips & Tricks
- For a more intense chocolate flavor, consider using dark chocolate wafer cookies.
- If you’re short on time, you can speed up the softening process by slightly dampening the cookies with milk or coffee before assembling the log. However, be careful not to over-saturate them, or they will become mushy.
- To prevent the log from sliding around on the serving dish, place a small dollop of whipped cream underneath it to act as an adhesive.
- If you want to get really fancy, use a piping bag and decorating tips to create more elaborate designs with the whipped cream frosting.
- For a richer flavor, consider adding a teaspoon of vanilla extract to the whipped cream.
- The peanut butter variation adds a lovely salty-sweet dimension, but be sure to use smooth peanut butter for best results.
Serving & Storage Suggestions
Serve the Chocolate Christmas Log immediately after decorating for the best presentation. The diagonal slices showcase the beautiful layers of cookie and cream.
Leftovers should be stored in an airtight container in the refrigerator. They will last for up to 3 days, but the cookies may become softer over time.
Freezing is not recommended as it can alter the texture of the whipped cream and cookies.
Nutritional Information
| Nutrient | Amount per Serving | % Daily Value |
|---|---|---|
| Calories | 305 kcal | 15% |
| Total Fat | 18.5g | 28% |
| Saturated Fat | 11.9g | 60% |
| Cholesterol | 65.7mg | 22% |
| Sodium | 174.9mg | 7% |
| Total Carbohydrate | 17.8g | 6% |
| Dietary Fiber | 0.8g | 3% |
| Sugars | 6.8g | 27% |
| Protein | 2.5g | 5% |
Note: Nutritional information is an estimate and may vary based on specific ingredients and portion sizes.
Variations & Substitutions
- Gluten-Free: Use gluten-free chocolate wafer cookies to make this recipe suitable for those with gluten sensitivities.
- Dairy-Free: Substitute the whipping cream with a non-dairy whipped topping, such as coconut cream or almond-based whipped cream. Ensure the chocolate wafer cookies are also dairy-free.
- Flavor Variations: Add a few drops of peppermint extract to the whipped cream for a festive holiday flavor. You could also use coffee-flavored whipped cream or add a layer of raspberry jam between the cookies for a different twist.
- Nut-Free: Omit the peanut butter or substitute it with sunflower seed butter or tahini.
- Espresso Kick: Add a tablespoon of instant espresso powder to the whipped cream for a mocha flavor.
FAQs (Frequently Asked Questions)
Q: Can I make this Chocolate Christmas Log ahead of time?
A: Absolutely! In fact, it’s best to make it at least 12 hours in advance to allow the cookies to soften properly.
Q: Can I use a different type of cookie?
A: While chocolate wafers provide the classic look and taste, you can experiment with other cookies like gingerbread cookies or even chocolate chip cookies for a different flavor profile.
Q: How do I prevent the whipped cream from becoming runny?
A: Make sure your bowl and beaters are chilled before whipping the cream. Also, avoid over-whipping, as this can cause the cream to separate.
Q: Can I add alcohol to the whipped cream?
A: Yes, a tablespoon or two of your favorite liqueur, such as rum or coffee liqueur, can add a delightful touch. Add it slowly while whipping the cream.
Q: What’s the best way to decorate the log?
A: Besides chocolate shavings, you can use crushed candy canes, sprinkles, or even a dusting of cocoa powder to decorate your Chocolate Christmas Log.
Final Thoughts
This Chocolate Christmas Log is more than just a dessert; it’s a celebration of simple pleasures and cherished traditions. I hope this recipe inspires you to create your own delicious memories this holiday season. Don’t be afraid to experiment with flavors and decorations to make it your own. And, most importantly, share it with the people you love. I’d love to hear about your creations and any variations you try! Happy baking!