
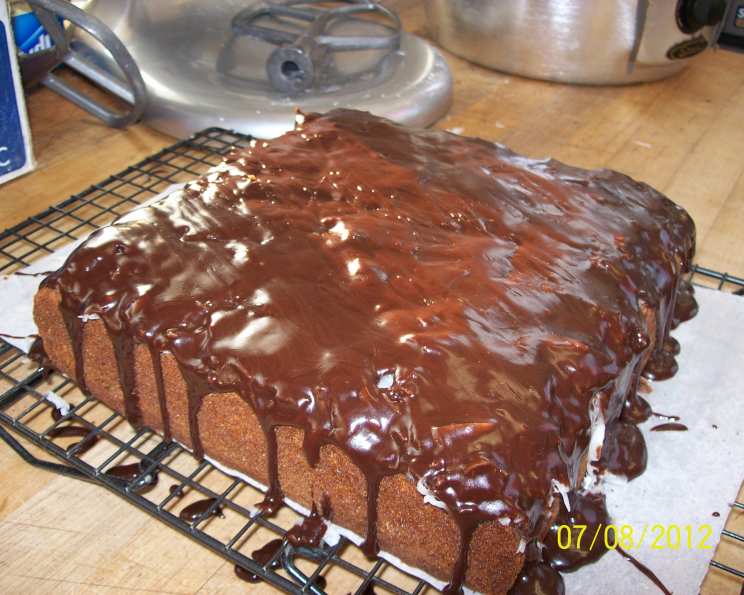
Chocolate Coconut Mounds Cake: A Slice of Paradise
My grandmother, bless her heart, wasn’t much of a baker, but she had a knack for finding the best shortcut recipes. I remember the first time she made this cake – the scent of chocolate and coconut filled her tiny kitchen, a symphony of aromas so intoxicating that even my sugar-averse grandfather couldn’t resist a slice. To this day, one bite of this cake sends me straight back to her warm kitchen, surrounded by family and the comforting aroma of simple, delicious goodness. It’s a testament to how something so easy can create such lasting memories.
Recipe Overview
- Prep Time: 20 minutes
- Cook Time: 30 minutes
- Total Time: 1 hour 5 minutes (plus refrigeration time)
- Servings: 12
- Yield: One 9×13 inch cake
- Dietary Type: Not specified (can be modified with substitutions)
Ingredients
- (18 ounce) package chocolate cake mix
- 3 eggs (or as called for by your cake mix)
- 1/3 cup oil (or as called for by your cake mix)
- 1 1/3 cups water (or as called for by your cake mix)
For filling layer:
- 1 cup sugar
- 1 cup milk
- 2 1/2 cups mini marshmallows
- 14 ounces coconut
For frosting:
- 1/2 cup milk
- 1/2 cup butter or 1/2 cup margarine
- 1 cup sugar
- (12 ounce) package chocolate chips
Equipment Needed
- 9×13 inch baking pan
- Mixing bowls
- Electric mixer (optional, but recommended)
- Saucepan
- Wooden spoon or spatula
- Measuring cups and spoons
Instructions
-
Preheat your oven according to the cake mix package directions. Typically, this will be around 350°F (175°C), but always check the instructions on your specific mix. Grease and flour a 9×13 inch baking pan. This is crucial to prevent the cake from sticking.
-
Prepare the cake batter. In a large mixing bowl, combine the chocolate cake mix, eggs, oil, and water. Use an electric mixer (or a sturdy whisk) to beat the ingredients together until well combined. Be careful not to overmix, as this can lead to a tough cake. Follow the mixing time recommended on the cake mix package.
-
Bake the cake for the time specified on the package directions. This is usually around 25-35 minutes, but start checking for doneness around the 25-minute mark. To check for doneness, insert a toothpick into the center of the cake. If it comes out clean or with just a few moist crumbs, the cake is ready.
-
While the cake is baking, prepare the coconut filling. In a medium saucepan, combine the sugar, milk, and mini marshmallows. Place the saucepan over medium heat and bring the mixture to a boil, stirring constantly. Marshmallows have a tendency to stick and burn, so watch it closely and stir frequently to prevent scorching.
-
Once the mixture is boiling, continue to cook for about 1-2 minutes, stirring constantly, until the marshmallows are completely melted and the mixture is smooth.
-
Remove the saucepan from the heat and stir in the coconut. Mix well to ensure the coconut is evenly distributed throughout the marshmallow mixture.
-
As soon as the cake comes out of the oven, immediately pour the coconut filling over the hot cake. Spread it evenly across the surface. The heat from the cake will help the filling to meld and adhere properly.
-
Now, let’s prepare the chocolate frosting. In a separate medium saucepan, combine the milk, butter (or margarine), and sugar. Place the saucepan over medium heat and bring the mixture to a boil, stirring constantly, until the sugar is dissolved and the butter is melted.
-
Remove the saucepan from the heat and add the chocolate chips. Stir until the chocolate chips are completely melted and the frosting is smooth and glossy.
-
Pour the chocolate frosting over the coconut layer and spread it evenly across the surface.
-
Refrigerate the cake overnight (or for at least 4 hours) to allow the frosting and filling to set completely. This step is essential for achieving the best texture and flavor. The flavors meld together beautifully as the cake chills.
Expert Tips & Tricks
-
For a richer chocolate flavor: Use dark chocolate cake mix or add a tablespoon of unsweetened cocoa powder to the batter.
-
Toasting the coconut: Lightly toasting the coconut before adding it to the filling enhances its flavor and adds a pleasant crunch. Spread the coconut on a baking sheet and bake at 350°F (175°C) for 5-7 minutes, or until lightly golden, watching carefully to prevent burning.
-
Preventing a soggy cake: Make sure the cake is hot when you pour the coconut filling over it. This helps the filling absorb into the cake slightly.
-
Easy frosting variation: If you’re short on time, use a can of prepared chocolate frosting. Just warm it slightly in the microwave to make it easier to spread.
-
Making it ahead: The cake can be made 1-2 days in advance and stored in the refrigerator.
Serving & Storage Suggestions
To serve, cut the cake into squares and arrange them on a platter. A dollop of whipped cream or a scoop of vanilla ice cream makes a delightful accompaniment. The cake is best served chilled.
Leftovers should be stored in an airtight container in the refrigerator for up to 3-4 days. The cake can also be frozen for longer storage. Wrap individual slices tightly in plastic wrap and then place them in a freezer-safe container. Frozen cake will keep for up to 2-3 months. To thaw, place the frozen slices in the refrigerator overnight.
Nutritional Information
| Nutrient | Amount per Serving | % Daily Value |
|---|---|---|
| Calories | 857.9 kcal | N/A |
| Calories from Fat | 473 g | 55% |
| Total Fat | 52.6 g | 80% |
| Saturated Fat | 32.1 g | 160% |
| Cholesterol | 71.1 mg | 23% |
| Sodium | 476.5 mg | 19% |
| Total Carbohydrate | 100.4 g | 33% |
| Dietary Fiber | 8.1 g | 32% |
| Sugars | 73.5 g | 294% |
| Protein | 8.8 g | 17% |
Please note: Nutritional information is an estimate and may vary based on specific ingredients and portion sizes.
Variations & Substitutions
- Gluten-Free: Use a gluten-free chocolate cake mix.
- Dairy-Free: Use non-dairy milk and margarine for the filling and frosting. Ensure the chocolate chips are also dairy-free.
- Nut-Free: This recipe is naturally nut-free, but always check the labels of your ingredients to ensure they were not manufactured in a facility that processes nuts.
- Extra Coconutty: Add shredded coconut to the cake batter itself for an even more intense coconut flavor.
- Different Extracts: A drop or two of almond extract can be added to the coconut filling.
FAQs (Frequently Asked Questions)
Q: Can I use sweetened or unsweetened coconut?
A: Sweetened coconut is typically used in this recipe, but you can use unsweetened coconut if you prefer a less sweet cake. You may want to add a bit more sugar to the filling if you use unsweetened coconut.
Q: Why does the recipe call for refrigerating the cake overnight?
A: Refrigerating the cake allows the frosting and filling to set properly, which improves the texture and enhances the flavors. It’s crucial for achieving the best possible results.
Q: Can I freeze the cake?
A: Yes, the cake freezes well. Wrap individual slices tightly in plastic wrap and then place them in a freezer-safe container. Thaw in the refrigerator overnight.
Q: My marshmallow filling burned! What did I do wrong?
A: Marshmallows are very prone to burning. Make sure to stir the filling constantly while it’s cooking, and keep the heat at medium to prevent scorching.
Q: Can I use a different size pan?
A: While a 9×13 inch pan is recommended, you can use two 9-inch round cake pans. Adjust baking time accordingly, checking for doneness with a toothpick.
Final Thoughts
This Chocolate Coconut Mounds Cake is more than just a recipe; it’s a slice of pure comfort and nostalgia. It’s a simple yet satisfying treat that’s perfect for any occasion. I encourage you to try this recipe and share it with your loved ones. I guarantee the combination of rich chocolate and sweet coconut will be a hit! Don’t hesitate to experiment with variations to make it your own, and please, share your feedback – I’d love to hear about your baking adventures! Pair it with a cold glass of milk or a warm cup of coffee for the ultimate indulgence.