
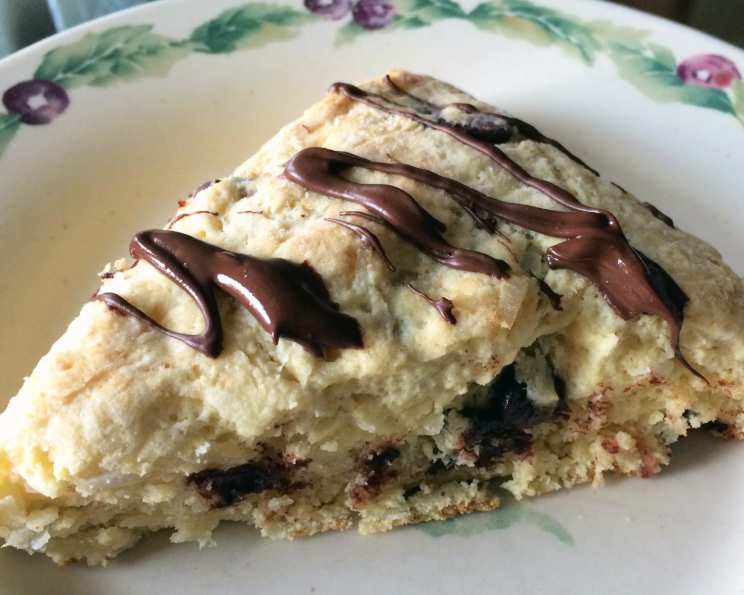
Chocolate Coconut Scones: A Tropical Twist on a Classic
The scent of warm scones baking always transports me back to my grandmother’s kitchen. She had a way of making the simplest things feel special, and her scones were legendary – flaky, buttery, and always served with a generous dollop of clotted cream and homemade jam. While her recipe was a closely guarded secret, I’ve since experimented with my own variations, always seeking that perfect balance of texture and flavor. These Chocolate Coconut Scones are a delightful departure from the traditional, bringing a taste of the tropics to a beloved classic. The subtle sweetness of coconut milk, the satisfying chew of shredded coconut, and the bursts of melted chocolate create a symphony of flavors that will brighten any morning.
Recipe Overview
- Prep Time: 20 minutes
- Cook Time: 20-25 minutes
- Total Time: 40-45 minutes
- Servings: 8
- Yield: 8 scones
- Dietary Type: Vegetarian
Ingredients
- 2 cups all-purpose flour
- 3 tablespoons sugar
- 2 teaspoons baking powder
- 1/4 teaspoon salt
- 6 tablespoons butter, cold and cut into cubes
- 1 egg, beaten
- 1/2 cup unsweetened coconut milk (or milk)
- 1/3 cup shredded coconut, unsweetened
- 1/3 cup miniature semisweet chocolate chips
- Milk (optional, for brushing)
- Coarse sugar (optional, for sprinkling)
Equipment Needed
- Baking sheet
- Medium mixing bowl
- Small mixing bowl
- Pastry blender or food processor
- Fork
- Lightly floured surface
- Rolling pin (optional)
- Wire rack
Instructions
-
Preheat your oven to 400°F (200°C). Lightly grease a baking sheet; set it aside. This prevents sticking and ensures even browning.
-
In a medium mixing bowl, combine the flour, sugar, baking powder, and salt. Whisk these dry ingredients together to ensure even distribution of the baking powder, which is crucial for a good rise.
-
Using a pastry blender or your fingertips, cut in the cold butter until the mixture resembles coarse crumbs. The butter should be very cold to create pockets of fat that will melt during baking, resulting in a flaky texture. If using your fingertips, work quickly to prevent the butter from melting. Alternatively, pulse the flour and butter in a food processor until the desired consistency is achieved.
-
Make a well in the center of the dry mixture; set aside. This creates a space for the wet ingredients to be evenly distributed.
-
In a small mixing bowl, combine the beaten egg, coconut milk, shredded coconut, and chocolate chips. Whisk until just combined. Don’t overmix at this stage.
-
Add the egg mixture all at once to the flour mixture. Using a fork, stir just until moistened. Be careful not to overmix, as this can develop the gluten in the flour and result in tough scones. The dough should be shaggy and slightly sticky.
-
Turn the dough out onto a lightly floured surface. Quickly knead by folding and gently pressing the dough for 10 to 12 strokes, or until the dough is nearly smooth. This brief kneading helps to bring the dough together without overworking it.
-
On the prepared baking sheet, pat or lightly roll the dough into a 7-inch circle. Aim for a consistent thickness for even baking. If you prefer smaller scones, you can divide the dough in half and create two smaller circles.
-
Cut the circle into 8 wedges; do not separate the wedges. Keeping them connected ensures they bake evenly and helps to retain moisture.
-
If desired, brush the tops of the scones with milk and sprinkle with coarse sugar. This adds a beautiful golden sheen and a delightful crunch to the finished scones.
-
Bake in the preheated 400°F (200°C) oven for 20 to 25 minutes, or until golden brown. The baking time may vary depending on your oven, so keep a close eye on them. The scones are done when a toothpick inserted into the center comes out clean.
-
Transfer the scones to a wire rack to cool for 5 minutes. This prevents the bottoms from becoming soggy.
-
Separate the scones. Cool completely. While they’re best enjoyed warm, cooling them completely allows the chocolate to set and prevents them from crumbling when handled.
-
Transfer to an airtight container or bag and store at room temperature for up to 3 days, or in the freezer for up to 3 months. Proper storage ensures they stay fresh and delicious.
Expert Tips & Tricks
- Cold Butter is Key: Using very cold butter is essential for creating flaky scones. You can even freeze the butter for 15 minutes before cutting it into the flour.
- Don’t Overmix: Overmixing the dough develops the gluten in the flour, resulting in tough scones. Mix until just combined.
- Handle Gently: When kneading and shaping the dough, be gentle. Avoid pressing down too hard, which can compress the dough and prevent it from rising properly.
- Freezing for Later: These scones freeze beautifully. To freeze, place the cooled scones in a single layer on a baking sheet and freeze until solid. Then, transfer them to a freezer bag or container.
- Even Baking: To ensure even baking, rotate the baking sheet halfway through the baking time.
Serving & Storage Suggestions
These Chocolate Coconut Scones are best served warm with a pat of butter, a dollop of clotted cream, or a spoonful of your favorite jam. They are also delicious on their own, as a satisfying breakfast or afternoon treat. For a truly decadent experience, serve them with a scoop of vanilla ice cream.
Store leftover scones in an airtight container at room temperature for up to 3 days. For longer storage, freeze them for up to 3 months. To reheat frozen scones, thaw them at room temperature or in the microwave. Then, warm them in a preheated oven at 350°F (175°C) for 5-10 minutes, or until heated through. You can also reheat them in a toaster oven for a crispier texture.
Nutritional Information
| Nutrient | Amount per Serving | % Daily Value |
|---|---|---|
| Calories | 200 kcal | 10% |
| Total Fat | 11g | 17% |
| Saturated Fat | 7g | 35% |
| Cholesterol | 33mg | 11% |
| Sodium | 165mg | 7% |
| Total Carbohydrate | 24g | 8% |
| Dietary Fiber | 1g | 4% |
| Sugars | 7g | – |
| Protein | 3g | 6% |
Note: Nutritional information is an estimate and may vary based on specific ingredients and preparation methods.
Variations & Substitutions
- Gluten-Free: Substitute the all-purpose flour with a gluten-free blend. Be sure to add 1/2 teaspoon of xanthan gum to help bind the ingredients.
- Dairy-Free: Ensure that the chocolate chips are dairy-free. You can substitute the butter with a plant-based butter alternative.
- Nutty Twist: Add 1/4 cup of chopped macadamia nuts or toasted almonds for extra flavor and texture.
- Citrus Zest: Add the zest of one lime or orange for a bright, zesty flavor.
- Spice It Up: Add 1/2 teaspoon of ground cinnamon or nutmeg to the dry ingredients for a warm, comforting flavor.
FAQs (Frequently Asked Questions)
Q: Can I use sweetened coconut milk instead of unsweetened?
A: Yes, but reduce the amount of sugar in the recipe to avoid overly sweet scones. Start with 1 tablespoon of sugar and adjust to taste.
Q: Can I make the dough ahead of time?
A: Yes, you can prepare the dough and chill it in the refrigerator for up to 24 hours. This can actually improve the flavor and texture of the scones.
Q: How do I prevent the chocolate chips from melting too much?
A: Use miniature chocolate chips and avoid overmixing the dough. Also, be sure to cool the scones completely before handling them.
Q: Can I make these scones without coconut?
A: Yes, simply omit the shredded coconut and use regular milk instead of coconut milk. You may want to add a little vanilla extract for extra flavor.
Q: My scones are dry. What did I do wrong?
A: You likely overmixed the dough or baked them for too long. Be careful not to overmix, and check the scones for doneness a few minutes before the recommended baking time.
Final Thoughts
These Chocolate Coconut Scones are a delightful treat that’s perfect for any occasion. The combination of rich chocolate, tropical coconut, and buttery, flaky dough is simply irresistible. So, gather your ingredients, preheat your oven, and prepare to embark on a culinary adventure that will transport your taste buds to paradise. Don’t be afraid to experiment with different variations and substitutions to create your own signature scone. And most importantly, have fun and enjoy the process! I encourage you to try this recipe and share your feedback. Perhaps pair these scones with a cup of strong coffee or a refreshing iced tea for the ultimate indulgence. Happy baking!