
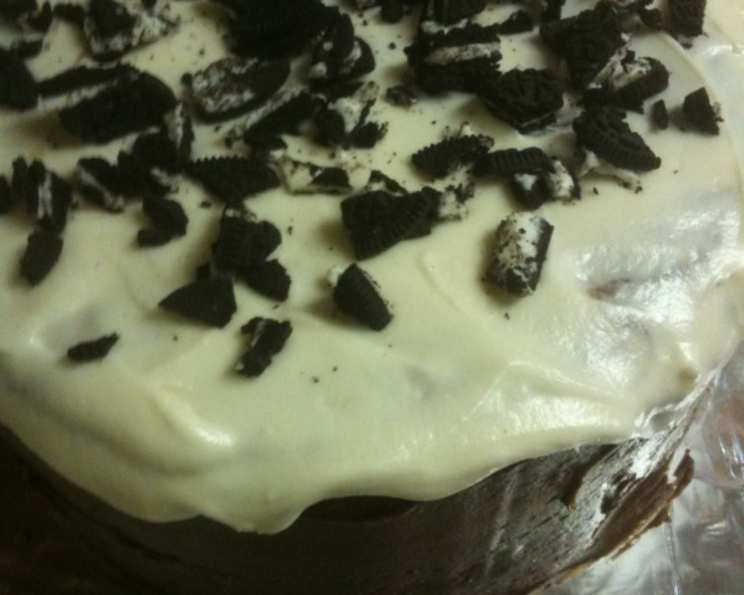
Decadent Chocolate Cookie Cake
My grandmother, Nana Elsie, wasn’t much of a baker. Her repertoire consisted mainly of sturdy, practical dishes – meatloaf, mashed potatoes, and apple crisp. But every so often, she’d surprise us with a towering, slightly lopsided chocolate cake. It wasn’t elegant or perfect, but it was made with love, and always disappeared in record time. The memory of that rich, chocolatey goodness, and the pure joy it brought, has always stayed with me. This Chocolate Cookie Cake, with its layers of moist chocolate cake, creamy cookie filling, and decadent chocolate frosting, is my attempt to recreate that magic – a nostalgic nod to Nana Elsie’s surprisingly delicious cake, elevated with a touch of modern flair.
Recipe Overview
- Prep Time: 45 minutes
- Cook Time: 25 minutes
- Total Time: 1 hour 20 minutes
- Servings: 16
- Yield: One 9-inch cake
- Dietary Type: Not specified, contains gluten, dairy, and eggs
Ingredients
For the Cake:
- 2 2/3 cups all-purpose flour
- 2 1/4 cups sugar
- 1 1/4 teaspoons baking soda
- 3/4 teaspoon salt
- 1/2 teaspoon baking powder
- 1 1/3 cups milk
- 1 (8 ounce) container sour cream
- 5 ounces unsweetened chocolate, melted and cooled
- 1/3 cup butter, softened (5 1/3 Tablespoons, it has to be REALLY soft)
- 3 eggs
- 2 teaspoons vanilla
- 1 recipe Cookie Filling (see recipe below)
- 1 recipe Chocolate-Sour Cream Frosting (see recipe below)
For the Cookie Filling:
- 4 cups sifted powdered sugar
- 1/3 cup butter, softened
- 2 tablespoons milk (plus additional 1-2 Tablespoons)
- 1 teaspoon vanilla
- 10 sandwich cookies, crushed
For the Chocolate-Sour Cream Frosting:
- 1 cup semisweet chocolate pieces
- 1/4 cup butter
- 1/2 cup sour cream
- 2 1/2 cups sifted powdered sugar
To Garnish:
- 4 sandwich cookies, crushed
Equipment Needed
- Two or three 9×1-1/2-inch round cake pans
- Electric mixer
- Mixing bowls (extra-large and large)
- Wire racks
- 4-cup Pyrex measuring cup (or small saucepan)
- Rubber spatula or icing spreader
Instructions
-
Prepare the Cake Pans: Begin by greasing and lightly flouring two or three 9×1-1/2-inch round cake pans. Set the prepared pans aside. This step ensures the cakes release easily after baking.
-
Combine Dry Ingredients: In an extra-large mixing bowl, combine the all-purpose flour, sugar, baking soda, salt, and baking powder. Whisking these dry ingredients together ensures they are evenly distributed throughout the batter.
-
Add Wet Ingredients: To the bowl with the dry ingredients, add the milk, sour cream, melted and cooled unsweetened chocolate, softened butter, eggs, and vanilla.
-
Mix the Batter: Beat the mixture with an electric mixer on low speed for about 1 minute, or until just combined. Then, increase the speed to high and beat for 3 minutes, scraping the sides of the bowl occasionally to ensure everything is thoroughly incorporated. This step is crucial for developing the cake’s structure and creating a light, airy texture.
-
Bake the Cake Layers: Divide the batter evenly among the prepared cake pans, aiming for approximately 1/3 of the batter per pan. Bake in a preheated 350 degree F (175 degree C) oven for about 25 minutes, or until a toothpick inserted near the center comes out clean. Check for doneness a few minutes early; ovens can vary.
-
Cool the Cakes: Once baked, cool the cakes in the pans on wire racks for 10 minutes. This allows them to set slightly before inverting.
-
Remove and Cool Completely: After 10 minutes, remove the cakes from the pans and place them directly on the wire racks to cool completely. Ensure the cakes are completely cooled before frosting to prevent the frosting from melting.
-
Prepare the Cookie Filling: While the cakes are cooling, prepare the cookie filling. In a large mixing bowl, combine the sifted powdered sugar, softened butter, milk, and vanilla.
-
Mix the Cookie Filling: Beat the mixture with an electric mixer on low speed until combined. Then, increase the speed to medium and beat until very smooth.
-
Adjust Consistency: If the filling is too thick, beat in enough additional milk (1 to 2 tablespoons) until it reaches an easy-to-spread consistency. Reserve 3/4 cup of the filling (without crumbs) for garnishing the cake later.
-
Incorporate Crushed Cookies: Stir the crushed sandwich cookies into the remaining cookie filling.
-
Assemble the Cake: To assemble the cake, place one cake layer on a serving plate. Top with half of the crumb-filled cookie filling, spreading it evenly over the layer.
-
Add Second Layer and Filling: Add a second cake layer and spread with the remaining portion of the cookie filling.
-
Top with Final Layer: Top with the remaining cake layer.
-
Prepare the Chocolate-Sour Cream Frosting: In a 4-cup Pyrex measuring cup (or a small saucepan), melt the semisweet chocolate pieces and butter, stirring frequently. Microwaving in short bursts, or using a double boiler, prevents scorching. Cool the mixture for about 5 minutes.
-
Add Sour Cream: Stir in the sour cream until smooth.
-
Incorporate Powdered Sugar: Gradually add the sifted powdered sugar, beating until the frosting is smooth and easy to spread.
-
Frost the Cake: Spread the chocolate-sour cream frosting over the top and sides of the cake.
-
Garnish the Cake: Spoon the reserved cookie filling (without crumbs) onto the center top of the cake. Carefully spread the filling to force some down the sides of the cake. Garnish the top of the cake with the 4 crushed chocolate sandwich cookies.
-
Chill and Serve: Cover the cake and store it in the refrigerator until ready to serve. Chilling allows the frosting to set and the flavors to meld.
Expert Tips & Tricks
- For an even richer chocolate flavor, add a tablespoon of instant espresso powder to the dry ingredients.
- Ensure the butter for both the cake and frosting is truly softened. This is key to a smooth batter and frosting.
- If you only have two cake pans, bake the batter in two batches. Make sure to let the pan cool completely before using it for the second batch.
- To prevent the cake layers from sticking, line the bottoms of the cake pans with parchment paper rounds.
- For a neater presentation, chill the cake layers for about 30 minutes before frosting. This makes them easier to handle and prevents crumbs from getting into the frosting.
Serving & Storage Suggestions
This Chocolate Cookie Cake is best served chilled. Cut a generous slice and enjoy it with a tall glass of cold milk or a scoop of vanilla ice cream. Leftovers should be stored in an airtight container in the refrigerator for up to 3 days. The cake can also be frozen for up to 2 months. To freeze, wrap individual slices tightly in plastic wrap and then place them in a freezer-safe bag or container. Thaw in the refrigerator before serving.
Nutritional Information
| Nutrient | Amount per Serving | % Daily Value |
|---|---|---|
| Calories | 662.1 kcal | N/A |
| Calories from Fat | 229 g | 35% |
| Total Fat | 25.5 g | 39% |
| Saturated Fat | 15.5 g | 77% |
| Cholesterol | 80.9 mg | 26% |
| Sodium | 332.8 mg | 13% |
| Total Carbohydrate | 106.7 g | 35% |
| Dietary Fiber | 3 g | 11% |
| Sugars | 83.6 g | 334% |
| Protein | 6.6 g | 13% |
Variations & Substitutions
- Gluten-Free: Substitute the all-purpose flour with a gluten-free all-purpose flour blend. Be sure to check the ingredient list for any added xanthan gum, which helps to mimic the structure of gluten.
- Dairy-Free: Replace the milk with almond or soy milk, the sour cream with a dairy-free sour cream alternative, and the butter with a vegan butter substitute. Use dairy-free chocolate chips for the frosting.
- Peanut Butter Variation: Add 1/2 cup of peanut butter to the cookie filling for a delicious twist.
- Mint Chocolate: Use mint-flavored sandwich cookies in the filling and add a few drops of peppermint extract to the frosting for a refreshing mint chocolate cake.
FAQs (Frequently Asked Questions)
Q: Can I make the cake layers ahead of time?
A: Yes, you can bake the cake layers a day or two in advance. Wrap them tightly in plastic wrap and store them at room temperature or in the refrigerator.
Q: How do I prevent the cake from drying out?
A: Make sure not to overbake the cake. Check for doneness using a toothpick, and remove the cake from the oven as soon as the toothpick comes out clean.
Q: Can I use a different size cake pan?
A: Yes, but you may need to adjust the baking time. Keep an eye on the cake and check for doneness frequently. Using smaller pans will increase baking time; larger pans will decrease it.
Q: What if my frosting is too thick?
A: Add a tablespoon of milk at a time until the frosting reaches the desired consistency.
Q: Can I freeze the entire cake?
A: Yes, you can freeze the entire frosted cake. Place it in the freezer for about an hour to firm up the frosting, then wrap it tightly in plastic wrap and aluminum foil. Thaw in the refrigerator before serving.
Final Thoughts
This Chocolate Cookie Cake is more than just a dessert; it’s a celebration of simple pleasures and shared moments. With its layers of moist chocolate cake, creamy cookie filling, and decadent chocolate frosting, it’s guaranteed to be a crowd-pleaser. Don’t be afraid to experiment with variations and make it your own. Whether you’re baking for a special occasion or simply craving a sweet treat, I encourage you to give this recipe a try. Gather your ingredients, preheat your oven, and get ready to create a cake that will bring joy to everyone who tastes it. And please, don’t forget to share your baking adventures and any delicious modifications you make!