
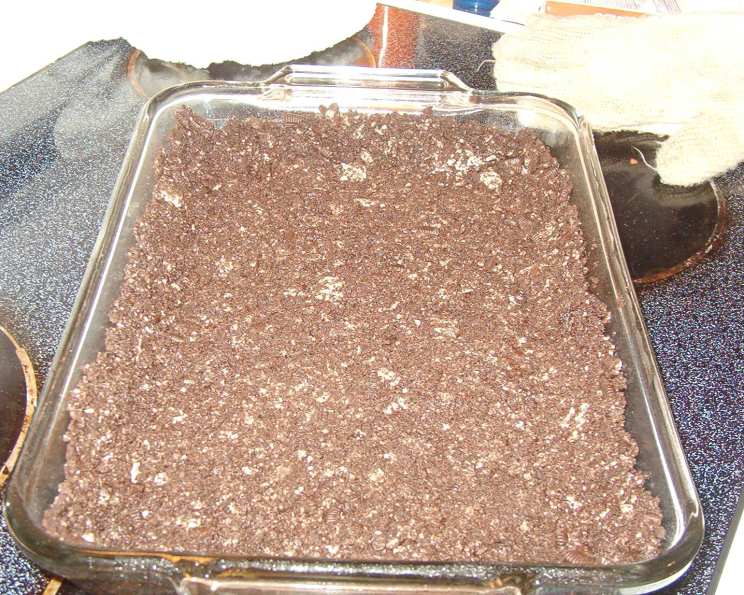
Decadent Chocolate Cookie Crumb Crust: The Perfect Base for Any Pie
There’s a certain magic in the simple act of baking a pie. As a child, the scent of warm, chocolatey goodness wafting from the oven signaled more than just dessert – it meant family, love, and a little bit of indulgence. I remember sneaking Oreo cookies from the package, my fingers stained with the dark, rich cream, and dreaming of a pie made entirely of that flavor. Years later, that childhood craving turned into this recipe, a testament to the fact that sometimes, the simplest pleasures are the most satisfying. This Chocolate Cookie Crumb Crust isn’t just a base; it’s an invitation to create something truly special.
Recipe Overview
- Prep Time: 10 minutes
- Cook Time: 10 minutes
- Total Time: 20 minutes
- Yields: 1 pie crust
- Serves: 8
- Dietary Type: Vegetarian (easily adaptable to vegan – see variations)
Ingredients
- 16 Oreo cookies, with filling, broken into rough pieces (about 2 1/2 cups)
- 2 tablespoons unsalted butter, melted and cooled
Equipment Needed
- Large zip-lock plastic bag (or food processor)
- Rolling pin
- Medium bowl
- 9-inch Pyrex pie plate
- Wire rack
Instructions
-
Position a rack in the middle of the oven and preheat to 350 degrees F (175 degrees C).
-
Place the Oreo cookies in a large zip-lock plastic bag. Seal the bag, removing as much air as possible.
-
Using a rolling pin, crush the cookies into fine crumbs. Alternatively, you can use a food processor to achieve the same result. If using a food processor, pulse until the cookies are finely ground.
-
Transfer the cookie crumbs to a medium bowl.
-
Drizzle the melted and cooled butter over the crumbs.
-
Using your fingers (or a fork), mix the crumbs and butter until well combined. The mixture should resemble damp sand and hold its shape when pressed together.
-
Pour the crumb mixture into a 9-inch Pyrex pie plate.
-
Using your fingers or the bottom of a measuring cup, press the crumbs evenly onto the bottom and up the sides of the pie plate. Make sure the crust is uniform in thickness to ensure even baking. Pay special attention to the edges, as they tend to be thinner.
-
Refrigerate the crust for at least 20 minutes to allow the butter to firm up and help the crust hold its shape during baking. This step is crucial for preventing the crust from shrinking or becoming soggy.
-
Bake the crust in the preheated oven for about 10 minutes, or until the crumbs are set and slightly fragrant. The edges should be lightly browned.
-
Remove the pie plate from the oven and cool the crust completely on a wire rack before filling. This will prevent the filling from melting or softening the crust.
Expert Tips & Tricks
- Don’t over-process the cookies: If using a food processor, be careful not to over-process the cookies into a paste. You want fine crumbs, not a smooth mixture.
- Cool the butter: Ensure the butter is cooled before adding it to the crumbs. Hot butter can melt the cookie filling and create a greasy crust.
- Press firmly: Press the crumbs firmly and evenly into the pie plate. This is key to a sturdy crust that won’t fall apart.
- Par-bake for added crispness: For an extra-crisp crust, consider par-baking it for a few minutes longer (12-15 minutes), then letting it cool completely before adding the filling. This works particularly well for no-bake pies.
- Prevent burning: If the edges of the crust start to brown too quickly, you can cover them with aluminum foil or a pie shield during the last few minutes of baking.
Serving & Storage Suggestions
This Chocolate Cookie Crumb Crust is incredibly versatile and can be used for a variety of pies and desserts. Once filled, serve your pie chilled for the best flavor and texture.
- Storage: Store unfilled baked crusts at room temperature in an airtight container for up to 3 days. Filled pies should be stored in the refrigerator.
- Refrigeration: Refrigerate filled pies for up to 3-4 days. Cover loosely with plastic wrap or foil to prevent the crust from drying out.
- Freezing: To freeze a baked crust (filled or unfilled), wrap it tightly in plastic wrap and then in aluminum foil. It can be frozen for up to 2-3 months. Thaw overnight in the refrigerator before serving or filling.
Nutritional Information
The following is an estimated nutritional breakdown per serving (1/8 of the crust):
| Nutrient | Amount per Serving | % Daily Value |
|---|---|---|
| Calories | 133 kcal | 7% |
| Total Fat | 7.4g | 11% |
| Saturated Fat | 3.3g | 16% |
| Cholesterol | 7.6mg | 2% |
| Sodium | 116.1mg | 5% |
| Total Carbohydrate | 16.3g | 6% |
| Dietary Fiber | 0.6g | 2% |
| Sugars | 9.4g | 19% |
| Protein | 1.3g | 3% |
Note: Nutritional information is an estimate and may vary based on specific ingredients and portion sizes.
Variations & Substitutions
- Vegan Option: To make this crust vegan, use Oreo cookies that are certified vegan (some varieties are) and substitute the unsalted butter with a vegan butter alternative.
- Gluten-Free Option: Use gluten-free chocolate sandwich cookies in place of Oreos. Ensure the butter is clarified (ghee) to ensure no gluten traces if necessary.
- Flavor Variations: Add a pinch of sea salt to the crumb mixture for a salty-sweet contrast. You can also incorporate spices like cinnamon or nutmeg for a warmer flavor profile.
- Nutty Crust: Add 1/4 cup of finely ground nuts (such as almonds or pecans) to the crumb mixture for added texture and flavor.
- Liqueur Boost: For an adult twist, brush the cooled crust with a tablespoon of chocolate liqueur or coffee liqueur before adding the filling.
FAQs (Frequently Asked Questions)
Q: Can I use a different type of chocolate cookie?
A: Absolutely! While Oreos are a classic choice, you can use any similar chocolate sandwich cookie. Just ensure the filling is intact for the best results.
Q: Why is it important to refrigerate the crust before baking?
A: Refrigerating the crust allows the butter to solidify, which helps the crust hold its shape during baking and prevents it from shrinking.
Q: My crust is crumbling. What did I do wrong?
A: The most common cause of a crumbly crust is not using enough butter or not pressing the crumbs firmly enough into the pie plate. Make sure the crumb mixture is evenly moistened and press it down firmly.
Q: Can I make this crust ahead of time?
A: Yes, you can bake the crust ahead of time and store it at room temperature for up to 3 days. Wrap it tightly to prevent it from drying out.
Q: What fillings work best with this chocolate cookie crust?
A: The possibilities are endless! This crust pairs beautifully with chocolate mousse, peanut butter filling, vanilla cream, coffee flavored desserts, or even fruit fillings like strawberries or raspberries.
Final Thoughts
This Chocolate Cookie Crumb Crust is more than just a recipe; it’s a foundation for countless delicious desserts. I encourage you to experiment with different fillings, flavors, and toppings to create your own signature pie. Share your creations with friends and family, and don’t be afraid to get creative in the kitchen. After all, the best recipes are those that are made with love and shared with joy. Happy baking!