
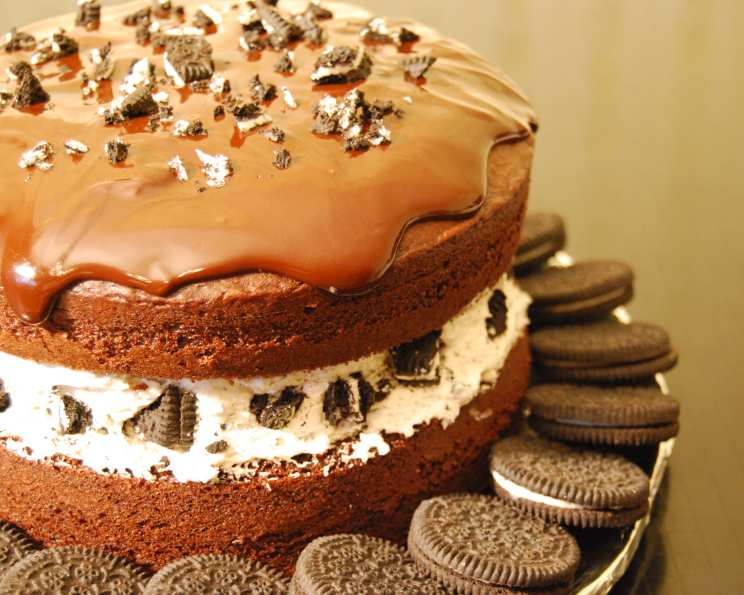
Chocolate Covered Oreo Cookie Cake
I can still remember the hushed excitement whenever my mom would pull out her stand mixer. It meant something special was about to happen. More often than not, that “something” was a glorious, towering cake. While she had plenty of go-to recipes, the one that always brought the biggest smiles was her version of an Oreo cake. It wasn’t just the taste – a symphony of rich chocolate and creamy filling – but the sheer joy of sharing something so decadent and comforting with loved ones. Every bite was a memory in the making, and this Chocolate Covered Oreo Cookie Cake brings back that exact feeling.
Recipe Overview
- Prep Time: 30 minutes
- Cook Time: 30-35 minutes
- Total Time: 1 hour 5 minutes
- Servings: 16
- Yield: 1 double-layer cake
- Dietary Type: Vegetarian
Ingredients
- 1 (18 ounce) package devil’s food cake mix
- 1/4 cup oil
- 2 eggs
- 4 baker’s semi-sweet chocolate baking squares
- 1/4 cup butter, cut up
- 1 (8 ounce) package Philadelphia Cream Cheese, softened
- 1/2 cup sugar
- 2 cups thawed Cool Whip Topping
- 12 Oreo cookies, coarsely crushed
Equipment Needed
- Two 9-inch round cake pans
- Wire racks
- Small microwaveable bowl
- Electric mixer
- Serving plate
Instructions
- Preheat your oven to 350°F (175°C). Prepare the devil’s food cake mix according to package directions, using the oil and eggs specified.
- Divide the batter evenly between two (9-inch) round cake pans.
- Bake as directed on the package instructions. Generally, this will be approximately 30-35 minutes.
- Cool the cakes in the pans for 5 minutes after removing them from the oven.
- Invert the cakes onto wire racks and carefully remove the pans. Allow the cake layers to cool completely. This is crucial to prevent the frosting from melting.
- While the cakes are cooling, prepare the chocolate glaze. Place the baker’s semi-sweet chocolate baking squares and butter (cut into pieces) in a small microwaveable bowl.
- Microwave on HIGH for 2 minutes, or until the butter is melted.
- Stir the mixture until the chocolate is completely melted and smooth. If needed, microwave in 30-second intervals, stirring in between, to prevent burning.
- Cool the chocolate glaze for 5 minutes. This will allow it to thicken slightly.
- Now, prepare the cream cheese filling. In a large bowl, beat the softened cream cheese and sugar with an electric mixer on medium speed until well blended and smooth.
- Gently fold in the thawed Cool Whip Topping and coarsely crushed Oreo cookies until just combined. Be careful not to overmix, as this can deflate the Cool Whip.
- Once the cake layers are completely cooled, place one cake layer, top-side down, on a serving plate.
- Spread the cream cheese mixture evenly over the cake layer.
- Cover with the remaining cake layer, placing it top-side up.
- Spoon the cooled chocolate glaze over the top of the cake, allowing it to drip down the sides. You can use a spatula to gently spread the glaze evenly.
- Let stand until the chocolate glaze is set. This will take about 30 minutes at room temperature, or you can speed up the process by refrigerating the cake.
- Store the cake in the refrigerator.
Expert Tips & Tricks
- For a richer chocolate flavor, add a tablespoon of instant coffee granules to the cake batter before baking.
- To ensure the cake layers are perfectly level, use a serrated knife to trim off any domed tops after they have cooled.
- If you don’t have Cool Whip, you can substitute with homemade whipped cream. Be sure to stabilize it with a bit of powdered sugar to prevent it from weeping.
- For a more intense Oreo flavor, soak the crushed Oreos in a tablespoon or two of milk before adding them to the cream cheese filling. This will soften them slightly and release their flavor.
- If your chocolate glaze becomes too thick, add a teaspoon of milk or cream to thin it out. If it’s too thin, add a bit of powdered sugar.
Serving & Storage Suggestions
Serve this Chocolate Covered Oreo Cookie Cake chilled for the best flavor and texture. A scoop of vanilla ice cream or a dollop of whipped cream makes a delightful accompaniment. Leftover cake should be stored in an airtight container in the refrigerator for up to 3 days. For longer storage, you can freeze individual slices for up to 2 months. Thaw in the refrigerator before serving.
Nutritional Information
| Nutrient | Amount per Serving | % Daily Value |
|---|---|---|
| Calories | 400.3 | N/A |
| Calories from Fat | N/A | N/A |
| Total Fat | 26.1 g | 40% |
| Saturated Fat | 11.5 g | 57% |
| Cholesterol | 67 mg | 22% |
| Sodium | 393.3 mg | 16% |
| Total Carbohydrate | 41.2 g | 13% |
| Dietary Fiber | 1.4 g | 5% |
| Sugars | 26.4 g | N/A |
| Protein | 4.6 g | 9% |
Note: Nutritional information is an estimate and can vary based on specific ingredients and portion sizes.
Variations & Substitutions
- Gluten-Free: Use a gluten-free devil’s food cake mix. Ensure the Oreo cookies are also gluten-free (some brands offer gluten-free versions).
- Dairy-Free: Substitute the cream cheese with a dairy-free cream cheese alternative. Use a dairy-free whipped topping, such as coconut whipped cream. You will also need to find a dairy-free substitute for the chocolate squares.
- Peanut Butter Oreo Cake: Add 1/2 cup of peanut butter to the cream cheese filling for a delicious peanut butter twist. Use Peanut Butter Oreos instead of regular Oreos.
- Mint Chocolate Oreo Cake: Add 1/2 teaspoon of peppermint extract to the cream cheese filling and use Mint Oreos.
- Coffee Infused Oreo Cake: Brew strong coffee and allow it to cool. Then brush each cake layer with coffee before adding the filling and glaze. This enhances the chocolate flavor beautifully.
FAQs (Frequently Asked Questions)
Q: Can I use a different type of cake mix?
A: Yes, you can substitute the devil’s food cake mix with chocolate, white, or even funfetti cake mix, depending on your preference. Just be sure to adjust the baking time accordingly.
Q: Can I make the cake ahead of time?
A: Absolutely! This cake can be assembled a day or two in advance. Just store it in the refrigerator until ready to serve. The flavors actually meld together and improve over time.
Q: What’s the best way to crush the Oreo cookies?
A: You can crush the Oreo cookies by placing them in a zip-top bag and using a rolling pin or by pulsing them in a food processor. Avoid over-processing them into a fine powder; you want to keep some texture.
Q: How do I prevent the cake from sticking to the pans?
A: Grease and flour the cake pans thoroughly before adding the batter. Alternatively, you can use baking spray with flour or line the bottoms of the pans with parchment paper.
Q: Can I freeze this cake?
A: Yes, this cake freezes well. Wrap individual slices tightly in plastic wrap and then place them in a freezer-safe bag or container. Thaw in the refrigerator before serving.
Final Thoughts
I hope this Chocolate Covered Oreo Cookie Cake brings as much joy to your table as it does to mine. It’s more than just a recipe; it’s an invitation to create memories, share laughter, and savor the simple pleasures in life. Don’t be afraid to experiment with variations and make it your own. And please, share your creations and feedback – I’d love to hear how it turns out! Pair it with a glass of cold milk or a warm cup of coffee for the perfect indulgence. Happy baking!