
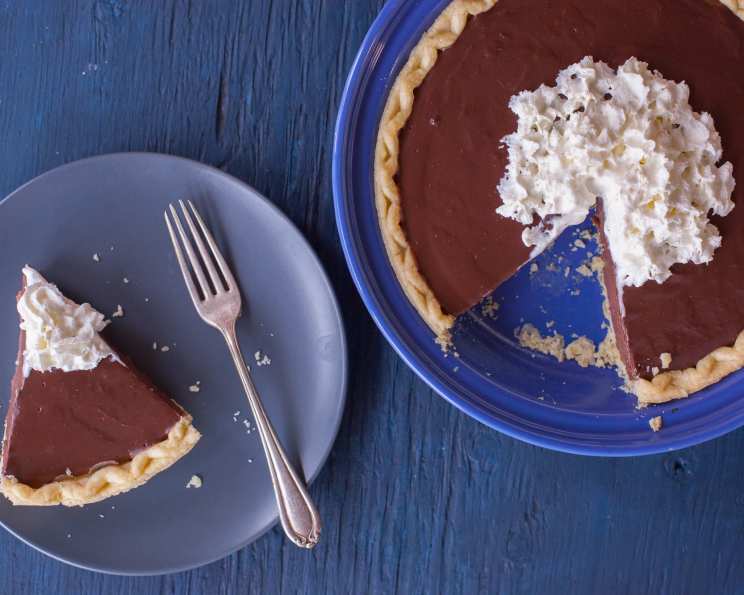
Decadent Chocolate Cream Pie: A Family Favorite
The scent of chocolate, sweet and inviting, always takes me back to childhood Thanksgivings. While the turkey and stuffing were undeniably important, it was my Aunt Sherry’s chocolate cream pie that truly stole the show. Its rich, velvety filling, nestled in a perfectly baked crust, was the stuff of dreams. Every year, the anticipation would build, and every year, that first bite delivered pure, unadulterated happiness. Now, years later, I carry on the tradition, and this pie remains a cherished part of our family gatherings.
Recipe Overview
- Prep Time: 20 minutes
- Cook Time: 10 minutes
- Total Time: 30 minutes
- Servings: 8
- Yield: 1 pie
- Dietary Type: Vegetarian
Ingredients
- 1 2/3 cups water
- 3 tablespoons cornstarch
- 5 tablespoons cocoa powder
- 1 (14 ounce) can Eagle Brand Sweetened Condensed Milk
- 3 egg yolks, beaten
- 2 tablespoons butter
- 1 teaspoon vanilla extract
- 1 (9 inch) baked pastry shell
Optional Toppings:
- Meringue (recipe follows)
- Whipped cream
Equipment Needed
- Medium saucepan
- Whisk
- Measuring cups and spoons
- 9-inch pie plate
- Oven
- Mixer (for meringue, if using)
Instructions
-
In a medium saucepan, whisk together the 1 2/3 cups of water, 3 tablespoons of cornstarch, and 5 tablespoons of cocoa powder until completely smooth, ensuring there are no lumps of cornstarch or cocoa. This is crucial for a silky-smooth filling.
-
Stir in the 1 (14 ounce) can of Eagle Brand Sweetened Condensed Milk and the 3 beaten egg yolks. Whisk until well combined. Be sure to incorporate the egg yolks quickly to prevent them from cooking from the heat of the other ingredients.
-
Cook the mixture over medium heat, stirring constantly with a whisk, until it thickens to a pudding-like consistency. This usually takes about 5-7 minutes. Be patient and continue stirring to prevent scorching on the bottom of the pan. If you prefer using a microwave, you can cook the mixture in a microwave-safe bowl in 1-minute intervals, stirring well between each interval, until thickened.
-
Remove the saucepan from the heat and stir in the 2 tablespoons of butter until it is completely melted and incorporated into the chocolate mixture.
-
Add 1 teaspoon of vanilla extract and stir until evenly distributed throughout the chocolate mixture. The vanilla enhances the chocolate flavor beautifully.
-
Allow the chocolate filling to cool slightly for about 5-10 minutes, stirring occasionally to prevent a skin from forming on the surface. This will help maintain a smooth texture when poured into the crust.
-
Pour the slightly cooled chocolate filling into the 9-inch baked pastry shell, spreading it evenly to fill the crust.
-
For Meringue Topping (Optional): Preheat the oven to 400°F (200°C). Prepare your favorite meringue recipe, ensuring stiff peaks are formed. Spread the meringue evenly over the chocolate filling, sealing it to the edges of the crust. Bake for 3-5 minutes, or until the meringue is lightly browned.
-
Alternative Topping: If you prefer a simpler topping, you can top the pie with whipped cream after it has chilled completely.
-
Allow the pie to cool completely at room temperature before refrigerating for at least 2 hours (or preferably overnight) to allow the filling to set properly.
Expert Tips & Tricks
- Preventing a Skin: To prevent a skin from forming on the cooling chocolate filling, press a piece of plastic wrap directly onto the surface of the filling while it cools. Remove the plastic wrap before pouring the filling into the crust.
- Perfect Pastry Shell: For a crisp, flaky crust, use a store-bought pastry shell or make your own using a high-quality recipe. Blind baking the crust before filling it will help prevent it from becoming soggy.
- Richer Flavor: For a richer chocolate flavor, use high-quality dark cocoa powder.
- Smooth Filling: If you find any lumps in your filling, you can strain it through a fine-mesh sieve before pouring it into the crust.
- Microwave Option: When microwaving, use a large, deep bowl to prevent splattering. Check and stir every minute to avoid burning.
- Even Meringue Browning: For evenly browned meringue, use a piping bag with a decorative tip to apply the meringue in a uniform layer. Keep a close eye on the meringue while baking to prevent burning.
Serving & Storage Suggestions
Serve the chocolate cream pie chilled, either plain or with a dollop of whipped cream or a scoop of vanilla ice cream. A sprinkle of chocolate shavings or a dusting of cocoa powder can also add a nice finishing touch.
Store leftover pie in the refrigerator, covered tightly, for up to 3-4 days. While it’s best enjoyed fresh, the pie can also be frozen for longer storage. To freeze, wrap the pie tightly in plastic wrap and then in aluminum foil. Thaw in the refrigerator overnight before serving. It is not recommended to freeze a pie with a meringue topping.
Nutritional Information
(Estimates; actual values may vary)
| Nutrient | Amount per Serving | % Daily Value |
|---|---|---|
| Calories | 350 kcal | 18% |
| Total Fat | 18g | 28% |
| Saturated Fat | 10g | 50% |
| Cholesterol | 85mg | 28% |
| Sodium | 200mg | 9% |
| Total Carbohydrate | 45g | 15% |
| Dietary Fiber | 2g | 8% |
| Sugars | 28g | – |
| Protein | 6g | 12% |
Variations & Substitutions
- Dairy-Free: Substitute the sweetened condensed milk with a dairy-free sweetened condensed milk alternative (such as coconut or oat-based). Use a plant-based butter alternative.
- Gluten-Free: Use a gluten-free baked pie crust. There are many commercially available options, or you can make your own.
- Chocolate Intensity: Adjust the amount of cocoa powder to your preference. For a darker, more intense flavor, increase the cocoa powder by 1-2 tablespoons.
- Coffee Infusion: Add 1 teaspoon of instant espresso powder to the chocolate mixture for a mocha-flavored pie.
- Peppermint Twist: Add ¼ teaspoon of peppermint extract to the chocolate mixture for a festive holiday flavor.
- Mexican Chocolate: Incorporate ¼ teaspoon of ground cinnamon and a pinch of cayenne pepper for a spicy Mexican chocolate version.
FAQs (Frequently Asked Questions)
Q: Can I make this pie ahead of time?
A: Absolutely! This pie is best made a day in advance to allow the filling to set properly. Store it covered in the refrigerator.
Q: My chocolate filling is too thick. What can I do?
A: If the filling becomes too thick, whisk in a tablespoon or two of milk (dairy or non-dairy) until it reaches your desired consistency.
Q: Can I use a graham cracker crust instead of a pastry crust?
A: Yes, a graham cracker crust is a delicious alternative! Simply press the graham cracker mixture into a pie plate and bake according to the crust recipe instructions before adding the chocolate filling.
Q: How do I prevent my meringue from weeping?
A: Make sure to seal the meringue to the edges of the crust to prevent moisture from seeping out. Also, avoid overbaking the meringue, as this can cause it to weep.
Q: What can I use instead of egg yolks?
A: For an egg-free version, you can use cornstarch as the sole thickener. Increase the cornstarch to 4 tablespoons and whisk it well with the other ingredients before cooking.
Final Thoughts
This chocolate cream pie is more than just a dessert; it’s a slice of nostalgia, a taste of home, and a reminder of cherished family traditions. Whether you’re a seasoned baker or just starting out, this recipe is simple enough to master and impressive enough to share. So, gather your ingredients, preheat your oven, and prepare to create a pie that will bring joy to your table. I encourage you to try this recipe and make it your own, adding your personal touches and creating new memories with every bite. Happy baking!