
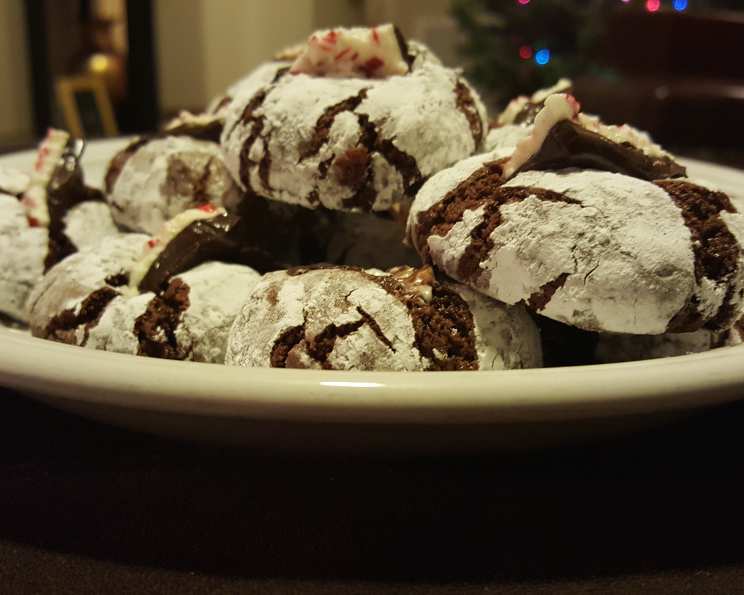
Chocolate Crinkle Cookies: A Baker’s Dream
The first time I tasted a Chocolate Crinkle Cookie, it was a snow day. School was canceled, the house was warm, and the air was thick with the scent of cocoa. My grandmother, a woman whose love language was definitely baking, pulled a tray of these dark, crackled beauties from the oven. The powdered sugar dusting looked like fresh snowfall against the deep chocolate, and the fudgy interior melted in my mouth. From that day on, they became synonymous with comfort, joy, and the simple pleasure of a perfectly baked treat.
Recipe Overview
- Prep Time: 20 minutes
- Cook Time: 12-14 minutes per batch
- Total Time: Overnight chilling + 3 hours
- Yields: Approximately 3 dozen cookies
- Dietary Type: Not specified (contains eggs and dairy)
Ingredients
- 2 cups granulated sugar
- ¾ cup vegetable oil
- ¾ cup unsweetened cocoa powder
- 4 eggs
- 2 teaspoons vanilla extract
- 2 ⅓ cups all-purpose flour
- 2 teaspoons baking powder
- ½ teaspoon salt
- 1 cup powdered sugar
Equipment Needed
- Large mixing bowl
- Wooden spoon or electric mixer
- Measuring cups and spoons
- Plastic wrap
- Cookie sheets
- Parchment paper (optional)
- Cookie scoop (optional, but recommended)
- Wire cooling rack
Instructions
- In a large bowl, stir together the granulated sugar and vegetable oil. A sturdy wooden spoon works perfectly for this, ensuring everything is well combined. You can use an electric mixer if preferred.
- Add the unsweetened cocoa powder to the mixture, blending thoroughly until no streaks remain. Ensure the cocoa powder is fully incorporated to achieve that rich, deep chocolate flavor.
- Beat in the eggs one at a time, followed by the vanilla extract. Mix until the batter is smooth and glossy. This step is crucial for creating the right texture in your cookies.
- In a separate bowl, stir together the all-purpose flour, baking powder, and salt. This ensures even distribution of the leavening agent, resulting in uniformly textured cookies.
- Gradually add the dry ingredients to the cocoa mixture, blending until just combined. Be careful not to overmix, as this can lead to tough cookies. The dough will be quite thick.
- Cover the bowl tightly with plastic wrap and refrigerate the dough until it is firm enough to handle. This usually takes overnight, or at least 3 hours. This chilling period is essential for preventing the cookies from spreading too thin during baking and for developing the signature crinkled appearance. The dough will have the consistency of soft fudge when properly chilled.
- When ready to bake, preheat your oven to 350°F (175°C).
- Grease your cookie sheets lightly, or line them with parchment paper for easy removal.
- For uniform cookies, use a cookie scoop. A #50 cookie scoop (approximately 2 tablespoons in size) works well. Spray the scoop with cooking spray (like Pam) before each scoop to prevent sticking. You may need to repeat this spraying throughout the process.
- Scoop the chilled dough and roll each ball generously in powdered sugar, ensuring it’s completely coated. The thick layer of powdered sugar is what creates the dramatic crackle effect.
- Keep the remaining dough in the refrigerator between batches to maintain its firmness.
- Place the sugar-coated dough balls about 2 inches apart on the prepared cookie sheets.
- Bake for 12 to 14 minutes, or until the cookies are almost set and only a slight indentation remains when touched lightly. The tops should be visibly crackled. Avoid overbaking, as this will result in dry cookies.
- Transfer the baked cookies to a wire rack to cool completely. This prevents them from continuing to bake on the hot cookie sheet and allows them to firm up.
Expert Tips & Tricks
- Chilling is Key: Do not skip the chilling step! It’s crucial for the cookies to maintain their shape and develop the signature crinkled tops.
- Powdered Sugar Generosity: Don’t be shy with the powdered sugar. The thicker the coating, the more dramatic the cracks.
- Scoop Spray: Keep that cookie scoop sprayed! Sticky dough can be frustrating, but a quick spritz of cooking spray makes all the difference.
- Oven Calibration: Every oven is different. Keep a close eye on your first batch and adjust baking time as needed.
- Dough Consistency: If your dough seems too soft even after chilling, try adding a tablespoon or two of flour.
- Avoid Doubling: The original recipe creator notes that doubling the recipe does not yield ideal results, so stick to single batches for the best outcome.
Serving & Storage Suggestions
Chocolate Crinkle Cookies are best enjoyed fresh, when their centers are still slightly soft. They are wonderful on their own with a glass of cold milk or a cup of hot coffee or tea. For a decadent treat, serve them warm with a scoop of vanilla ice cream.
Store cooled cookies in an airtight container at room temperature for up to 3 days. They can also be stored in the freezer for up to 2 months. To freeze, place cooled cookies in a single layer on a baking sheet, freeze until solid, then transfer to a freezer bag or container. Thaw at room temperature before serving.
Nutritional Information
| Nutrient | Amount per Serving (estimated) | % Daily Value (approximate) |
|---|---|---|
| Calories | 141 kcal | 7% |
| Total Fat | 5g | 8% |
| Saturated Fat | 1g | 5% |
| Cholesterol | 20 mg | 7% |
| Sodium | 60 mg | 3% |
| Total Carbohydrate | 22g | 7% |
| Dietary Fiber | 0.5g | 2% |
| Sugars | 15g | N/A |
| Protein | 1.5g | 3% |
Nutritional information is an estimate and may vary based on specific ingredients and portion sizes.
Variations & Substitutions
- Gluten-Free Crinkle Cookies: Substitute a gluten-free all-purpose flour blend for the regular flour. Be sure to choose a blend that contains xanthan gum for best results.
- Spiced Crinkle Cookies: Add 1 teaspoon of ground cinnamon, ½ teaspoon of ground nutmeg, and ¼ teaspoon of ground cloves to the dry ingredients for a warm, spiced version.
- Mint Chocolate Crinkle Cookies: Add ½ teaspoon of peppermint extract along with the vanilla.
- Espresso Crinkle Cookies: Add 1 tablespoon of instant espresso powder to the dry ingredients for a mocha flavor boost.
- Vegan Crinkle Cookies: Substitute the eggs with flax eggs (1 tablespoon ground flaxseed mixed with 3 tablespoons water per egg, let sit for 5 minutes before using). Use vegan butter or shortening in place of the vegetable oil.
FAQs (Frequently Asked Questions)
Q: Why are my cookies flat?
A: The most common reason for flat cookies is that the dough wasn’t chilled long enough. Chilling firms up the fat, preventing excessive spreading in the oven. Also, ensure your oven temperature is accurate.
Q: Why aren’t my cookies cracking?
A: The key to crackling is the generous coating of powdered sugar. Also, ensure the dough is cold when it goes into the oven, as the temperature shock encourages the cracking.
Q: Can I use Dutch-processed cocoa powder?
A: Yes, you can use Dutch-processed cocoa powder, but it may result in a slightly darker and more intense chocolate flavor.
Q: How do I store these cookies?
A: Store them in an airtight container at room temperature for up to 3 days, or freeze them for longer storage.
Q: Can I make the dough ahead of time?
A: Absolutely! In fact, it’s recommended. The dough needs to be chilled for at least 3 hours, but it can be made up to 2 days in advance.
Final Thoughts
These Chocolate Crinkle Cookies are more than just a recipe; they are a memory, a tradition, and a little bit of love baked into each bite. Don’t be intimidated by the chilling time – it’s well worth the wait! Gather your ingredients, follow the steps, and get ready to enjoy these fudgy, crackled delights. Bake a batch today and share the joy with your loved ones! I encourage you to experiment with variations and make this recipe your own. Happy baking!