
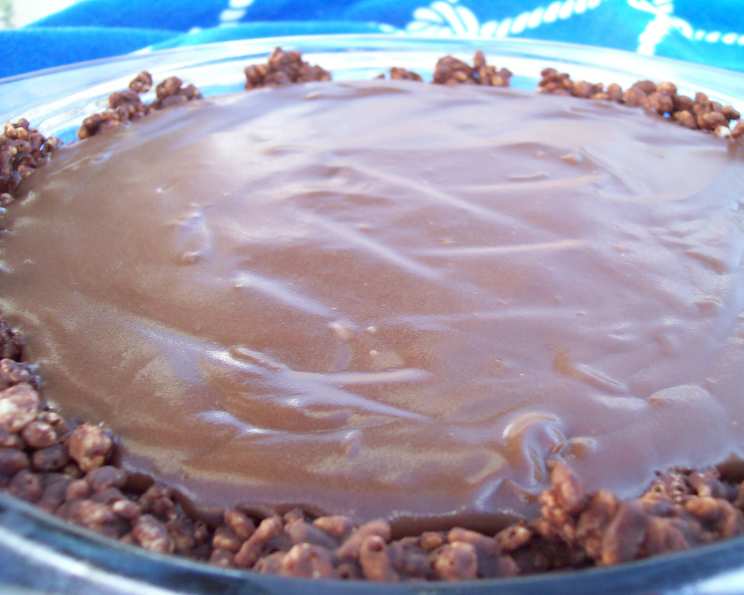
Chocolate Crispy Pie: A Symphony of Textures and Flavors
The first time I tasted anything remotely like this pie, I was a kid, standing on a wobbly stool in my grandmother’s kitchen. The aroma of warm chocolate and toasted rice cereal swirled around me as she carefully spread the still-warm filling into the crisp crust. It wasn’t fancy, but it was pure love – a comforting, decadent treat that instantly transported me to a place of pure happiness. This Chocolate Crispy Pie isn’t just dessert; it’s a memory, a hug, a slice of pure, unadulterated joy. I’ve adapted it over the years to make it my own, but the spirit of that original, heartwarming recipe remains the same.
Recipe Overview
- Prep Time: 45 minutes (includes chilling)
- Cook Time: 10 minutes
- Total Time: 2 hours 55 minutes
- Servings: 6
- Yield: 1 pie
- Dietary Type: Not specified
Ingredients
- For the Crust:
- 1/3 cup butter
- 1 (6 ounce) package semi-sweet chocolate chips
- 2 1/2 cups crispy rice cereal
- For the Filling:
- 1 cup sugar
- 1/2 cup flour
- 1/3 cup cocoa powder
- 1/2 cup cold water
- 2 cups boiling water
- 1/4 cup butter
- 1 teaspoon vanilla
- Topping:
- 1/2 cup whipping cream, whipped
Equipment Needed
- Saucepan
- 9-inch pie plate
- Whisk
- Mixing bowl
- Cling wrap
- Measuring cups and spoons
Instructions
- Prepare the Crust: In a saucepan over medium heat, melt 1/3 cup butter. Be careful not to burn the butter; low and slow is the key here.
- Melt the Chocolate: Add the 6-ounce package of semi-sweet chocolate chips to the melted butter. Stir constantly until the chocolate is completely melted and smooth. Remove from heat.
- Coat the Cereal: Add the 2 1/2 cups of crispy rice cereal to the melted chocolate mixture. Mix until the cereal is thoroughly coated with the chocolate. Ensure every piece is covered for optimal crispiness and flavor.
- Form the Crust: Place the chocolate-covered cereal mixture into a greased 9-inch pie plate. Using your fingers or the back of a spoon, press the mixture firmly and evenly against the bottom and up the sides of the pie plate to create a well-formed crust.
- Chill the Crust: Chill the crust in the refrigerator for at least 30 minutes, or until it is firm. This allows the crust to set properly and prevents it from crumbling when you add the filling.
- Combine Dry Ingredients (Filling): In a separate saucepan, combine 1 cup sugar, 1/2 cup flour, and 1/3 cup cocoa powder.
- Create a Paste: Whisk in 1/2 cup cold water until a thick paste forms. This step is crucial for preventing lumps in the filling.
- Incorporate Boiling Water: Gradually whisk in 2 cups boiling water. Adding it slowly and whisking constantly will ensure a smooth and consistent mixture.
- Cook the Filling: Cook the mixture over medium heat, whisking constantly, until it thickens. This typically takes about 10 minutes. Continue whisking to prevent scorching. The pudding is ready when it coats the back of a spoon.
- Finish the Filling: Remove the saucepan from the heat and stir in 1/4 cup butter and 1 teaspoon vanilla. These ingredients add richness and enhance the overall flavor of the filling.
- Cool the Pudding: Transfer the pudding to a bowl. Place a piece of cling wrap directly on the surface of the pudding to prevent a skin from forming while it cools. Allow the pudding to cool completely.
- Assemble the Pie: Once the pudding has cooled, pour it into the cooled pie shell.
- Refrigerate: Refrigerate the pie for at least 2 hours, or until the filling is completely set. This allows the flavors to meld together and the filling to firm up.
- Garnish and Serve: Top the pie with 1/2 cup whipped cream before serving.
Expert Tips & Tricks
- Crispy Crust Secret: For an extra crispy crust, you can lightly toast the rice cereal in a dry pan before mixing it with the melted chocolate and butter. This will enhance its nutty flavor and provide a more satisfying crunch.
- Lump-Free Filling: To ensure a perfectly smooth filling, sift the flour and cocoa powder before combining them with the sugar. This will prevent any lumps from forming during cooking.
- Preventing a Skin: Covering the pudding with cling wrap is essential for preventing a skin. Make sure the cling wrap is touching the entire surface of the pudding to effectively block air exposure.
- Chocolate Intensity: Adjust the amount of cocoa powder to control the richness of the filling. Use dark cocoa powder for a deeper, more intense chocolate flavor, or stick with regular cocoa powder for a milder taste.
- Make Ahead: The filling can be made a day in advance. Just store it in the refrigerator with cling wrap pressed against the surface. The crust can also be made ahead and stored in an airtight container at room temperature.
Serving & Storage Suggestions
Serve the Chocolate Crispy Pie chilled, topped with a generous dollop of freshly whipped cream. For an extra touch of elegance, you can sprinkle some cocoa powder or chocolate shavings on top. Leftover pie should be stored in the refrigerator, covered, and will keep for up to 3 days. While it can be frozen, the texture of the crust might change slightly upon thawing. It’s best enjoyed fresh for optimal crispness. The pie is best served cold and isn’t typically reheated.
Nutritional Information
| Nutrient | Amount per Serving | % Daily Value |
|---|---|---|
| Calories | 584.7 kcal | N/A |
| Calories from Fat | 311 g | 53% |
| Total Fat | 34.6 g | 53% |
| Saturated Fat | 21.4 g | 106% |
| Cholesterol | 74.6 mg | 24% |
| Sodium | 230 mg | 9% |
| Total Carbohydrate | 72.5 g | 24% |
| Dietary Fiber | 3.6 g | 14% |
| Sugars | 49.9 g | 199% |
| Protein | 4.6 g | 9% |
Note: Nutritional information is an estimate and may vary based on specific ingredients and preparation methods.
Variations & Substitutions
- Gluten-Free Option: Use gluten-free crispy rice cereal to make the crust gluten-free. Ensure the chocolate chips are also gluten-free.
- Dairy-Free Version: Substitute the butter in the crust and filling with a dairy-free butter alternative. Use non-dairy whipped topping instead of regular whipped cream.
- Peanut Butter Twist: Add a layer of peanut butter between the crust and the filling for a delicious peanut butter chocolate combination.
- Mint Chocolate: Add a few drops of peppermint extract to the chocolate filling for a refreshing mint chocolate flavor.
- Espresso Infusion: Stir a teaspoon of instant espresso powder into the chocolate filling for a mocha flavor boost.
FAQs (Frequently Asked Questions)
Q: Why is it important to grease the pie plate before pressing in the crust?
A: Greasing the pie plate prevents the chocolate crispy crust from sticking, making it easier to remove slices cleanly.
Q: How can I prevent the crust from becoming soggy?
A: Make sure the filling is completely cooled before pouring it into the crust. Also, refrigerate the pie for the recommended time to allow the filling to set properly.
Q: What can I use if I don’t have whipping cream?
A: You can substitute whipped cream with whipped topping or a dollop of vanilla ice cream.
Q: Can I use a pre-made graham cracker crust instead?
A: Yes, you can use a pre-made graham cracker crust if you prefer, but the crispy rice cereal crust adds a unique texture and flavor.
Q: How long will the pie last in the refrigerator?
A: The pie will last for up to 3 days in the refrigerator, stored in an airtight container.
Final Thoughts
I hope this Chocolate Crispy Pie brings you as much joy as it has brought me and my family over the years. It’s a comforting, easy-to-make dessert that’s perfect for any occasion. Don’t be afraid to experiment with variations to make it your own signature creation. And please, share your baking adventures and feedback – I’d love to hear how your pie turns out! Consider pairing it with a rich coffee or a glass of cold milk for the ultimate indulgence. Happy baking!