
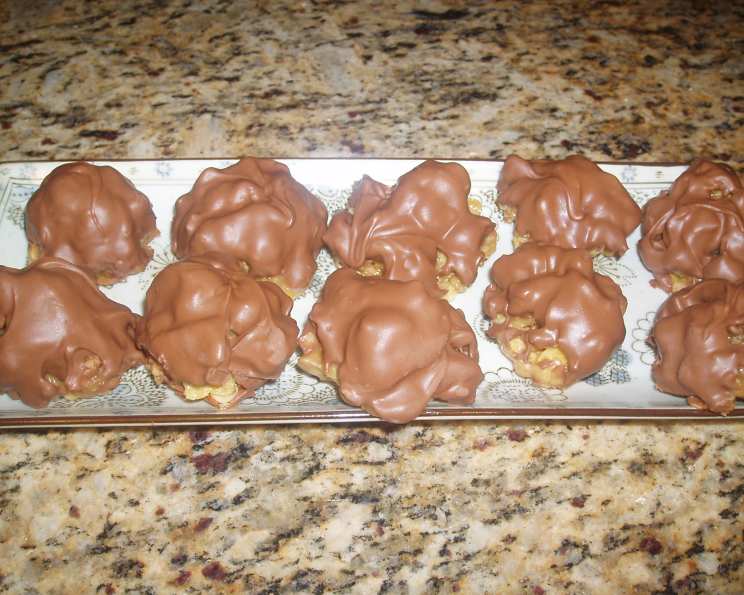
Chocolate-Dipped Snowballs: A Holiday Treat
The aroma of melting marshmallows always transports me back to childhood Christmases. I remember huddling around the kitchen table with my cousins, our little hands sticky with melted butter and sugary cereal, as we attempted to roll these very snowballs into perfectly round shapes. Of course, most of them ended up more like oddly-shaped blobs, but the taste was always pure holiday magic – a sweet, crunchy, chocolatey delight that we couldn’t get enough of. Now, years later, I cherish the chance to recreate that simple joy with my own family.
Recipe Overview
- Prep Time: 20 minutes
- Cook Time: 5 minutes
- Total Time: 45 minutes (includes refrigeration)
- Yields: 24 balls
- Serves: 24
- Dietary Type: Vegetarian
Ingredients
- 1/4 cup butter
- 1 (10 ounce) package Jet-Puffed Marshmallows
- 1 (7 ounce) container Baker’s Dipping Chocolate
- 5 cups Post Honey Bunches of Oats cereal, with almonds
Equipment Needed
- Large saucepan
- Wax paper
- Baking sheet
Instructions
-
Begin by melting the butter in a large saucepan over low heat. Patience is key here; you want the butter to melt gently without browning.
-
Add the Jet-Puffed Marshmallows to the melted butter. Continue cooking over low heat for about 5 minutes, or until the marshmallows are completely melted and the mixture is well blended. Stir the mixture occasionally to prevent scorching and ensure even melting. The final mixture should be smooth and glossy.
-
Remove the saucepan from the heat. It’s crucial to take it off the heat at this stage to prevent the cereal from becoming soggy.
-
Stir in the Post Honey Bunches of Oats cereal, with almonds. Gently fold the cereal into the marshmallow mixture until it is evenly coated. Be careful not to crush the cereal too much; you want to maintain its crunchy texture.
-
Allow the mixture to cool slightly. This will make it easier to handle and prevent burning your hands when shaping the snowballs. It should be cool enough to touch but still pliable.
-
With moistened hands, shape the mixture into 24 balls. The water will prevent the mixture from sticking to your hands. Aim for a uniform size for each snowball. Place the formed balls on a baking sheet covered with wax paper.
-
Cool the snowballs completely on the wax paper-covered baking sheet. This step is important to allow the snowballs to firm up before dipping them in chocolate.
-
Heat the Baker’s Dipping Chocolate as directed on the container. Follow the instructions carefully to avoid burning the chocolate. Typically, this involves melting it in the microwave in short intervals, stirring in between, or using a double boiler.
-
Dip the top of each snowball in the melted chocolate. Ensure that the chocolate is evenly distributed over the top surface. Gently shake off any excess chocolate.
-
Return the chocolate-dipped snowballs to the baking sheet, placing them dipped-side up.
-
Refrigerate the baking sheet for 15 minutes, or until the chocolate is firm. This will set the chocolate and give the snowballs a nice, crisp finish.
-
Serve and enjoy! These taste fantastic with any flavor of Post Honey Bunches of Oats, so feel free to experiment with different varieties.
Expert Tips & Tricks
- Marshmallow Melting Mastery: For the smoothest marshmallow mixture, use fresh marshmallows. Stale marshmallows tend to clump and take longer to melt.
- Preventing Sticky Situations: Moisten your hands frequently with water when shaping the snowballs to prevent the mixture from sticking. Alternatively, you can lightly grease your hands with butter or cooking spray.
- Chocolate Tempering (Optional): For a professional-looking, glossy chocolate finish, consider tempering the chocolate. This involves carefully heating and cooling the chocolate to specific temperatures, resulting in a more stable and shiny coating. However, for this simple recipe, the dipping chocolate works perfectly well without tempering.
- Even Chocolate Coverage: Use a fork or dipping tools to ensure even chocolate coverage. Tap the fork gently against the edge of the bowl to remove excess chocolate.
- Flavor Boost: Add a pinch of sea salt to the melted chocolate to enhance the sweetness and create a more complex flavor profile.
- Make-Ahead Magic: The undipped snowballs can be made a day or two in advance and stored in an airtight container at room temperature. This allows you to break up the preparation process and save time on the day of serving.
Serving & Storage Suggestions
These Chocolate-Dipped Snowballs make a delightful addition to any holiday dessert platter. Arrange them attractively on a serving dish or package them in festive boxes for gifting.
Store leftover snowballs in an airtight container at room temperature for up to 3 days. For longer storage, refrigerate them for up to a week. The chocolate may bloom (develop a white coating) when refrigerated, but this does not affect the taste.
Freezing is not recommended as it can alter the texture of the cereal.
Nutritional Information
| Nutrient | Amount per Serving | % Daily Value |
|---|---|---|
| Calories | 87.6 kcal | N/A |
| Calories from Fat | 21 g | 25% |
| Total Fat | 2.4 g | 3% |
| Saturated Fat | 1.3 g | 6% |
| Cholesterol | 5.1 mg | 1% |
| Sodium | 76.6 mg | 3% |
| Total Carbohydrate | 16.5 g | 5% |
| Dietary Fiber | 0.4 g | 1% |
| Sugars | 8.7 g | 34% |
| Protein | 0.8 g | 1% |
Variations & Substitutions
- Cereal Swaps: Experiment with different types of cereal. Rice Krispies, Cheerios, or even crushed graham crackers can be used in place of Honey Bunches of Oats. Consider using a gluten-free cereal option to make these snowballs gluten-free.
- Nutty Additions: Add chopped nuts (walnuts, pecans, or almonds) to the cereal mixture for extra crunch and flavor.
- Flavor Extracts: Incorporate a few drops of vanilla extract, almond extract, or peppermint extract into the melted marshmallow mixture for added flavor.
- Chocolate Alternatives: Use white chocolate or dark chocolate for dipping instead of milk chocolate.
- Sprinkles: Decorate the chocolate-dipped snowballs with festive sprinkles before the chocolate sets.
- Vegan option: Substitute butter with a vegan butter alternative and ensure that the cereal and chocolate are vegan friendly.
FAQs (Frequently Asked Questions)
Q: Can I use a different type of dipping chocolate?
A: Absolutely! Feel free to experiment with dark chocolate, white chocolate, or even flavored melting wafers. Just be sure to follow the melting instructions on the package.
Q: My marshmallow mixture is too sticky. What can I do?
A: Make sure you’re using low heat when melting the marshmallows. If the mixture is still too sticky, try adding a little bit more cereal to absorb some of the excess moisture. Also, remember to moisten your hands when shaping the balls.
Q: Can I make these ahead of time?
A: Yes, you can make the cereal balls a day or two in advance and store them in an airtight container at room temperature. Dip them in chocolate just before serving.
Q: What can I do if my chocolate seizes up while melting?
A: This can happen if even a tiny drop of water gets into the chocolate. Unfortunately, seized chocolate is difficult to salvage. The best prevention is to use completely dry utensils and bowls.
Q: My chocolate is blooming (has a white coating). Is it still safe to eat?
A: Yes, chocolate bloom is a harmless phenomenon that occurs when the fat or sugar crystals separate and rise to the surface. The chocolate is still perfectly safe to eat, though the texture may be slightly different.
Final Thoughts
These Chocolate-Dipped Snowballs are a guaranteed crowd-pleaser, perfect for holiday gatherings, bake sales, or simply a sweet treat to enjoy with a cup of hot cocoa. Don’t be afraid to get creative with variations and make them your own. Share your creations with friends and family, and most importantly, have fun in the kitchen! Whether you are making them with kids or by yourself, the simple joy of making these snowballs is part of the holiday experience.