
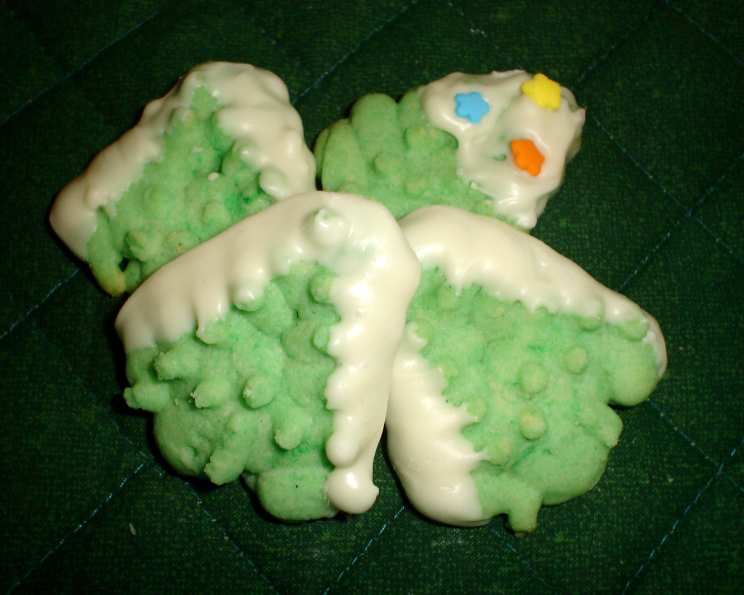
Chocolate-Dipped Spritz Cookies: A Holiday Classic
The scent of warm butter and vanilla always takes me back to my grandmother’s kitchen during the holidays. As a child, I would eagerly watch her crank out these delicate, intricately shaped spritz cookies from her well-worn cookie press. The rhythmic chunk-chunk of the press, the anticipation of the first bite, the pure joy of decorating them with colorful sprinkles – these are memories I cherish, and now, I’m excited to share this time-honored recipe with you.
Recipe Overview
- Prep Time: 20 minutes
- Cook Time: 7-9 minutes
- Total Time: 30 minutes
- Yield: Approximately 4-6 dozen cookies
- Dietary Type: Not specified, contains dairy and eggs
Ingredients
- 1 cup butter, softened
- ¾ cup sugar
- 1 large egg
- 1 teaspoon vanilla extract
- 2 ¼ cups all-purpose flour
- ½ teaspoon salt
- ¼ teaspoon baking powder
- 11 ounces white candy coating or 11 ounces milk chocolate confectionary coating
- Nuts (optional, finely ground) or candy sprinkles (optional)
Equipment Needed
- Mixing bowl
- Electric mixer
- Cookie press
- Un-greased cookie sheets
- Cooling rack
- Double boiler or microwave-safe bowl
- Wax paper
Instructions
-
Begin by creaming together the softened butter and sugar in a mixing bowl. Use an electric mixer to achieve a light and fluffy consistency. This step is crucial for creating tender cookies, so don’t rush it!
-
Beat in the egg and vanilla extract until well combined. The egg helps bind the ingredients and adds richness, while the vanilla enhances the overall flavor profile.
-
In a separate bowl, combine the flour, salt, and baking powder. Whisk these dry ingredients together to ensure even distribution. This prevents pockets of salt or baking powder in your cookies.
-
Gradually add the dry ingredients to the creamed mixture, mixing on low speed until just combined. Be careful not to overmix the dough, as this can develop the gluten in the flour, resulting in tough cookies.
-
Load the dough into a cookie press fitted with your desired shape. A star or Christmas tree shape is classic, but feel free to get creative!
-
Press the dough directly onto ungreased cookie sheets. Hold the cookie press firmly against the sheet and press the trigger to release the dough. Lift the press straight up to create clean, defined shapes.
-
Bake in a preheated oven at 375°F (190°C) for 7-9 minutes. The original recipe cautions against browning, but a slight browning around the edges can add a delicious crispness to the bottoms of the cookies. Keep a close eye on them to prevent burning.
-
Remove the cookies from the oven and transfer them to a cooling rack to cool completely. This prevents them from becoming soggy on the baking sheet.
-
While the cookies are cooling, melt the confectionary coating according to package directions. You can use a double boiler for a gentle, controlled melt or microwave in short intervals, stirring frequently to prevent burning.
-
Dip each cookie halfway into the melted confectionary coating. Allow any excess coating to drip back into the bowl.
-
Immediately sprinkle the dipped portion of the cookie with finely ground nuts or candy sprinkles, if desired. Get creative with your decorations!
-
Place the decorated cookies on wax paper to harden completely. This usually takes about 30 minutes at room temperature.
Expert Tips & Tricks
- Soft Butter is Key: Ensure your butter is properly softened for optimal creaming. It should be pliable but not melted.
- Don’t Overmix: Overmixing develops gluten and can result in tough cookies. Mix until just combined.
- Chill the Dough: If the dough becomes too soft to press, chill it in the refrigerator for 15-20 minutes to firm it up.
- Cookie Press Issues: If the dough isn’t releasing properly from the press, try adding a tablespoon of milk or cream to soften it slightly.
- Melt Chocolate Smoothly: When melting the chocolate coating, add a teaspoon of vegetable shortening or coconut oil to create a smoother, glossier finish.
- Elevate the Flavor: Experiment with different extracts, such as almond, lemon, or peppermint, to add unique flavor profiles to the cookies.
- Make Ahead: The dough can be made ahead of time and stored in the refrigerator for up to 3 days. Let it soften slightly before using.
Serving & Storage Suggestions
Serve these delightful cookies on a festive platter alongside other holiday treats. They pair perfectly with a warm mug of hot chocolate, coffee, or tea.
Store cooled and decorated cookies in an airtight container at room temperature for up to 5 days. For longer storage, freeze undecorated cookies for up to 2 months. Thaw completely before decorating. Avoid stacking the decorated cookies directly on top of each other as the chocolate may get smudged.
Nutritional Information
(Estimated values per cookie – based on a yield of 6 dozen and using milk chocolate coating)
| Nutrient | Amount per Serving | % Daily Value |
|---|---|---|
| Calories | 70 kcal | 4% |
| Total Fat | 4g | 6% |
| Saturated Fat | 2.5g | 13% |
| Cholesterol | 10mg | 3% |
| Sodium | 35mg | 2% |
| Total Carbohydrate | 8g | 3% |
| Dietary Fiber | 0g | 0% |
| Sugars | 4g | N/A |
| Protein | 0.5g | 1% |
Variations & Substitutions
- Gluten-Free: Substitute the all-purpose flour with a gluten-free blend. You may need to add a binder like xanthan gum for a better texture.
- Dairy-Free: Use a plant-based butter alternative and dairy-free chocolate coating.
- Flavor Variations: Add citrus zest (lemon, orange) to the dough for a bright, refreshing flavor.
- Chocolate Coating: Experiment with different types of chocolate, such as dark chocolate, semi-sweet chocolate, or even flavored chocolate like peppermint or raspberry.
- Decorations: Use different types of sprinkles, chopped nuts, or even edible glitter for a festive touch.
- Seasonal Adaptations: During the fall, add a teaspoon of pumpkin pie spice to the dough. In the spring, decorate with pastel-colored sprinkles.
FAQs (Frequently Asked Questions)
Q: My cookie dough is too sticky to press. What should I do?
A: Wrap the dough in plastic wrap and chill it in the refrigerator for 15-20 minutes to firm it up.
Q: Can I use a piping bag instead of a cookie press?
A: While you can try, the dough is designed for a cookie press and may be too thick for piping. The resulting cookies may not hold their shape as well.
Q: My cookies are spreading too much in the oven. What am I doing wrong?
A: Make sure your oven temperature is accurate and that you are using the correct amount of flour. Also, ensure your butter is not too soft or melted.
Q: How can I prevent the chocolate from cracking after it hardens?
A: Tempering the chocolate will help prevent cracking. You can find instructions on how to temper chocolate online or in cookbooks.
Q: Can I freeze the baked cookies?
A: Yes, you can freeze the baked cookies, but it’s best to freeze them undecorated. Thaw completely before decorating.
Final Thoughts
These Chocolate-Dipped Spritz Cookies are more than just a treat; they’re a tradition, a memory waiting to be made. Whether you’re baking them for a holiday gathering, a special occasion, or simply to brighten someone’s day, I hope this recipe brings you as much joy as it has brought me over the years. Don’t be afraid to experiment with different flavors and decorations to create your own unique twist. And most importantly, share your creations with loved ones and savor every delicious bite. Happy baking!