
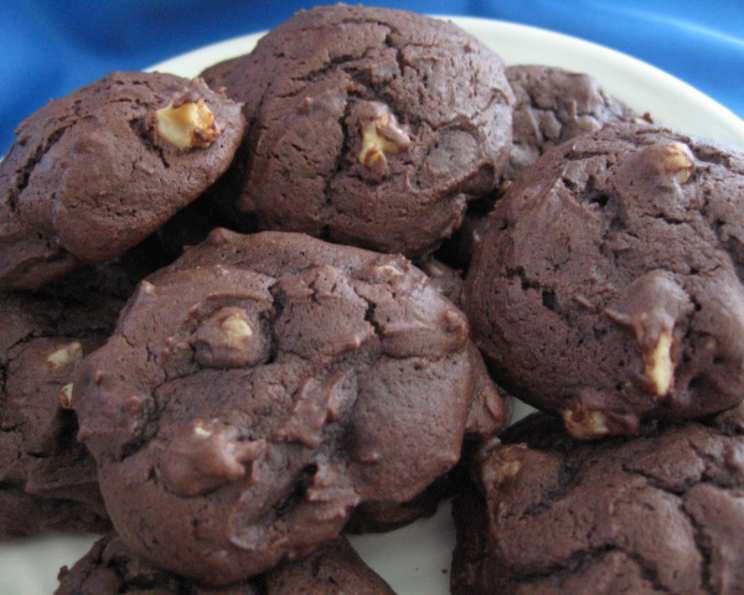
Chocolate Drop Cookies: A Taste of Nostalgia
The scent of chocolate always takes me back. It’s not just any chocolate, but the specific aroma of cocoa baking in the oven, the kind that promises warm, comforting treats. My grandmother, a woman of few words but many delicious recipes, always seemed to have a batch of chocolate drop cookies ready for us grandkids. They weren’t fancy, but they were perfect – soft, chewy, and deeply chocolatey, a simple pleasure that made every visit feel like a special occasion. The memory of those cookies is forever intertwined with her love, a silent language spoken through every bite.
Recipe Overview
- Prep Time: 20 minutes
- Cook Time: 8-10 minutes
- Total Time: 1 hour 20-30 minutes (includes chilling)
- Yields: 20-24 cookies
- Dietary Type: Not specified (contains dairy, eggs)
Ingredients
- 1/2 cup shortening
- 1 cup sugar
- 1 egg
- 3/4 cup sour milk (see note below for substitution)
- 1 teaspoon vanilla
- 1 3/4 cups sifted flour
- 1/2 teaspoon baking soda
- 1/2 teaspoon salt
- 1/2 cup cocoa
- 1/2 cup chopped nuts (optional)
Equipment Needed
- Mixing bowls
- Measuring cups and spoons
- Sifter
- Cookie sheet
- Greased cookie sheet
- Spatula
Instructions
-
In a large mixing bowl, mix together the shortening, sugar, and egg until well combined and creamy. This is best achieved with an electric mixer, but a sturdy spoon and some elbow grease will work too.
-
Stir in the sour milk and vanilla extract until evenly incorporated. The mixture might look a little curdled, but don’t worry, it will all come together beautifully.
-
In a separate bowl, sift together the flour, baking soda, salt, and cocoa. This step is crucial for preventing lumps and ensuring a tender cookie. Sifting aerates the dry ingredients, resulting in a lighter texture.
-
Gradually add the dry ingredients to the wet ingredients, stirring until just combined. Be careful not to overmix, as this can lead to tough cookies.
-
If desired, add the chopped nuts and stir to distribute them evenly throughout the dough. Walnuts, pecans, or even hazelnuts would work wonderfully.
-
Chill the dough for 1 hour in the refrigerator. This step is essential for preventing the cookies from spreading too much during baking. Chilling allows the fats in the shortening to solidify, which helps the cookies hold their shape.
-
Preheat your oven to 375°F (190°C). Make sure your oven rack is in the center position for even baking.
-
Drop the dough by spoonfuls onto a greased cookie sheet, leaving some space between each cookie to allow for spreading. I like to use a small cookie scoop for uniform sizes.
-
Bake for 8-10 minutes, or until the edges of the cookies are set and the centers are still slightly soft. Keep a close eye on them, as baking times can vary depending on your oven.
-
Remove the cookie sheet from the oven and let the cookies cool on the sheet for a few minutes before transferring them to a wire rack to cool completely.
Note: If you don’t have sour milk on hand, you can easily make your own by adding 1 tablespoon of vinegar to plain milk. Let it sit for a few minutes until it curdles. This substitution works just as well as commercially prepared sour milk.
Expert Tips & Tricks
- For extra chewy cookies, try using brown sugar instead of granulated sugar.
- To intensify the chocolate flavor, add a tablespoon of instant espresso powder to the dry ingredients.
- Don’t have shortening? Softened butter works as a substitute, though it may slightly alter the texture.
- If your cookies spread too thin, chill the dough for a longer period or add a tablespoon or two of flour.
- For perfectly round cookies, use a round cookie cutter to gently nudge the edges of the cookies back into shape as soon as they come out of the oven.
Serving & Storage Suggestions
These chocolate drop cookies are delightful served warm with a glass of cold milk, a scoop of vanilla ice cream, or a cup of hot coffee. They are also perfect for packing in lunchboxes or gifting to friends and neighbors.
To store, keep the cookies in an airtight container at room temperature for up to 3 days. For longer storage, freeze them in a single layer on a baking sheet, then transfer them to a freezer bag or container. Frozen cookies will last for up to 2 months. Thaw at room temperature before serving. You can also reheat them briefly in a low oven or microwave for a warm, gooey treat.
Nutritional Information
(Estimated values – actual values may vary based on specific ingredients and portion sizes)
| Nutrient | Amount per Serving | % Daily Value |
|---|---|---|
| Calories | 150 kcal | 8% |
| Total Fat | 7g | 11% |
| Saturated Fat | 2g | 10% |
| Cholesterol | 15mg | 5% |
| Sodium | 100mg | 4% |
| Total Carbohydrate | 20g | 7% |
| Dietary Fiber | 1g | 4% |
| Sugars | 11g | N/A |
| Protein | 2g | 4% |
Variations & Substitutions
- Gluten-Free: Substitute the all-purpose flour with a gluten-free flour blend, ensuring it contains xanthan gum for binding.
- Dairy-Free: Use a non-dairy milk alternative such as almond, soy, or oat milk in place of the sour milk. Also, use a dairy-free shortening or vegan butter substitute.
- Nut-Free: Simply omit the chopped nuts or replace them with sunflower seeds or chocolate chips.
- Spiced Chocolate: Add a pinch of cinnamon, nutmeg, or cardamom to the dry ingredients for a warm, spiced flavor.
- Chocolate Chip Variation: Replace half of the cocoa powder with chocolate chips for added texture and sweetness.
FAQs (Frequently Asked Questions)
Q: Why do I need to chill the dough?
A: Chilling the dough solidifies the fats, preventing the cookies from spreading too thin during baking and resulting in a chewier texture.
Q: Can I use plain milk instead of sour milk?
A: Yes, you can sour the milk by adding 1 tablespoon of vinegar to plain milk and letting it sit for a few minutes.
Q: How do I know when the cookies are done?
A: The cookies are done when the edges are set and the centers are still slightly soft. They will continue to firm up as they cool.
Q: Can I freeze the cookie dough?
A: Yes, you can freeze the dough for up to 2 months. Wrap it tightly in plastic wrap and then in a freezer bag. Thaw in the refrigerator before baking.
Q: Why are my cookies dry?
A: Overbaking is the most common cause of dry cookies. Make sure to bake them only until the edges are set and the centers are still slightly soft. Also, be careful not to overmix the dough.
Final Thoughts
These chocolate drop cookies are more than just a sweet treat; they’re a reminder of simple joys and cherished memories. The aroma of chocolate baking in the oven fills the kitchen with warmth and nostalgia, inviting you to slow down and savor the moment. Whether you’re baking them for your family, friends, or yourself, I hope these cookies bring a little bit of happiness to your day. Don’t hesitate to experiment with different variations and substitutions to create your own signature version. And most importantly, enjoy the process! Consider pairing these cookies with a rich, dark roast coffee, or a light, fruity red wine for a delightful after-dinner experience. Happy baking!