
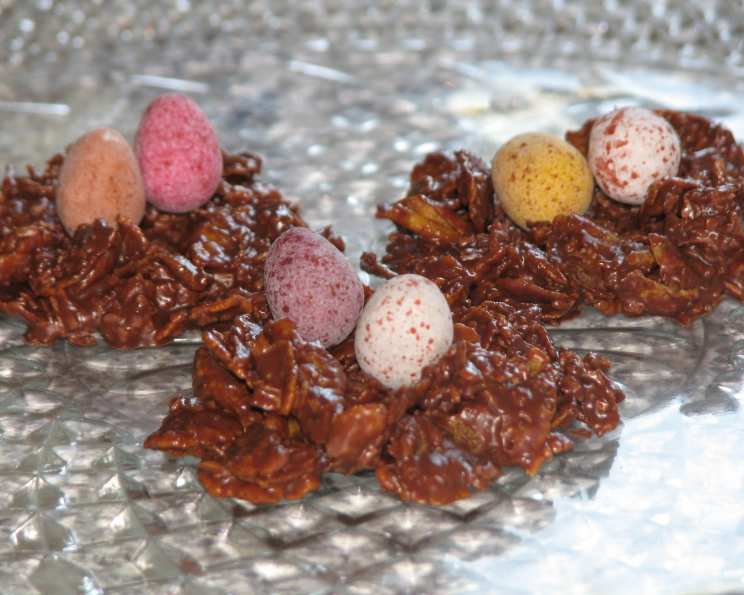
Chocolate Easter Nests: A Sweet Family Tradition
Every Easter, without fail, a wave of nostalgia washes over me as the aroma of melting chocolate fills the kitchen. It’s a scent inextricably linked to my childhood, to egg hunts in the backyard, and to the slightly sticky, chocolate-covered fingers that always followed. These aren’t just any chocolate treats; they’re Chocolate Easter Nests, a recipe passed down from my mother – its origins now lost to time – and a cornerstone of our family’s Easter celebrations. The anticipation of crafting these simple yet delightful nests, then carefully placing the colorful jelly bean “eggs” inside, is a tradition I eagerly anticipate sharing with generations to come.
Recipe Overview
- Prep Time: 15 minutes
- Cook Time: 5 minutes
- Total Time: 20 minutes (plus 30 minutes refrigeration)
- Servings: 20 nests
- Yield: 20 nests
- Dietary Type: Vegetarian
Ingredients
- 9 ¾ ounces plain chocolate candy bars (such as Hershey’s)
- 4 ounces German sweet chocolate
- 4 ounces shredded coconut
- 2 cups crushed corn flakes
- 1 (12 ounce) bag jelly beans
Equipment Needed
- Double boiler or heat-safe bowl and saucepan
- Wax paper
- Spoon
- Refrigerator
Instructions
-
Begin by preparing your workspace. Lay out a large sheet of wax paper on a flat surface. This will prevent the nests from sticking.
-
Now, it’s time to melt the chocolate. Using a double boiler or a heat-safe bowl set over a simmering pot of water, combine the 9 ¾ ounces of plain chocolate candy bars and the 4 ounces of German sweet chocolate. Ensure the bowl doesn’t touch the water.
-
Stir the chocolate frequently until it’s completely melted and smooth. Be patient and keep the heat low to prevent the chocolate from seizing or burning.
-
Remove the melted chocolate from the heat. Quickly add the 4 ounces of shredded coconut and the 2 cups of crushed corn flakes.
-
Using a sturdy spoon, stir the mixture thoroughly until the coconut and corn flakes are evenly coated in the luscious chocolate. Make sure every flake is covered for the best texture and flavor.
-
Working quickly, drop spoonfuls of the chocolate mixture onto the prepared wax paper. Aim for approximately one tablespoon per nest.
-
Before the chocolate sets, use the back of a spoon or your fingers (lightly oiled to prevent sticking) to shape each spoonful into a nest. Gently create an indentation in the center of each nest to hold the jelly beans.
-
While the chocolate is still soft, carefully place two jelly beans into the indentation of each nest. Choose your favorite colors for a vibrant and festive touch.
-
Carefully transfer the wax paper with the nests onto a baking sheet or large plate.
-
Place the nests in the refrigerator for about 30 minutes to allow the chocolate to fully set and harden. This will make them easier to handle.
-
Once the chocolate has hardened, gently peel the nests off the wax paper.
-
Serve immediately and enjoy the sweet taste of this Easter tradition!
Expert Tips & Tricks
- For a richer flavor, consider using a higher quality of chocolate. Semi-sweet or dark chocolate adds depth and complexity.
- If you don’t have a double boiler, you can melt the chocolate in the microwave in 30-second intervals, stirring in between, to prevent burning.
- To prevent the chocolate from sticking to your fingers while shaping the nests, lightly dampen your fingers with water or coat them with a little vegetable oil.
- If you want to make the nests ahead of time, store them in an airtight container in the refrigerator. They can be made up to a week in advance.
- For a fun twist, add a pinch of sea salt to the chocolate mixture to enhance the sweetness and create a salty-sweet flavor profile.
Serving & Storage Suggestions
These Chocolate Easter Nests are best served chilled or at room temperature. Arrange them attractively on a platter or in a basket lined with Easter-themed paper.
Store any leftover nests in an airtight container in the refrigerator. They will keep for up to a week. You can also freeze them for longer storage (up to 2 months), but the texture of the chocolate may change slightly upon thawing. If frozen, allow the nests to thaw in the refrigerator before serving.
These nests are delightful on their own, or as part of an Easter dessert spread. Pair them with fresh fruit, other candies, or a refreshing glass of milk.
Nutritional Information
(Estimates based on available data and may vary depending on specific ingredients used.)
| Nutrient | Amount per Serving | % Daily Value |
|---|---|---|
| Calories | 205.8 kcal | N/A |
| Calories from Fat | 72 g | 35% |
| Total Fat | 8.1 g | 12% |
| Saturated Fat | 5.5 g | 27% |
| Cholesterol | 3.2 mg | 1% |
| Sodium | 55.6 mg | 2% |
| Total Carbohydrate | 32.8 g | 10% |
| Dietary Fiber | 1.1 g | 4% |
| Sugars | 24.8 g | N/A |
| Protein | 1.6 g | 3% |
Variations & Substitutions
- Gluten-Free: Ensure that the corn flakes you use are certified gluten-free.
- Dairy-Free: Substitute the plain and German chocolate with a dairy-free chocolate alternative. You may also consider using a dairy-free margarine when melting the chocolate.
- Nut-Free: Ensure the chocolate and coconut you are using is nut-free, and use sunflower seeds instead of nuts, if nuts are an issue.
- Other Cereals: Experiment with other types of cereal, such as rice cereal or crispy wheat cereal, for a different texture.
FAQs (Frequently Asked Questions)
Q: Can I use a different type of chocolate?
A: Absolutely! Feel free to experiment with milk chocolate, dark chocolate, or even white chocolate for a unique twist.
Q: Can I make these nests ahead of time?
A: Yes, these nests can be made up to a week in advance. Store them in an airtight container in the refrigerator.
Q: What if my chocolate seizes while melting?
A: Try adding a teaspoon of vegetable oil or shortening to the chocolate and stirring gently. Sometimes this can help to smooth it out.
Q: Can I use different toppings instead of jelly beans?
A: Of course! Consider using mini chocolate eggs, sprinkles, or other small candies.
Q: How do I prevent the chocolate from sticking to the wax paper?
A: Ensure the wax paper is clean and dry. You can also lightly grease it with cooking spray for extra insurance.
Final Thoughts
These Chocolate Easter Nests are more than just a simple recipe; they’re a vessel for creating cherished memories and sharing joy with loved ones. Whether you’re continuing a family tradition or starting a new one, I encourage you to gather your ingredients, invite your family to join in, and experience the magic of making these delightful treats together. The smiles and laughter you share will be the sweetest ingredient of all. So go ahead, bake up some Easter joy and share your creations with the world! Don’t forget to let me know how they turn out!