
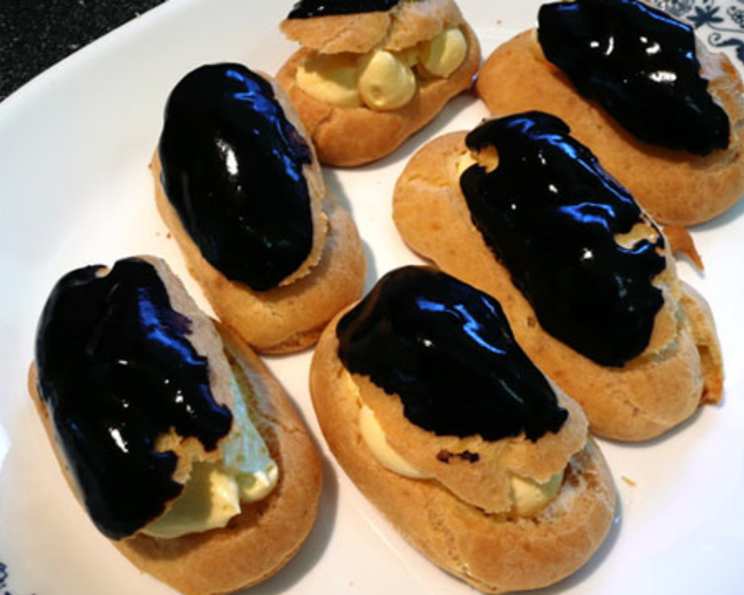
Mastering the Art of Chocolate Éclairs: A Classic Pastry Delight
The memory is as vivid as the first bite: my tiny hands, dusted with powdered sugar, reaching for the glistening chocolate-covered oblong. It was a rare treat, an eclair from the local bakery, brought home by my grandfather. The airy pastry, the cool cream filling, the satisfying snap of the chocolate – it was pure magic. Even now, decades later, that single eclair remains a symbol of simple joy and expertly crafted deliciousness. Recreating that experience in my own kitchen has become a treasured pursuit, and I’m delighted to share this wonderful recipe with you.
Recipe Overview
- Prep Time: 45 minutes
- Cook Time: 35-40 minutes
- Total Time: 1 hour 20-25 minutes
- Servings: 18
- Yield: Approximately 18 éclairs
- Dietary Type: Not suitable for Vegan, Dairy-Free, or Gluten-Free diets
Ingredients
-
For the Choux Pastry:
- 2 ounces (57g) unsalted butter, cut into cubes
- 1/4 pint (118ml) water
- 3 large eggs
- 2 1/2 ounces (71g) all-purpose flour, sifted
- 1 pinch salt
-
For the Chocolate Icing:
- (Use your favourite recipe or store-bought version)
-
For the Filling:
- (Use your favourite whipped cream recipe)
Equipment Needed
- Medium saucepan
- Wooden spoon
- Baking tray
- Piping bag with a 1/2 inch or 1 inch plain nozzle
- Wire rack
- Electric mixer (for whipping cream)
Instructions
- Prepare the Choux Pastry: Begin by melting the butter in a medium saucepan over medium heat.
- Add Water and Boil: Once the butter is melted, add the water to the saucepan and bring the mixture to a rolling boil. It’s important to ensure the butter is fully melted before the water boils.
- Incorporate Flour and Salt: Remove the saucepan from the heat. Immediately add the sifted flour and salt to the boiling mixture.
- Beat Vigorously: Using a wooden spoon, vigorously beat the flour and salt into the liquid until a smooth dough forms and pulls away from the sides of the pan. There should be no visible lumps of flour.
- Cook the Dough: Return the saucepan to low heat and continue to cook the dough, stirring constantly, for about 1-2 minutes. This step helps to dry out the dough slightly, which is crucial for achieving the proper texture. The dough should form a ball and leave a slight film on the bottom of the pan.
- Cool Slightly: Remove the saucepan from the heat and allow the dough to cool for a few minutes. This is essential to prevent the eggs from scrambling when added.
- Incorporate Eggs: Add one egg to the dough and beat it in thoroughly with the wooden spoon until it is fully incorporated. The dough will initially appear curdled, but continue beating until it becomes smooth and elastic again.
- Add Remaining Eggs: Add the remaining two eggs one at a time, beating well after each addition. Again, ensure each egg is fully incorporated before adding the next. The dough should be smooth, glossy, and have a pipeable consistency.
- Test the Consistency: To check the consistency, lift some of the dough with the wooden spoon. It should fall slowly and softly from the spoon, leaving a small amount clinging to the spoon. If the dough is too stiff, it will not puff up properly in the oven. If it’s too loose, the éclairs will spread out too thin.
- Prepare Piping Bag: Fit a piping bag with a 1/2 inch or 1 inch plain nozzle.
- Pipe the Éclairs: Transfer the choux pastry dough to the prepared piping bag. On a lightly greased baking tray, pipe out lengths of dough about 3-4 inches long. Leave some space between each eclair to allow for expansion during baking.
- Bake the Éclairs: Bake in a preheated oven at 350°F (175°C) for 35-40 minutes, or until the éclairs are golden brown and puffed up. It is absolutely crucial not to open the oven door during the first 25 minutes of baking, as this can cause the éclairs to collapse.
- Cool Completely: Once the éclairs are baked, turn off the oven and crack the door open slightly. Allow the éclairs to cool in the oven for about 10 minutes to help them dry out and prevent them from becoming soggy. Transfer the éclairs to a wire rack to cool completely before filling and icing.
- Prepare Whipped Cream: Make your favorite whipped cream recipe.
- Fill the Éclairs: Once the éclairs are completely cool, use a serrated knife to carefully slice them in half horizontally. Alternatively, you can use a piping bag fitted with a small nozzle to pipe the whipped cream into the éclairs through small holes poked in the bottom.
- Ice with Chocolate Icing: Prepare your favorite chocolate icing (store-bought is fine too!). Dip the top of each filled eclair into the melted chocolate icing, allowing any excess to drip off.
- Set the Icing: Place the iced éclairs back on the wire rack until the chocolate icing has set completely.
Expert Tips & Tricks
- Perfecting Choux Pastry: The key to successful choux pastry lies in the dough’s consistency. Too dry, and the éclairs won’t rise properly. Too wet, and they’ll spread and be flat. Practice makes perfect!
- Egg Size Matters: Large eggs are generally recommended for choux pastry. If your eggs are smaller, you may need to add a little extra water to the dough to achieve the correct consistency.
- Baking Time is Crucial: The baking time may vary slightly depending on your oven. Watch the éclairs carefully and adjust the baking time accordingly. The éclairs should be golden brown and feel light when lifted.
- Preventing Soggy Éclairs: Make sure the éclairs are completely cool before filling and icing them, as any residual heat can cause the whipped cream to melt and the icing to become runny.
- Piping Techniques: For even-sized éclairs, practice piping the dough onto the baking tray. Hold the piping bag at a 45-degree angle and apply consistent pressure.
Serving & Storage Suggestions
Serve the chocolate éclairs chilled or at room temperature. They are best enjoyed on the day they are made, as the choux pastry can become soggy over time.
- Storage: Store leftover éclairs in an airtight container in the refrigerator for up to 2 days. The pastry may soften slightly, but they will still be delicious.
- Freezing: You can freeze unfilled, baked choux pastry shells for up to 1 month. Thaw them completely at room temperature before filling and icing. It’s generally not recommended to freeze filled or iced éclairs, as the whipped cream and chocolate icing can become watery.
Nutritional Information
(Note: Nutritional information is an estimate and can vary based on specific ingredients and portion sizes.)
| Nutrient | Amount per Serving | % Daily Value |
|---|---|---|
| Calories | 250 kcal | 13% |
| Total Fat | 15g | 23% |
| Saturated Fat | 9g | 45% |
| Cholesterol | 100mg | 33% |
| Sodium | 150mg | 7% |
| Total Carbohydrate | 25g | 8% |
| Dietary Fiber | 1g | 4% |
| Sugars | 15g | – |
| Protein | 4g | 8% |
Variations & Substitutions
- Different Fillings: Experiment with different fillings, such as pastry cream, chocolate cream, or even fruit-flavored creams.
- Gluten-Free Éclairs: Use a gluten-free flour blend to make gluten-free choux pastry. Be sure to add a binder like xanthan gum.
- Different Icings: Try different icings, such as vanilla glaze, coffee glaze, or even a simple dusting of powdered sugar.
- Éclair shapes: Make smaller, round profiteroles instead of the traditional oblong eclair shape.
- Flavored Pastry: Infuse the water with citrus zest or vanilla bean when making the pastry for a subtle flavor.
FAQs (Frequently Asked Questions)
Q: Why are my éclairs not puffing up?
A: This is often due to the dough being too wet, the oven temperature being too low, or opening the oven door too early during baking.
Q: How can I prevent my éclairs from collapsing after baking?
A: Let the éclairs cool gradually in the oven with the door slightly ajar to help them dry out and maintain their shape.
Q: Can I make the choux pastry ahead of time?
A: Yes, you can make the choux pastry a few hours in advance and store it in the refrigerator in a piping bag.
Q: What is the best way to fill the éclairs?
A: You can either slice the éclairs in half horizontally and pipe the filling into the bottom half, or use a piping bag with a small nozzle to pipe the filling into the éclairs through small holes poked in the bottom.
Q: My chocolate icing is too thick. What can I do?
A: Add a small amount of warm milk or water to the icing and stir until it reaches the desired consistency.
Final Thoughts
Chocolate éclairs might seem intimidating, but with a little patience and attention to detail, you can master this classic pastry. Don’t be afraid to experiment with different fillings and icings to create your own signature version. The satisfaction of biting into a perfectly crafted eclair is truly rewarding. I hope you enjoy this recipe and share your creations with friends and family. Bon appétit!