
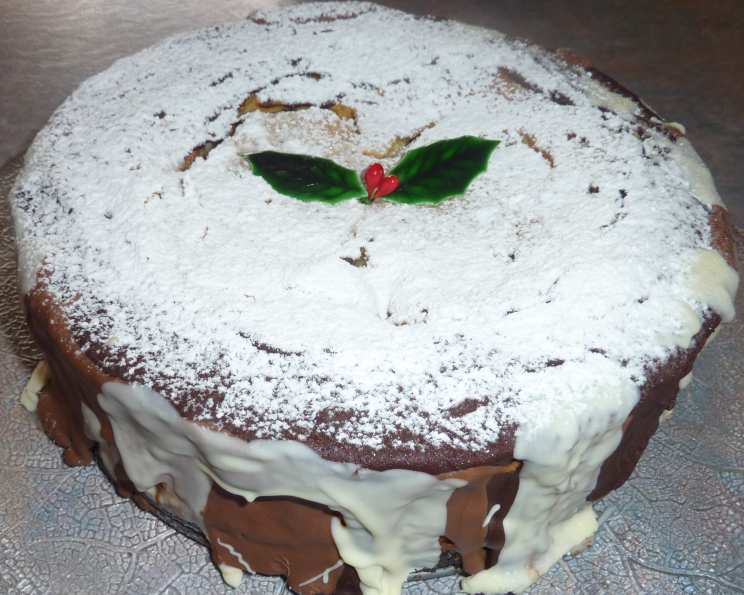
Chocolate Eruption Cheesecake: A Decadent Delight
I still remember the first time I tasted a cheesecake that wasn’t the traditional New York style. It was at a local bakery, and nestled amongst the lemon bars and chocolate croissants, sat a behemoth of a dessert labeled “Chocolate Eruption Cheesecake.” The name alone was enough to entice me, but the swirls of chocolate, the visible chunks of candy, and the promise of caramel were irresistible. One bite, and I was hooked. It was pure, unadulterated indulgence, a symphony of textures and flavors that danced across my palate. Today, I’m thrilled to share my version of that memorable treat, a recipe designed to create an explosion of chocolatey goodness in every bite.
Recipe Overview
- Prep Time: 30 minutes
- Cook Time: 45-55 minutes
- Total Time: Several hours (including chilling)
- Servings: 20
- Yield: 1 (10-inch) cheesecake
- Dietary Type: Not specified (Contains dairy, eggs, and gluten)
Ingredients
Bottom Crust:
- 1 1/4 cups chocolate cookie crumbs or 1 1/4 cups fine brownie crumbs
- 1/4 cup white chocolate, finely ground
- 3 tablespoons unsalted butter, melted
Filling:
- 2 1/2 lbs cream cheese, softened
- 1/2 cup sugar
- 1 (14 ounce) can condensed milk
- 5 eggs
- 1/3 cup light cream
- 2 tablespoons flour
- 1 tablespoon pure vanilla extract
- 1 pinch salt
- 1 1/2 cups white chocolate, coarsely chopped
- 1 cup semi-sweet chocolate chips or 1 cup coarsely chopped chocolate
- 2 cups coarsely chopped Snickers candy bars or 2 cups turtle candy bars
- 1 cup coarsely cut chunks brownie, homemade or prepared from a mix
- 1/2 cup caramel ice cream topping
Garnish:
- 1/4 cup melted white chocolate
- 1/4 cup melted semisweet chocolate
- 1/4 cup melted milk chocolate
- Chocolate shavings
- 1/4 cup powdered sugar
Equipment Needed
- 10-inch springform pan
- Mixing bowls
- Electric mixer
- Rubber spatula or wooden spoon
- Butter knife
Instructions
- Preheat your oven to 325 degrees F (160 degrees C). This lower temperature ensures even baking and helps prevent cracking.
- Spray a 10-inch springform pan generously with non-stick cooking spray. This step is crucial for easy release after baking. You can also line the bottom of the pan with parchment paper for extra insurance.
- In a medium bowl, mix the chocolate cookie crumbs (or brownie crumbs), finely ground white chocolate, and melted butter together until evenly combined. The mixture should resemble wet sand.
- Press the crumb mixture firmly into the bottom of the prepared springform pan to create a solid crust. Use the bottom of a measuring cup or your fingers to ensure it’s packed tightly and evenly.
- In a large mixing bowl, beat the softened cream cheese with the sugar until smooth and creamy. It’s important that the cream cheese is at room temperature to avoid lumps.
- Add the condensed milk to the cream cheese mixture and continue to beat until well combined. Scrape down the sides of the bowl to ensure everything is incorporated.
- Add the eggs one at a time, beating well after each addition. Overmixing at this stage can incorporate too much air, which can lead to cracks in the cheesecake.
- Add the light cream, flour, vanilla extract, and salt to the mixture and blend until smooth, about 5 minutes on slow speed. Again, scrape the bottom of the mixing bowl to ensure all ingredients are fully incorporated. The flour helps to stabilize the cheesecake and prevent it from being too soft.
- Remove 1/3 of the cheesecake batter and place it in a separate bowl.
- Mix the reserved 1/3 of the batter with the coarsely chopped white chocolate. Gently fold the white chocolate into the batter until evenly distributed.
- Pour the white chocolate batter into the prepared springform pan, spreading it evenly over the crust.
- Fold in the remaining ingredients (semi-sweet chocolate chips or chopped chocolate, Snickers or turtle candy bars, and brownie chunks) into the remaining cheesecake batter. Be gentle when folding to avoid breaking the candy bars and brownie chunks into tiny pieces.
- Mix the filling gently by hand. Overmixing can toughen the cheesecake.
- Fold half of the remaining batter into the pan (on top of the white chocolate cheesecake batter).
- Drop spoonfuls of half the caramel sauce all over the batter.
- Top with the remaining batter and then the remaining caramel sauce.
- Stir with a butter knife. This helps to create a marbled effect and distribute the caramel sauce throughout the cheesecake. Don’t over-stir, just a few gentle swirls will do.
- The pan will be very full! This is normal, but be careful when transferring it to the oven to avoid spilling.
- Bake in the preheated oven until the cheesecake is set, about 45-55 minutes. The cheesecake is done when the edges are set but the center still has a slight jiggle.
- Turn off the oven and cool the cheesecake in the oven for an hour with the door slightly ajar. This gradual cooling helps prevent cracking.
- After an hour, place the cheesecake in the refrigerator for several hours or, preferably, overnight. This allows the cheesecake to fully set and develop its flavor.
- Before serving, drizzle the top with melted milk, white, and dark chocolate, allowing it to drip down the sides.
- Garnish with large chocolate shavings and dust with powdered sugar.
Expert Tips & Tricks
- Water Bath (Optional): For an even creamier texture and to further prevent cracking, consider baking the cheesecake in a water bath. Wrap the bottom of the springform pan tightly with foil and place it in a larger roasting pan. Fill the roasting pan with hot water until it reaches halfway up the sides of the springform pan.
- Preventing a Soggy Crust: Blind bake the crust for 8-10 minutes before adding the filling to ensure it’s crisp and doesn’t become soggy.
- Cracking Repair: If your cheesecake does crack, don’t worry! You can easily cover it up with the chocolate drizzles and garnishes.
Serving & Storage Suggestions
Serve the Chocolate Eruption Cheesecake chilled. For an elegant presentation, slice the cheesecake with a warm, damp knife to ensure clean cuts. Store leftover cheesecake in an airtight container in the refrigerator for up to 5 days. You can also freeze individual slices for longer storage; wrap them tightly in plastic wrap and then in foil. Thaw overnight in the refrigerator before serving. This cheesecake is best enjoyed cold, so avoid reheating.
Nutritional Information
Note: Nutritional information is an estimate and may vary based on specific ingredients used.
| Nutrient | Amount per Serving | % Daily Value |
|---|---|---|
| Calories | 661 kcal | N/A |
| Total Fat | 42.1g | 64% |
| Saturated Fat | 22.7g | 113% |
| Cholesterol | 130mg | 43% |
| Sodium | 387.4mg | 16% |
| Total Carbohydrate | 64.2g | 21% |
| Dietary Fiber | 2g | 7% |
| Sugars | 50.2g | N/A |
| Protein | 11g | 22% |
Variations & Substitutions
- Gluten-Free: Use gluten-free chocolate cookie crumbs or brownie mix for the crust. Ensure all other ingredients are also gluten-free.
- Nut-Free: Omit the Snickers or turtle candy bars. Use other chocolate candies that are nut-free or simply add more chocolate chips and brownie chunks.
- Different Candy: Feel free to swap out the Snickers or turtle candy bars for your favorite candies, such as Reese’s Peanut Butter Cups, M&Ms, or chopped Oreos.
- Crust Flavor: Experiment with different crust flavors by using graham crackers, oreos, or other cookie varieties.
- Lighter Version: Use Neufchatel cheese (reduced-fat cream cheese) and a sugar substitute for a slightly lighter version.
FAQs (Frequently Asked Questions)
Q: Why did my cheesecake crack?
A: Cheesecakes crack due to rapid temperature changes. Cooling the cheesecake slowly in the oven and using a water bath can help prevent this.
Q: Can I use a different size springform pan?
A: While a 10-inch pan is recommended, you can use a smaller pan. Be aware that the baking time may need to be adjusted, and the cheesecake will be thicker.
Q: Can I make this cheesecake ahead of time?
A: Absolutely! In fact, this cheesecake is best made a day or two in advance to allow the flavors to fully develop.
Q: How do I prevent the crust from sticking to the pan?
A: Generously spray the springform pan with non-stick cooking spray and consider lining the bottom with parchment paper.
Q: Can I freeze this cheesecake?
A: Yes, you can freeze the cheesecake. Wrap it tightly in plastic wrap and then in foil. Thaw it overnight in the refrigerator before serving.
Final Thoughts
This Chocolate Eruption Cheesecake is a guaranteed showstopper, perfect for birthdays, holidays, or any occasion that calls for a decadent dessert. Don’t be intimidated by the number of ingredients or steps; the result is well worth the effort. Gather your ingredients, embrace the process, and prepare to create a masterpiece that will delight your friends and family. I encourage you to try this recipe and make it your own by experimenting with different candies and toppings. And please, share your feedback and photos with me – I’d love to see your creations! Pair this rich cheesecake with a glass of cold milk, a scoop of vanilla ice cream, or a steaming cup of coffee for the ultimate indulgence. Happy baking!