
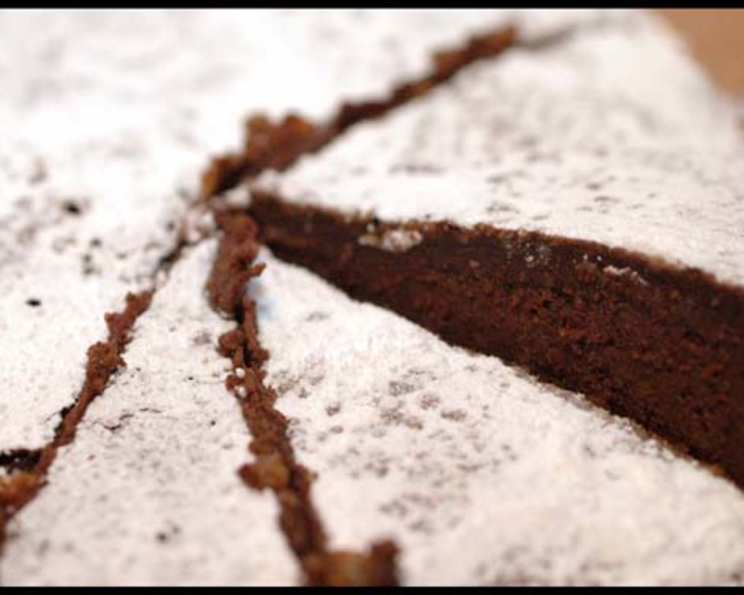
Chocolate Espresso Torte: A Symphony of Richness
My grandmother, a woman of few words but boundless affection, always knew how to mark a special occasion. Her signature dessert wasn’t a towering layer cake or a delicate pastry, but a deceptively simple, intensely flavored chocolate torte. It was a dense, almost fudge-like creation, infused with the deep, dark notes of espresso that lingered on the palate long after the last bite. This recipe, while not hers exactly (her secret died with her), captures the essence of that memory – a bittersweet indulgence perfect for celebrations or quiet moments of self-care.
Recipe Overview
- Prep Time: 20 minutes
- Cook Time: 1 hour
- Total Time: 1 hour 20 minutes (+ 12 hours refrigeration)
- Servings: 12
- Yield: 1 torte
- Dietary Type: Gluten-Free
Ingredients
- 1 cup butter
- 1 cup sugar, plus 1 tablespoon sugar
- 1 cup espresso, plus 2 tablespoons espresso
- 16 ounces semisweet chocolate
- 6 eggs
- 6 egg yolks
- Icing sugar (for garnish)
Equipment Needed
- 9-inch springform pan
- Double boiler or heatproof bowl and saucepan
- Wax paper
- Electric mixer (optional, but helpful)
Instructions
- Preheat your oven to 325°F (160°C).
- Grease a 9-inch springform pan thoroughly.
- Cut a circle of wax paper to fit the bottom of the pan. Place it in the pan, then grease and flour the wax paper and the sides of the pan. This ensures the torte releases cleanly. If making this recipe for Passover, use Passover cake meal instead of flour. Set the prepared pan aside.
- Prepare the chocolate mixture. In a double boiler (or a heatproof bowl set over a simmering pot of water, ensuring the bowl doesn’t touch the water), combine the butter, 1 cup of sugar, and 1 cup of espresso.
- Heat the mixture over medium heat, stirring occasionally, until the sugar is completely dissolved and the butter is melted.
- Remove the double boiler from the heat. Pour the hot butter mixture over the semisweet chocolate.
- Stir continuously until the chocolate is completely melted and the mixture is smooth and glossy. Set aside to cool slightly.
- In a separate bowl, beat the eggs and egg yolks together until they are frothy and slightly lightened in color. This can be done with an electric mixer or by hand with a whisk.
- Add the beaten eggs and yolks to the slightly cooled chocolate mixture. Gently fold them in until just combined. Be careful not to overmix, as this can result in a tough torte.
- Pour the chocolate batter into the prepared springform pan.
- Bake in the preheated oven for 1 hour. The edges of the torte should crack slightly, but the center will still appear soft and not fully set. This is normal.
- Remove the torte from the oven and let it cool completely in the pan on a wire rack.
- Cover the cooled torte with plastic wrap and refrigerate for at least 12 hours, or preferably overnight. This chilling period is crucial for the torte to set properly and develop its characteristic dense, creamy texture. It will not look fully done when you remove it from the oven – that’s correct!
- After chilling, remove the torte from the springform pan. Gently run a thin knife around the edges of the pan to loosen the torte if necessary.
- Sprinkle the top of the torte generously with icing sugar before serving.
- For an elegant presentation, garnish with fresh strawberries and a sprig of mint, if desired.
Expert Tips & Tricks
- For an even richer flavor, use a high-quality dark chocolate with a cocoa content of 70% or higher.
- Don’t skip the chilling time! This is essential for the torte to achieve its signature dense and creamy texture. It also allows the flavors to meld and deepen.
- To prevent a soggy bottom, make sure your oven is properly preheated and that the baking sheet is not warped.
- If the top of the torte browns too quickly, tent it loosely with foil during the last 15-20 minutes of baking.
- For easy slicing, use a warm, sharp knife. Run the knife under hot water and dry it between slices.
- Make-ahead tip: The torte can be made up to 3 days in advance and stored in the refrigerator.
Serving & Storage Suggestions
Serve the Chocolate Espresso Torte chilled, in small slices. Its richness means a little goes a long way! It pairs beautifully with a dollop of whipped cream (dairy or non-dairy), fresh berries, or a scoop of vanilla ice cream. For a sophisticated touch, serve with a glass of dessert wine or a shot of espresso.
Leftovers can be stored in an airtight container in the refrigerator for up to 5 days. The torte can also be frozen for up to 2 months. To freeze, wrap the torte tightly in plastic wrap and then in foil. Thaw overnight in the refrigerator before serving.
Nutritional Information
(Estimated values per serving)
| Nutrient | Amount per Serving | % Daily Value |
|---|---|---|
| Calories | 455 kcal | N/A |
| Total Fat | 40g | 61% |
| Saturated Fat | 24g | 117% |
| Cholesterol | 241mg | 80% |
| Sodium | 160mg | 6% |
| Total Carbohydrate | 30g | 9% |
| Dietary Fiber | 6g | 25% |
| Sugars | 18g | N/A |
| Protein | 9g | 18% |
Note: Nutritional information is an estimate and may vary based on specific ingredients and portion sizes.
Variations & Substitutions
- Dairy-Free Version: Substitute the butter with a high-quality vegan butter alternative. Look for one that is specifically designed for baking.
- Different Chocolate: Experiment with different types of chocolate, such as milk chocolate or white chocolate, for a unique flavor profile. Adjust the amount of sugar accordingly, as milk and white chocolate are sweeter than semisweet.
- Nutty Torte: Add 1/2 cup of chopped toasted nuts, such as walnuts or pecans, to the batter for added texture and flavor.
- Citrus Infusion: Add the zest of one orange or lemon to the batter for a bright, citrusy twist.
- Spice it Up: Add a pinch of cinnamon or cayenne pepper to the batter for a warm, spicy kick.
FAQs (Frequently Asked Questions)
Q: Why does the torte crack on top?
A: Cracking is a normal part of the baking process for this type of dense, flourless cake. It indicates that the torte is cooked through and that the edges have set.
Q: Can I use instant espresso powder instead of brewed espresso?
A: Yes, you can substitute instant espresso powder. Use approximately 2 tablespoons of instant espresso powder dissolved in 1 cup plus 2 tablespoons of hot water.
Q: What if I don’t have a springform pan?
A: While a springform pan is recommended for easy removal, you can use a regular cake pan. Line the pan with parchment paper, leaving an overhang to help lift the torte out after chilling.
Q: Why is it important to chill the torte for so long?
A: The chilling period allows the torte to fully set and develop its characteristic dense, creamy texture. It also helps to meld the flavors together for a richer, more complex taste.
Q: Can I freeze the torte?
A: Yes, the torte freezes well. Wrap it tightly in plastic wrap and then in foil to prevent freezer burn. Thaw overnight in the refrigerator before serving.
Final Thoughts
I hope this Chocolate Espresso Torte becomes a cherished part of your own celebrations, big or small. Don’t be intimidated by the richness – a sliver of this decadent treat is truly satisfying. Feel free to experiment with variations to make it your own signature dessert. And please, share your experiences! I’d love to hear how it turns out and any creative twists you add. Perhaps pair it with a strong cup of coffee or a dessert wine for an unforgettable ending to your next meal. Happy baking!