
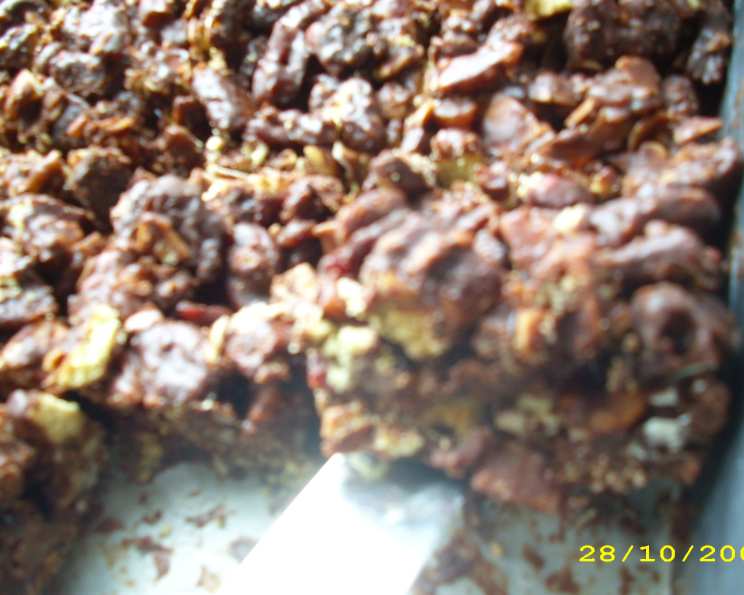
The Ultimate Chocolate Fridge Cake: No-Bake Bliss
There’s something profoundly comforting about a no-bake dessert, a culinary hug that requires minimal effort but delivers maximum satisfaction. My earliest memory of fridge cake involves raiding my grandmother’s pantry. She always had a tin of digestive biscuits, various nuts pilfered from her bird feeder (cleaned, of course!), and a bar of dark chocolate specifically for emergencies – like a surprise visit from her sweet-toothed granddaughter. We’d spend an afternoon smashing biscuits, melting chocolate in a double boiler, and carefully layering the ingredients. The resulting cake, far from perfect, was always a testament to shared joy and impromptu deliciousness. That spirit of joyful improvisation is what I aim to capture in this recipe.
Recipe Overview
- Prep Time: 20 minutes
- Cook Time: 10 minutes
- Total Time: At least 2 hours chilling
- Servings: 15
- Yields: Approximately 20 squares
- Dietary Type: Vegetarian
Ingredients
- 50 g sliced almonds, roughly chopped
- 25 g pecans, chopped
- 25 g walnuts, chopped
- 80 g sultanas
- 80 g dried cherries
- 220 g digestive biscuits
- 170 g butter, unsalted
- 150 g dark chocolate (70% cocoa solids)
- 4 tablespoons golden syrup
Ingredient Notes: Feel free to substitute other nuts like hazelnuts or pistachios, or dried fruits such as cranberries or apricots. For a richer flavor, use salted butter, but reduce the amount of salt you add later.
Equipment Needed
- Large mixing bowl
- Saucepan
- Glass bowl (heatproof)
- Spoon
- 28cm cake tin
- Parchment paper
Instructions
- First, prepare your nuts. Roughly chop the sliced almonds, pecans, and walnuts. This doesn’t need to be perfect; varying sizes add to the rustic charm.
- In a large bowl, combine the chopped nuts with the sultanas and dried cherries. This is your fruit and nut medley that will provide a delightful textural counterpoint to the richness of the chocolate.
- Now for the biscuit base: break the digestive biscuits into different sized chunks. You can do this by hand for a more rustic feel, or place them in a plastic bag and gently smash them against a kitchen surface. Aim for a mix of smaller pieces and larger chunks, as this will create pockets of different textures in the final cake. Add the crushed biscuits to the fruit and nut mix.
- Next, it’s time to melt the chocolate. The best way to do this is using a bain-marie (a fancy term for a double boiler). Place a saucepan with hot water on the stove over low heat. Ensure the water doesn’t touch the bottom of the glass bowl you’ll place on top.
- Add the butter, broken pieces of dark chocolate (breaking the chocolate helps it melt faster), and golden syrup to the glass bowl.
- Stir the mixture gently and consistently until everything is completely melted and smooth. This might take a few minutes, so be patient and avoid overheating the chocolate. Overheated chocolate can seize and become grainy.
- Once the chocolate mixture is melted and glossy, remove the bowl from the heat immediately.
- Pour the melted chocolate mixture over the fruit, nut, and biscuit mixture.
- Carefully incorporate the chocolate with the other ingredients using a spoon. Be gentle to avoid crushing the biscuits into crumbs. You want to coat everything evenly without pulverizing the biscuit chunks.
- Grease and line a 28cm cake tin with parchment paper. This step is crucial for easy removal later. Make sure the parchment paper overhangs the sides of the tin, acting as handles for lifting the cake out once it’s set.
- Pour the chocolate mixture into the prepared cake tin.
- Spread the mixture evenly with the back of a spoon, pressing down gently to create a compact base.
- Refrigerate for a minimum of two hours to allow the cake to harden completely. Ideally, leave it overnight for the best results. The longer it chills, the firmer it will become and the more the flavors will meld together.
- Once set, remove the cake from the tin by lifting the parchment paper overhang. Cut into squares and serve.
Expert Tips & Tricks
- For a deeper chocolate flavor, use a high-quality dark chocolate with a cocoa content of 70% or higher.
- If you don’t have golden syrup, you can substitute it with corn syrup or honey, although the flavor will be slightly different.
- Adding a pinch of sea salt to the melted chocolate mixture enhances the sweetness and adds a delightful contrast.
- For a boozy kick, soak the dried fruit in rum or brandy for a few hours before adding it to the mixture.
- If you find the mixture is too thick to pour easily, add a tablespoon of milk or cream to the melted chocolate.
Serving & Storage Suggestions
This Chocolate Fridge Cake is best served chilled. Cut it into squares or slices and arrange them on a plate. It pairs perfectly with a cup of coffee or tea. It also makes a great addition to a dessert platter or a homemade gift.
Storage: Store leftover fridge cake in an airtight container in the refrigerator for up to 5 days. You can also freeze it for up to 2 months. To freeze, wrap the cake tightly in plastic wrap and then in foil. Thaw in the refrigerator overnight before serving. It’s best to eat this cake directly from the fridge as it softens at room temperature.
Nutritional Information
Please note that these values are estimates and may vary based on specific ingredient brands and quantities used.
| Nutrient | Amount per Serving | % Daily Value |
|---|---|---|
| Calories | 256 kcal | 13% |
| Total Fat | 20.1 g | 26% |
| Saturated Fat | 10.1 g | 51% |
| Cholesterol | 24.2 mg | 8% |
| Sodium | 183.4 mg | 8% |
| Total Carbohydrate | 21.2 g | 8% |
| Dietary Fiber | 2.8 g | 10% |
| Sugars | 5.1 g | 10% |
| Protein | 3.9 g | 8% |
Variations & Substitutions
- Gluten-Free: Use gluten-free digestive biscuits for a gluten-free version.
- Vegan: Substitute the butter with a vegan butter alternative and ensure the chocolate is dairy-free.
- Orange Chocolate: Add the zest of one orange to the melted chocolate for a citrusy twist.
- White Chocolate: Use white chocolate instead of dark chocolate for a sweeter treat. You could also incorporate white chocolate chunks in the base mix.
- Peanut Butter: Swirl a tablespoon of peanut butter into the melted chocolate before adding it to the biscuit mixture.
FAQs (Frequently Asked Questions)
Q: Can I use different types of biscuits?
A: Yes, you can experiment with other types of biscuits, such as shortbread or gingersnaps, but keep in mind that this will alter the flavor and texture of the cake.
Q: Can I add marshmallows to the mixture?
A: Absolutely! Miniature marshmallows can be added to the fruit and nut mix for a chewy texture.
Q: How do I prevent the chocolate from seizing when melting?
A: Use a double boiler and low heat, and avoid getting any water in the chocolate. Stir gently and consistently.
Q: How long does the fridge cake need to chill?
A: A minimum of two hours is required, but it’s best to chill it overnight for optimal firmness and flavor.
Q: Can I use different types of dried fruit?
A: Yes, feel free to substitute the sultanas and dried cherries with other dried fruits like cranberries, apricots, or dates.
Final Thoughts
This Chocolate Fridge Cake is a testament to the simple pleasures of home baking. It’s a forgiving recipe that encourages experimentation and personal touches. So, gather your ingredients, embrace the process, and create a delicious treat that’s sure to impress. And please, don’t be afraid to raid your pantry – you never know what delicious combinations you might discover! I encourage you to try this recipe, share your creations, and let me know what creative twists you come up with.