
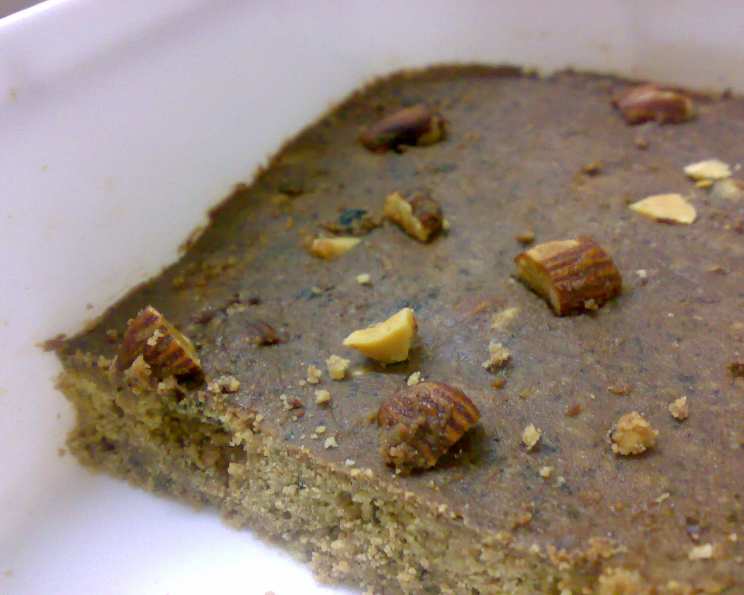
Chocolate Fridge Cake: A No-Bake Delight
My grandmother, bless her heart, wasn’t much of a baker. Her attempts at sponge cakes often ended up flatter than pancakes, and her cookies were legendary for their rock-hard texture. But there was one dessert she absolutely nailed every single time: Chocolate Fridge Cake. I remember as a child, the sheer anticipation as she unwrapped the cling film to reveal the dark, decadent block. The rich chocolate aroma mingled with the nutty scent of pecans and the bright pop of glace cherries—it was pure, unadulterated joy on a plate.
Recipe Overview
- Prep Time: 20 minutes
- Cook Time: 5 minutes
- Total Time: 2 hours 25 minutes (includes chilling)
- Servings: 8-10
- Yields: 1 loaf
- Dietary Type: Not suitable for vegan or gluten-free diets
Ingredients
- 250 g digestive biscuits or 250 g graham crackers
- 100 g pecan nuts, shelled
- 100 g sliced almonds
- 100 g glace cherries, chopped
- 150 g butter
- 1 tablespoon molasses
- 200 g good quality chocolate (about 70 percent cocoa solids)
- Cocoa powder, for dusting (optional)
Equipment Needed
- Large bowl
- Small saucepan
- Spoon
- Loaf pan
- Saran wrap (cling film)
Instructions
- Begin by preparing the dry ingredients. Break the digestive biscuits or graham crackers into small pieces and place them in a large bowl. Don’t pulverize them into dust; you want some texture in the final cake.
- Add the nuts and cherries to the biscuit pieces. Add the shelled pecan nuts, sliced almonds, and chopped glace cherries to the bowl.
- Stir all the dry ingredients together until well combined.
- Now, prepare the chocolate mixture. Put the butter, molasses, and chocolate in a small saucepan. Use the lowest possible heat to simmer the mixture until the chocolate and butter are completely melted. Stir occasionally to prevent the chocolate from burning.
- Ensure a smooth consistency. You may need to give the mixture a stir or two to fully combine the ingredients into a glossy, homogenous sauce. Patience is key here – avoid rushing the melting process by cranking up the heat, as this can lead to scorched chocolate.
- Combine wet and dry ingredients. Pour the melted chocolate mixture into the bowl with the biscuit mixture.
- Thoroughly combine all the ingredients. Use a spoon to mix everything until the chocolate is evenly distributed and all the dry ingredients are well coated. Make sure there are no dry pockets of biscuit lurking at the bottom of the bowl.
- Line the loaf pan. Line a loaf pan with saran wrap (cling film), leaving plenty of extra at the edges to cover the top of the finished cake. This step is crucial for easy removal of the cake later.
- Spoon the mixture into the loaf pan. Spoon the chocolate biscuit mixture into the prepared loaf pan.
- Pack the mixture tightly. Use the back of the spoon to pack the mixture down firmly into the loaf pan, ensuring it’s evenly distributed and compressed. This will help the cake hold its shape.
- Cover and compress. Pull the extra saran wrap over the top of the mixture. Use your hands to push down firmly on the cake, making sure it is well packed together. This is important for achieving a dense, cohesive texture.
- Chill the cake. Place the loaf pan in the fridge for at least two hours to allow the cake to cool and set completely.
- Slice and serve. After two hours, remove the cake from the fridge. Lift it out of the loaf pan using the overhanging saran wrap. Place it on a serving board and slice into portions.
- For a special touch, you can dust the slices with cocoa powder before serving.
Expert Tips & Tricks
- Quality matters: Use good quality chocolate with a high cocoa content (around 70%) for the best flavor.
- Nutty variations: Feel free to experiment with different nuts. Walnuts, hazelnuts, or even macadamia nuts would work beautifully. Toasting the nuts lightly before adding them to the mixture can enhance their flavor.
- Fruitful additions: Other dried fruits like raisins, cranberries, or dried apricots can be added for extra sweetness and texture.
- Texture control: For a smoother cake, you can pulse the digestive biscuits in a food processor before adding them to the other ingredients, but be careful not to over-process them into a powder.
- Molasses substitute: If you don’t have molasses on hand, you can substitute it with golden syrup or honey.
- Easier slicing: To get clean, even slices, dip a sharp knife in hot water and wipe it dry before each cut.
Serving & Storage Suggestions
Chocolate Fridge Cake is best served chilled. It pairs wonderfully with a cup of strong coffee or a glass of dessert wine. To store, wrap the remaining cake tightly in saran wrap and keep it in the refrigerator. It will last for up to 5 days. While freezing is possible, it can slightly alter the texture of the biscuits, making them a bit softer when thawed. If freezing, wrap tightly in multiple layers of plastic wrap and store for up to 1 month. Thaw in the refrigerator overnight.
Nutritional Information
| Nutrient | Amount per Serving | % Daily Value |
|---|---|---|
| Calories | 587.4 kcal | N/A |
| Calories from Fat | 437 g | 74% |
| Total Fat | 48.6 g | 74% |
| Saturated Fat | 20.8 g | 103% |
| Cholesterol | 40.1 mg | 13% |
| Sodium | 365 mg | 15% |
| Total Carbohydrate | 42 g | 14% |
| Dietary Fiber | 7.8 g | 31% |
| Sugars | 12.9 g | 51% |
| Protein | 10 g | 19% |
Variations & Substitutions
- Spice it up: Add a pinch of cinnamon or nutmeg to the chocolate mixture for a warm, festive flavor.
- Boozy twist: A splash of rum or brandy can be added to the melted chocolate for an extra kick.
- Orange zest: The zest of an orange can be added to the biscuit mixture for a bright, citrusy note.
- White chocolate version: Substitute the dark chocolate with white chocolate for a sweeter, creamier variation.
- Peanut butter version: Add 2-3 tablespoons of peanut butter to the melted chocolate mixture for a nutty flavor.
FAQs (Frequently Asked Questions)
Q: Can I use different types of biscuits?
A: Absolutely! Feel free to experiment with other types of biscuits, such as shortbread or oatcakes, but keep the total weight consistent.
Q: Can I make this cake ahead of time?
A: Yes, Chocolate Fridge Cake is perfect for making ahead of time. In fact, it benefits from sitting in the fridge for a day or two, as the flavors meld together even more.
Q: What if my chocolate mixture seizes?
A: If your chocolate mixture seizes (becomes grainy and stiff), try adding a tablespoon of hot water at a time, stirring constantly, until it smooths out.
Q: Can I use milk chocolate instead of dark chocolate?
A: While dark chocolate provides a richer, more intense flavor, you can use milk chocolate if you prefer a sweeter taste.
Q: The nuts that I have are salted, can I still use them?
A: Yes, but you may want to reduce the amount of molasses. If you are sensitive to the amount of salt in the recipe, you could also wash them before using. Make sure to dry them thoroughly.
Final Thoughts
Chocolate Fridge Cake is more than just a recipe; it’s a nostalgic trip back to simpler times, a reminder of shared moments and happy memories. It’s a wonderfully adaptable recipe, inviting you to experiment with flavors and textures to create your own signature version. So, gather your ingredients, put on some music, and let the simple joy of making this classic dessert fill your kitchen. And don’t forget to share your creations with friends and family – after all, good food is always best enjoyed in good company.