
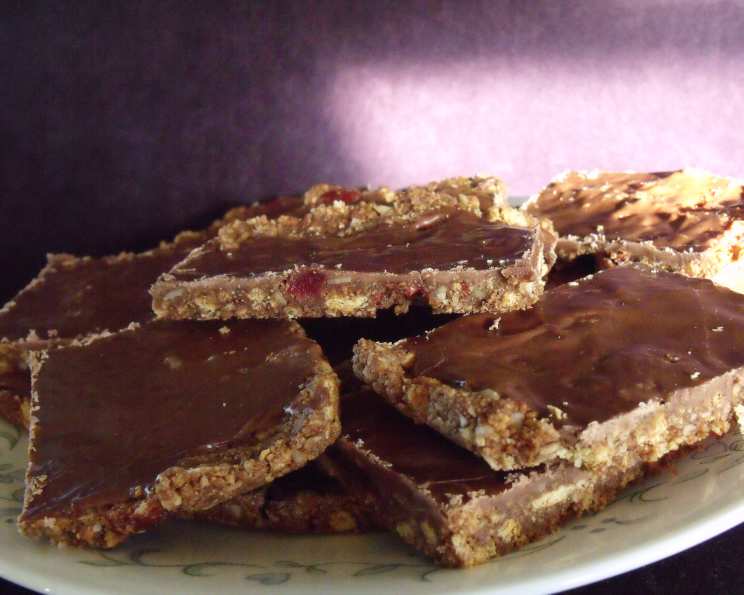
The Ultimate Chocolate Hedgehog Slice: A Childhood Favorite, Elevated
There’s something incredibly nostalgic about a Chocolate Hedgehog Slice. I remember my grandmother used to make it for our school bake sales, and it was always the first thing to disappear from the table. The combination of rich chocolate, crunchy biscuits, and chewy glace cherries was irresistible. This recipe is my take on that classic, tweaked ever so slightly to enhance the flavors and textures I loved as a child.
Recipe Overview
- Prep Time: 20 minutes
- Cook Time: 5 minutes (for melting butter)
- Total Time: Minimum 2 hours (includes chilling time)
- Servings: Approximately 24 squares
- Yield: 1 large slice
- Dietary Type: Not suitable for vegan, dairy-free, or gluten-free diets.
Ingredients
For the Slice:
- 160g butter
- ½ cup caster sugar
- 2 tablespoons cocoa
- 1 egg
- 2 tablespoons desiccated coconut
- ½ cup chopped mixed nuts (such as hazelnuts, walnuts, and almonds)
- 12 glace cherries, quartered
- ½ teaspoon vanilla extract
- 200g crushed plain sweet biscuits (like digestive biscuits or graham crackers)
For the Icing:
- 1 cup icing sugar
- 1 tablespoon cocoa
- 1 tablespoon boiling water
Equipment Needed
- Baking tin (approximately 20x30cm), lined with baking paper
- Small saucepan
- Mixing bowl
- Measuring cups and spoons
- Sifter (for icing sugar)
Instructions
-
Prepare the Baking Tin: Line a baking tin with baking paper. This will make it easier to remove the slice once it has set. Ensure the paper overhangs slightly to act as handles.
-
Melt Butter and Sugar: In a small saucepan, melt the butter and caster sugar together over a low heat. Stir frequently to prevent the sugar from burning and to ensure even melting.
-
Add Cocoa: Once the butter and sugar are melted, add the cocoa powder. Mix well until the cocoa is fully incorporated and the mixture is smooth and glossy.
-
Remove from Heat: Take the saucepan off the heat and allow the mixture to cool slightly for a minute or two. This prevents the egg from scrambling in the next step.
-
Incorporate the Egg: Add the beaten egg to the chocolate mixture. Stir quickly and thoroughly to ensure the egg is evenly distributed and doesn’t cook from the residual heat.
-
Combine Dry Ingredients: In a large mixing bowl, combine the crushed plain sweet biscuits, desiccated coconut, chopped mixed nuts, quartered glace cherries, and vanilla extract. Make sure the biscuits are crushed into a mix of coarse and fine crumbs for the best texture.
-
Combine Wet and Dry Ingredients: Pour the melted chocolate mixture over the dry ingredients in the bowl. Stir well until all the ingredients are evenly coated in the chocolate. The mixture should be moist but not overly wet.
-
Press into Pan: Transfer the mixture into the prepared baking tin. Use the back of a spoon or your hands to press the mixture firmly and evenly into the pan. Make sure to get the mixture into all the corners.
-
Chill Until Set: Place the baking tin in the refrigerator and chill for at least 2 hours, or preferably overnight, until the slice is firm and set. This allows the flavors to meld together and the slice to solidify.
-
Prepare the Icing: Sift the icing sugar and cocoa powder together into a bowl. This ensures a smooth, lump-free icing.
-
Add Water: Add the boiling water to the sifted icing sugar and cocoa. Mix well until you achieve a smooth and glossy consistency. If the icing is too thick, add a very small amount of additional boiling water, a teaspoon at a time, until the desired consistency is reached. It should be thick enough to spread without running off the slice.
-
Spread the Icing: Remove the chilled slice from the refrigerator. Spread the icing evenly over the top of the slice.
-
Optional Coconut Sprinkle: If desired, sprinkle some extra desiccated coconut over the icing for added decoration and flavor.
-
Chill Again: Return the slice to the refrigerator to allow the icing to set completely. This usually takes about 30 minutes.
-
Cut and Serve: Once the icing is set, remove the slice from the baking tin using the overhanging baking paper. Cut the slice into squares using a sharp knife. For clean cuts, wipe the knife with a damp cloth between each slice.
Expert Tips & Tricks
- Nut Toasting: For a more intense nutty flavor, lightly toast the chopped nuts in a dry pan before adding them to the mixture. Watch them carefully to prevent burning.
- Biscuit Crushing: Use a food processor for quick and even biscuit crushing. Alternatively, place the biscuits in a ziplock bag and crush them with a rolling pin.
- Chocolate Intensity: For a richer chocolate flavor, use dark cocoa powder instead of regular cocoa powder.
- Preventing a Soggy Base: Ensure the crushed biscuits aren’t too fine; a mix of textures will help prevent the base from becoming soggy.
- Even Icing: Warm the icing slightly (a few seconds in the microwave) for easier spreading.
Serving & Storage Suggestions
Serve the Chocolate Hedgehog Slice chilled, cut into small squares. It’s a perfect treat with a cup of coffee or tea.
To store, keep the slice in an airtight container in the refrigerator. It will last for up to 5 days. You can also freeze the slice for up to 2 months. Thaw it in the refrigerator overnight before serving.
Nutritional Information
| Nutrient | Amount per Serving (approx.) | % Daily Value (approx.) |
|---|---|---|
| Calories | 180 kcal | 9% |
| Total Fat | 9g | 14% |
| Saturated Fat | 5g | 25% |
| Cholesterol | 25mg | 8% |
| Sodium | 70mg | 3% |
| Total Carbohydrate | 20g | 7% |
| Dietary Fiber | 1g | 4% |
| Sugars | 12g | 24% |
| Protein | 2g | 4% |
Note: Nutritional information is an estimate and may vary based on specific ingredients used.
Variations & Substitutions
- Gluten-Free Hedgehog: Substitute the plain sweet biscuits with gluten-free biscuits.
- Dairy-Free Option: Use a dairy-free butter substitute. The taste will be slightly different but still delicious.
- Nut-Free Version: Omit the nuts altogether or substitute with seeds, such as sunflower or pumpkin seeds.
- Citrus Zest: Add the zest of an orange or lemon to the biscuit mixture for a zesty twist.
- Espresso Kick: Mix a teaspoon of instant espresso powder into the chocolate mixture for a mocha flavor.
FAQs (Frequently Asked Questions)
Q: Can I use different types of biscuits?
A: Yes, you can use any plain sweet biscuits you like, such as digestive biscuits, graham crackers, or even shortbread. The texture and flavor will vary slightly depending on the biscuit used.
Q: How do I prevent the base from becoming soggy?
A: Make sure the crushed biscuits aren’t too finely ground and that the melted butter mixture isn’t too hot when you combine them. Chilling the slice thoroughly also helps.
Q: Can I freeze the Chocolate Hedgehog Slice?
A: Yes, you can freeze it for up to 2 months. Wrap it tightly in plastic wrap and then in foil to prevent freezer burn. Thaw in the refrigerator overnight before serving.
Q: What can I use instead of glace cherries?
A: If you don’t like glace cherries, you can substitute them with dried cranberries, raisins, or chopped dates.
Q: My icing is too runny. How can I fix it?
A: Add a little more sifted icing sugar, a teaspoon at a time, until the icing reaches the desired consistency.
Final Thoughts
This Chocolate Hedgehog Slice is more than just a recipe; it’s a taste of nostalgia and a reminder of simple joys. I encourage you to try this recipe and create your own memories. Whether you follow it exactly or experiment with variations, I hope you enjoy the process and the delicious result. Don’t hesitate to share your creations and feedback – I’d love to hear how it turns out! Perhaps pair a square with a scoop of vanilla ice cream or a strong cup of black coffee for the perfect treat. Happy baking!