
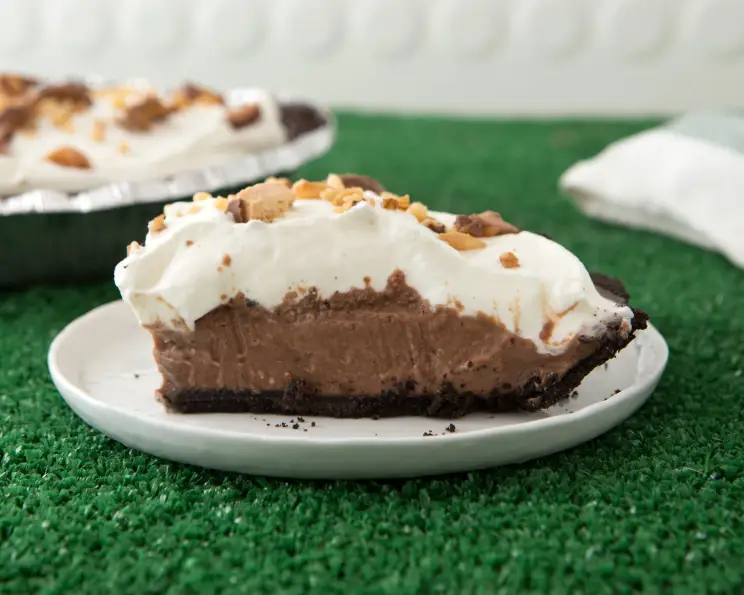
Chocolate Icebox Pie: A Timeless Classic
I can still remember the sweltering summer afternoons of my childhood, spent at my grandmother’s house. The air conditioning was always on full blast, a welcome respite from the oppressive heat. But the real treat was always waiting in the refrigerator: her famous Chocolate Icebox Pie. That first bite, the cool, creamy chocolate melting on my tongue, transported me to a place of pure bliss. It’s a taste of nostalgia, a tangible memory of love and simpler times, and a recipe I’m excited to share with you.
Recipe Overview
- Prep Time: 20 minutes
- Cook Time: 5 minutes
- Total Time: 8 hours 25 minutes (includes chilling time)
- Servings: 8
- Yield: 1 pie
- Dietary Type: Not Gluten-Free
Ingredients
- 2/3 cup milk
- 3/4 cup semisweet chocolate morsels
- 1/4 cup cold water
- 2 tablespoons cornstarch
- 1 (14 ounce) can sweetened condensed milk
- 3 large eggs, beaten
- 1 teaspoon vanilla
- 3 tablespoons butter
- 1 (6 ounce) ready-made chocolate crumb crust
- 1 cup whipping cream
- 1/4 cup sugar
- 1/2 cup chopped pecans, toasted
- 1 (1 5/8 ounce) milk chocolate candy bars, chopped
Equipment Needed
- 3-quart saucepan
- Whisk
- Measuring cups and spoons
- Mixer (hand or stand)
- Pie server
Instructions
- In a 3-quart saucepan, heat the milk over medium heat until it begins to bubble around the edges. Be careful not to let it boil over.
- Remove the saucepan from the heat and immediately whisk in the semisweet chocolate morsels until they are completely melted and the mixture is smooth. This should only take a minute or two. The residual heat from the milk will melt the chocolate.
- Allow the chocolate mixture to cool slightly. This prevents the eggs from cooking when you add them in the next step.
- In a separate small bowl, stir together the cold water and cornstarch until the cornstarch is completely dissolved. This creates a slurry that will help thicken the pie filling.
- Whisk the cornstarch mixture, sweetened condensed milk, beaten eggs, and vanilla into the cooled chocolate mixture. Ensure all ingredients are well combined.
- Return the saucepan to medium heat and bring the mixture to a boil, whisking constantly. Continuous whisking is crucial to prevent scorching and ensure a smooth, lump-free filling.
- Boil for 1 minute, still whisking, or until the mixture thickens and becomes smooth. Be careful not to overcook, as this can result in a grainy texture. The filling should be thick enough to coat the back of a spoon.
- Remove the saucepan from the heat and whisk in the butter until it is fully melted and incorporated into the filling. The butter adds richness and a glossy sheen.
- Spoon the hot chocolate mixture into the ready-made chocolate crumb crust. Spread evenly to fill the crust completely.
- Cover the pie with plastic wrap, pressing it gently against the surface of the filling to prevent a skin from forming. Chill in the refrigerator for at least 8 hours, or preferably overnight, to allow the filling to set completely.
- Once the pie is thoroughly chilled, prepare the whipped cream topping. In a mixing bowl, beat the whipping cream at high speed with a mixer until foamy.
- Gradually add the sugar and continue beating until soft peaks form. Be careful not to overwhip, as this can cause the cream to become grainy.
- Spread the whipped cream evenly over the chilled pie filling.
- Sprinkle the top of the pie with the toasted chopped pecans and chopped milk chocolate candy bars. These add texture and a final burst of chocolate flavor.
Expert Tips & Tricks
- Toasting the pecans enhances their nutty flavor. Simply spread them on a baking sheet and bake at 350°F (175°C) for 5-7 minutes, or until fragrant and lightly browned.
- If you don’t have a ready-made chocolate crumb crust, you can easily make your own. Combine crushed chocolate cookies with melted butter and press into a pie dish.
- For an even richer flavor, use dark chocolate morsels instead of semisweet.
- If the pie filling seems too thin after boiling, continue to cook it for another minute or two, whisking constantly, until it reaches the desired consistency.
- If you are concerned about using raw eggs, you can use pasteurized eggs.
Serving & Storage Suggestions
Serve the Chocolate Icebox Pie chilled, straight from the refrigerator. A slice of this pie is wonderful on its own, or you can serve it with a scoop of vanilla ice cream or a dollop of extra whipped cream.
Leftover pie should be stored in the refrigerator, covered tightly with plastic wrap, for up to 3 days. While you could freeze it, the texture of the whipped cream may change upon thawing. I would recommend freezing the filling before adding the whipped cream topping, and then adding a fresh topping once thawed.
Nutritional Information
| Nutrient | Amount per Serving | % Daily Value |
|---|---|---|
| Calories | 641 kcal | N/A |
| Total Fat | 39.5g | 60% |
| Saturated Fat | 18.7g | 93% |
| Cholesterol | 143.6mg | 47% |
| Sodium | 298.1mg | 12% |
| Total Carbohydrate | 63.4g | 21% |
| Dietary Fiber | 2.2g | 9% |
| Sugars | 49.7g | N/A |
| Protein | 10.4g | 20% |
Note: Nutritional information is an estimate and may vary based on specific ingredients and serving sizes.
Variations & Substitutions
- Gluten-Free: Use a gluten-free chocolate crumb crust or make your own crust using gluten-free cookies.
- Dairy-Free: Substitute the milk and whipping cream with your favorite dairy-free alternatives, such as almond milk and coconut cream.
- Peanut Butter Chocolate: Swirl a few tablespoons of peanut butter into the hot chocolate filling before pouring it into the crust. Top with chopped peanut butter cups instead of milk chocolate candy bars.
- Mint Chocolate: Add a few drops of peppermint extract to the chocolate filling and top with crushed mint chocolate candies.
- Espresso Chocolate: Add a teaspoon of instant espresso powder to the milk while heating for a subtle coffee flavor.
FAQs (Frequently Asked Questions)
Q: Can I use a different type of crust?
A: Absolutely! While a chocolate crumb crust complements the filling nicely, you can use a graham cracker crust, shortbread crust, or even a homemade pastry crust.
Q: Why is it important to cool the chocolate mixture before adding the eggs?
A: Cooling the mixture prevents the eggs from scrambling when they are added, ensuring a smooth and creamy filling.
Q: How do I know when the filling is thick enough?
A: The filling should be thick enough to coat the back of a spoon. If you run your finger down the back of the spoon, the line should remain distinct and not run back together.
Q: Can I make this pie ahead of time?
A: Yes! In fact, this pie is best made at least 8 hours in advance to allow the filling to set completely. You can prepare the pie a day or two ahead of time and store it in the refrigerator.
Q: What if I don’t have sweetened condensed milk?
A: Unfortunately, there is no direct substitute for sweetened condensed milk in this recipe. It is essential for the pie’s texture and sweetness.
Final Thoughts
This Chocolate Icebox Pie is more than just a dessert; it’s a taste of happiness, a slice of pure indulgence. It’s a simple recipe, yet the results are truly extraordinary. I encourage you to try this recipe and experience the joy of creating a timeless classic in your own kitchen. And when you do, please share your creations and feedback! Maybe pair it with a rich cup of coffee or a cold glass of milk – either way, enjoy every bite!