
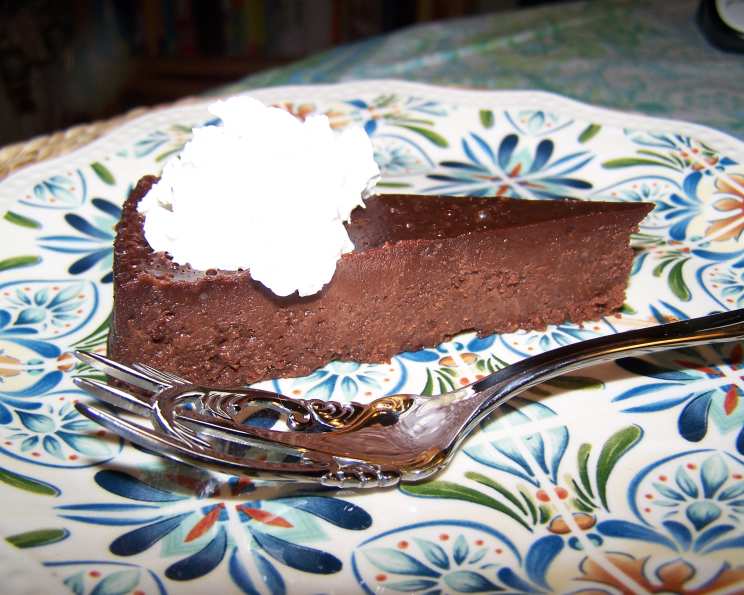
Chocolate Idiot Cake: A Foolproof Flourless Delight
The first time I tasted a cake like this, it was at a small bistro tucked away on a cobblestone street in Paris. The waiter, with a knowing wink, described it as “le gâteau idiot,” and I chuckled, wondering what culinary foolery I was about to encounter. What arrived was a dense, intensely chocolatey slice of heaven that melted on my tongue. The name, I realized, wasn’t an insult to the baker, but a testament to the recipe’s near-impossibility to botch. It’s a cake so simple, so forgiving, that even the most novice baker can achieve chocolate perfection. I’ve been making versions of it ever since, and the memories of that Parisian cafe always come flooding back with each bite.
Recipe Overview
- Prep Time: 15 minutes
- Cook Time: 1 hour 15 minutes
- Total Time: 1 hour 30 minutes
- Servings: 10
- Yield: 1 9-inch cake
- Dietary Type: Gluten-Free
Ingredients
- 10 ounces bittersweet chocolate, coarsely chopped
- 7 ounces butter, cut into pieces
- 5 large eggs, at room temperature
- 1 cup sugar
Equipment Needed
- 9-inch (23 cm) springform pan
- Double boiler or microwave-safe bowl
- Large bowl
- Whisk
- Roasting pan or larger baking pan
- Aluminum foil
- Cooling rack
Instructions
- Preheat your oven to 350°F (175°C).
- Prepare a 9-inch (23 cm) springform pan by generously buttering it and then dusting it with cocoa powder, ensuring you tap out any excess. This prevents the cake from sticking and gives it a lovely matte finish. If you’re concerned about your springform pan leaking (some aren’t completely watertight), tightly wrap the outside with aluminum foil, extending it all the way up to the rim. This will prevent any water from the water bath from seeping in.
- In a double boiler set over simmering water (or in a microwave-safe bowl, using 30-second intervals and stirring in between), melt the bittersweet chocolate and butter together. Stir occasionally until the mixture is completely smooth and glossy. Remove from the heat and set aside to cool slightly.
- In a large bowl, use a whisk to vigorously combine the eggs and sugar. Whisk until the mixture is light and slightly thickened. Don’t worry about incorporating too much air; this cake isn’t about being light and airy.
- Gradually whisk the melted chocolate mixture into the egg mixture until everything is beautifully combined and the batter is smooth and homogenous. Make sure there are no streaks of egg or unincorporated chocolate.
- Carefully pour the batter into the prepared springform pan. Gently tap the pan on the counter a few times to release any trapped air bubbles.
- Cover the top of the pan snugly with a sheet of aluminum foil. This will help keep the top of the cake moist and prevent it from over-browning during the long baking time.
- Place the springform pan inside a larger baking pan, such as a roasting pan. This will be your water bath. Carefully pour hot water into the larger pan until it reaches about halfway up the sides of the springform pan. The water bath is crucial for creating a gentle, even baking environment that prevents the cake from drying out or cracking.
- Bake in the preheated oven for 1 hour and 15 minutes. The cake is done when it feels just set, resembling a quivering chocolate pudding. To test for doneness, gently touch the center of the cake with your finger. It should come away clean, or with just a slight trace of moist chocolate. Don’t be alarmed if it seems a bit wobbly; it will firm up as it cools.
- Carefully lift the springform pan out of the water bath and remove the foil. Place the cake on a cooling rack and allow it to cool completely before attempting to remove it from the pan. This is important to prevent the cake from breaking.
- Once cooled, gently run a thin knife or offset spatula around the edges of the cake to loosen it from the sides of the springform pan. Release the springform latch and carefully remove the sides of the pan.
- Serve thin wedges of this incredibly rich cake at room temperature. It’s divine on its own, but even better with a dollop of crème anglaise, a scoop of ice cream, or a cloud of lightly sweetened whipped cream.
Expert Tips & Tricks
- Use high-quality chocolate: This cake is all about the chocolate, so splurge on the best you can afford. The better the chocolate, the more intense and delicious the flavor.
- Room temperature eggs are key: Room temperature eggs emulsify more easily, resulting in a smoother batter and a more tender cake. If you forgot to take your eggs out of the fridge in advance, you can quickly bring them to room temperature by placing them in a bowl of warm water for about 10 minutes.
- Don’t overbake: Overbaking will result in a dry, crumbly cake. The cake should be slightly soft and jiggly in the center when it’s done. It will continue to firm up as it cools.
- Cool completely before removing from the pan: This is crucial for preventing the cake from breaking. Be patient and let it cool completely before attempting to release it from the springform pan.
- For an extra decadent touch: Dust the top of the cake with cocoa powder or a sprinkle of powdered sugar before serving. You could also drizzle it with melted chocolate ganache or a homemade caramel sauce.
Serving & Storage Suggestions
Serve the Chocolate Idiot Cake in thin wedges, as it is incredibly rich. A small slice goes a long way! It pairs beautifully with crème anglaise, vanilla ice cream, or whipped cream. Fresh berries, such as raspberries or strawberries, also make a lovely accompaniment.
For storage, this cake can be wrapped tightly in plastic wrap or stored in an airtight container in the refrigerator for up to 3-5 days. It actually tastes even better after a day or two, as the flavors have time to meld together. You can also freeze the cake for up to 2 months. Thaw it in the refrigerator overnight before serving. To reheat, you can warm individual slices in the microwave for a few seconds, but it’s best enjoyed at room temperature.
Nutritional Information
| Nutrient | Amount per Serving | % Daily Value |
|---|---|---|
| Calories | 398 kcal | 20% |
| Total Fat | 33g | 51% |
| Saturated Fat | 20g | 100% |
| Cholesterol | 136mg | 45% |
| Sodium | 184mg | 8% |
| Total Carbohydrate | 29g | 10% |
| Dietary Fiber | 5g | 18% |
| Sugars | 20g | N/A |
| Protein | 7g | 14% |
Note: Nutritional information is an estimate and may vary depending on specific ingredients used.
Variations & Substitutions
- Espresso Boost: Add a tablespoon of instant espresso powder to the melted chocolate mixture for a deeper, richer flavor.
- Citrus Zest: Grate the zest of an orange or lemon into the batter for a bright, refreshing twist.
- Nutty Delight: Stir in a handful of chopped nuts, such as almonds, walnuts, or pecans, for added texture and flavor.
- Spiced Chocolate: Add a pinch of cinnamon, nutmeg, or cayenne pepper to the batter for a warm, spicy kick.
- Liqueur Infusion: Substitute a tablespoon of the water in the water bath with a liqueur like Frangelico (hazelnut), Grand Marnier (orange), or Kahlua (coffee) for a subtle flavor enhancement.
- Dairy-Free Option: While butter is essential for the traditional recipe, you can experiment with a high-quality vegan butter alternative, keeping in mind that it might slightly alter the texture.
FAQs (Frequently Asked Questions)
Q: Why is it called “Idiot Cake?”
A: The name refers to the cake’s simplicity and foolproof nature. It’s so easy to make that even a novice baker could succeed.
Q: Can I use different types of chocolate?
A: Yes, you can experiment with different percentages of cacao. Just be aware that the sweetness and bitterness will vary depending on the chocolate you choose.
Q: What if I don’t have a springform pan?
A: While a springform pan is ideal, you can use a regular cake pan. Line the bottom with parchment paper and grease the sides well. Be careful when inverting the cake to release it.
Q: The center of my cake cracked. What did I do wrong?
A: A crack in the center usually indicates that the oven temperature was too high or that the cake was overbaked. Make sure your oven is properly calibrated and follow the baking time closely.
Q: Can I make this cake ahead of time?
A: Absolutely! This cake actually tastes better the next day, as the flavors have time to meld. Store it in the refrigerator, wrapped tightly in plastic wrap or in an airtight container.
Final Thoughts
This Chocolate Idiot Cake is more than just a dessert; it’s an experience. It’s a testament to the fact that sometimes, the simplest things in life are the most satisfying. Whether you’re a seasoned baker or just starting out, I encourage you to give this recipe a try. Its rich, decadent flavor and foolproof instructions are sure to impress. Pair it with a glass of red wine or a cup of strong coffee for the ultimate indulgence. And don’t forget to share your creations and feedback – I’d love to hear about your “idiot” cake success stories!