
Chocolate Jelly Roll: A Timeless Classic
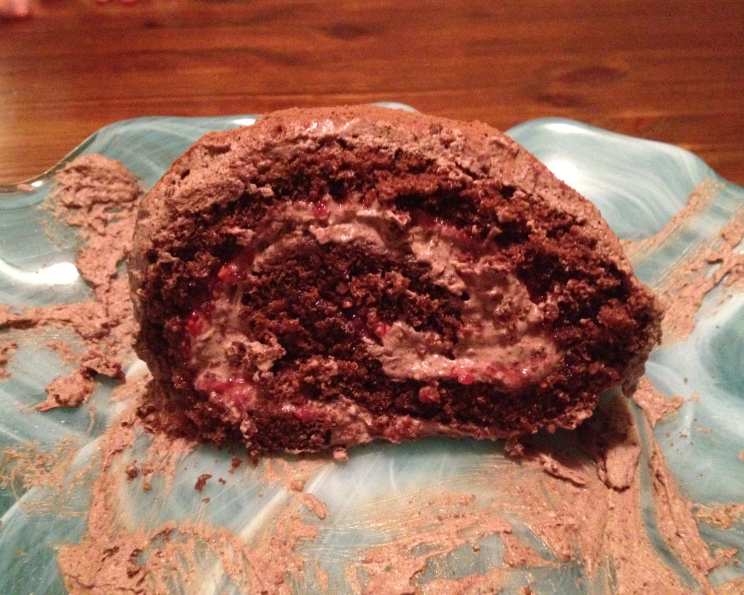
My grandmother, Nana Elsie, had a knack for simple pleasures. While she made countless show-stopping desserts, it was her humble chocolate jelly roll that I remember most fondly. It wasn’t fancy, but the moist chocolate cake, swirled with bright red raspberry jam, was pure comfort. Every bite transported me back to her sunny kitchen, filled with the comforting scent of baking and the sound of her gentle humming. It’s a treat that embodies love and warmth, and I’m thrilled to share it with you.
Recipe Overview
- Prep Time: 20 minutes
- Cook Time: 15 minutes
- Total Time: 35 minutes
- Servings: 8
- Yield: 1 Jelly Roll
- Dietary Type: Not Gluten-Free
Ingredients
- 3 large eggs
- 1 cup white sugar
- 1/3 cup water
- 1 teaspoon baking powder
- 1/4 teaspoon salt
- 1/4 cup cocoa, sifted
- 1 cup cake flour, sifted
- 1 teaspoon vanilla
- Icing sugar, for dusting
- Your favorite jelly, ice cream, or other filling
Equipment Needed
- Large cookie sheet
- Wax paper
- Mixing bowl
- Electric mixer
- Clean, moist tea towel
Instructions
-
Preheat your oven to 375°F (190°C). Prepare a large cookie sheet by lining it with wax paper. This step is crucial to prevent the cake from sticking and tearing when you roll it.
-
In a mixing bowl, combine the sugar, whole eggs, and water. Use an electric mixer to beat these ingredients together until the mixture is light and fluffy. This incorporates air, which is essential for a tender cake.
-
In the same bowl, beat in the remaining ingredients: baking powder, salt, sifted cocoa, sifted cake flour, and vanilla. Make sure everything is well combined, but be careful not to overmix. Overmixing can develop the gluten in the flour, resulting in a tough cake.
-
Pour the batter onto the prepared cookie sheet and spread it evenly.
-
Bake in the preheated oven for 12-15 minutes. Keep a close eye on it, as the baking time can vary depending on your oven. The cake is done when it springs back lightly when touched.
-
Remove the cookie sheet from the oven. Immediately turn the cake out onto a clean, moist tea towel that has been sprinkled generously with icing sugar. The moisture in the towel will help prevent the cake from cracking as you roll it.
-
Carefully peel off the wax paper. Trim off any crisp or dry edges of the cake with a sharp knife. This will make rolling easier and prevent the edges from cracking.
-
While the cake is still warm, roll it up tightly into the tea towel, rolling the towel along with the cake. This step is crucial for shaping the jelly roll and preventing it from cracking later.
-
Let the rolled cake cool completely in the tea towel. This will help it retain its shape.
-
When the cake is completely cool, carefully unroll it. Spread evenly with your favorite jelly, ice cream, or other filling. Raspberry, strawberry, or apricot jelly are classic choices, but feel free to experiment with different flavors. For a decadent treat, try chocolate ganache or whipped cream.
-
Roll the cake up again, this time without the tea towel. If you’re using ice cream as a filling, wrap the jelly roll tightly in plastic wrap and store it in the freezer until ready to serve.
-
To serve, slice the jelly roll into serving pieces. Dust with additional icing sugar if desired.
Expert Tips & Tricks
- Sifting is key: Sifting the cocoa and cake flour ensures that they are evenly distributed in the batter and prevents lumps. This results in a smoother, more tender cake.
- Don’t overbake: Overbaking will make the cake dry and brittle, increasing the risk of cracking when you roll it. Err on the side of slightly underbaked for a moister result.
- Moist towel is essential: A damp tea towel is crucial for preventing the cake from sticking and cracking during rolling. Make sure the towel is clean and free of any lint.
- Warm rolling: Rolling the cake while it is still warm helps it to maintain its shape and prevents cracking. However, be careful not to handle it too roughly, as it will be delicate.
- Freezing for easy slicing: If you’re using a soft filling like ice cream or whipped cream, freezing the jelly roll for a short time before slicing will make it easier to cut clean, even pieces.
Serving & Storage Suggestions
Serve your chocolate jelly roll chilled or at room temperature. It’s delicious on its own or with a scoop of vanilla ice cream and a drizzle of chocolate sauce.
To store leftovers, wrap the jelly roll tightly in plastic wrap or place it in an airtight container. It will keep at room temperature for up to 2 days, in the refrigerator for up to 5 days, or in the freezer for up to 2 months. If frozen, thaw in the refrigerator overnight before serving.
Nutritional Information
| Nutrient | Amount per Serving | % Daily Value |
|---|---|---|
| Calories | 205 kcal | 10% |
| Total Fat | 3g | 4% |
| Saturated Fat | 1g | 5% |
| Cholesterol | 70mg | 23% |
| Sodium | 150mg | 7% |
| Total Carbohydrate | 42g | 14% |
| Dietary Fiber | 1g | 4% |
| Sugars | 27g | – |
| Protein | 4g | 8% |
Nutritional information is an estimate and may vary based on specific ingredients and serving sizes.
Variations & Substitutions
- Gluten-Free: Substitute the cake flour with a gluten-free blend designed for baking. Be sure to add a binder like xanthan gum to help with structure.
- Dairy-Free: While the provided recipe does not contain any dairy, ensure that your filling of choice is also dairy-free.
- Different Fillings: Get creative with your fillings! Try Nutella, peanut butter, lemon curd, or even a combination of fillings.
- Espresso Boost: Add a teaspoon of instant espresso powder to the batter for a richer, more intense chocolate flavor.
- Citrus Zest: Add the zest of an orange or lemon to the batter for a bright, citrusy twist.
FAQs (Frequently Asked Questions)
Q: Why is my cake cracking when I roll it?
A: Cracking is usually caused by overbaking or not rolling the cake while it’s still warm. Make sure to bake the cake until it’s just set, and roll it up immediately after removing it from the oven.
Q: Can I make this jelly roll ahead of time?
A: Yes, you can! You can bake the cake and roll it up in the tea towel a day or two in advance. Store it at room temperature or in the refrigerator. Fill it just before serving.
Q: What if I don’t have cake flour?
A: You can make a substitute by using all-purpose flour. For every cup of all-purpose flour, remove two tablespoons and replace them with two tablespoons of cornstarch. Sift together well before using.
Q: Can I freeze the filled jelly roll?
A: Yes, you can freeze the filled jelly roll. Wrap it tightly in plastic wrap and then in foil. Thaw it in the refrigerator overnight before serving. If using ice cream filling, it’s best stored frozen until serving.
Q: What’s the best way to prevent the cake from sticking to the wax paper?
A: Make sure to grease the wax paper lightly with butter or cooking spray before pouring the batter onto it.
Final Thoughts
This chocolate jelly roll recipe is more than just a dessert; it’s a piece of history, a comforting embrace, and a delightful treat all in one. Don’t be intimidated by the rolling process – with a few simple steps and a little practice, you’ll be creating a masterpiece that will impress your friends and family. So, preheat your oven, gather your ingredients, and get ready to bake a little bit of happiness. I encourage you to try this recipe and share your creations with me. And why not pair it with a warm mug of coffee or a scoop of vanilla ice cream for the ultimate indulgence? Happy baking!