
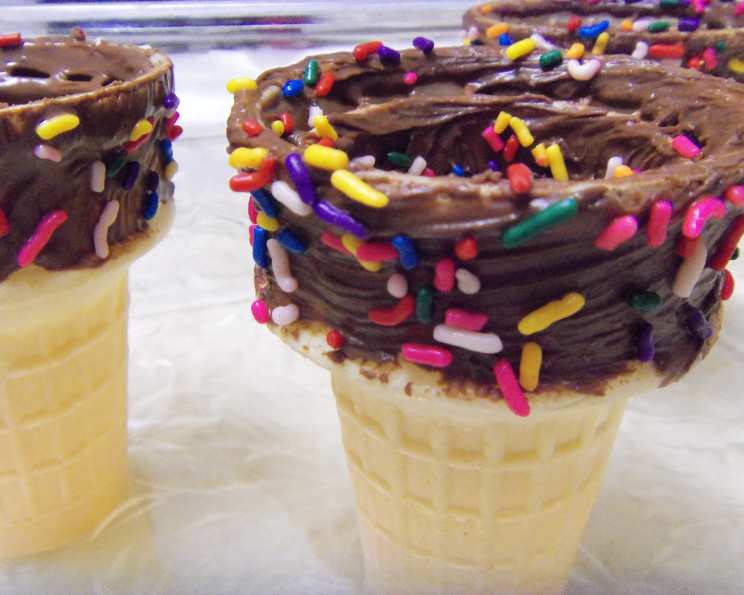
The Simple Elegance of Chocolate Lined Cones
I can still remember the thrill of my first visit to a proper gelateria in Rome. The sheer variety of flavors was overwhelming, but what truly caught my eye were the perfect, gleaming cones. They weren’t just holding the gelato; they were part of the experience, adding a touch of sophistication to a simple pleasure. Years later, I learned the secret – a lining of rich, dark chocolate, lending a satisfying crunch and preventing the cone from becoming soggy. This recipe brings that touch of Italian elegance to your own kitchen.
Recipe Overview
- Prep Time: 10 minutes
- Cook Time: 5 minutes
- Total Time: 15 minutes
- Servings: 24
- Yield: 24 cones
- Dietary Type: Vegetarian (easily adaptable to Vegan)
Ingredients
- 24 waffle cones
- 200g milk chocolate or 200g dark chocolate (choose your favorite, or mix!)
Equipment Needed
- Heatproof bowl
- Saucepan
- Spoon
- Baking sheet lined with parchment paper (optional)
Instructions
- Prepare a double boiler: Fill a saucepan with a few inches of water and bring it to a simmer over medium heat. Make sure the water doesn’t touch the bottom of the heatproof bowl you’ll place on top.
- Melt the chocolate: Place the chocolate in the heatproof bowl and set it over the simmering water. Stir frequently until the chocolate is completely melted and smooth. This process is gentle and prevents the chocolate from burning. Alternatively, you can melt the chocolate in the microwave in 30-second intervals, stirring in between, until melted and smooth.
- Line the cones: Using a spoon, carefully spoon about a tablespoon of the melted chocolate inside one of the waffle cones.
- Swirl the chocolate: Gently swirl the cone around, tilting and rotating it, to coat the entire inside surface with the melted chocolate. Work quickly, as the chocolate will start to set as it cools.
- Remove excess chocolate: Turn the cone upside down over the bowl of melted chocolate and gently tap it to allow any excess chocolate to drip out. This ensures you have a thin, even coating without excessive thickness at the bottom.
- Repeat: Repeat steps 3-5 with the remaining cones and chocolate.
- Set the chocolate: Place the chocolate-lined cones upright in glasses or cone holders, or lay them on a baking sheet lined with parchment paper.
- Chill: Place the cones in the refrigerator for at least 10 minutes, or until the chocolate is completely set and firm. This crucial step ensures a satisfying crunch with every bite.
- Enjoy! Once the chocolate is set, the cones are ready to be filled with your favorite ice cream or other delicious treats.
Expert Tips & Tricks
- Tempering the chocolate: For a truly professional finish, temper the chocolate before lining the cones. This gives the chocolate a glossy sheen and a crisp snap. Tempering involves carefully heating and cooling the chocolate to stabilize the cocoa butter crystals.
- Flavor infusions: Add a few drops of your favorite extract (such as vanilla, peppermint, or orange) to the melted chocolate for an extra layer of flavor.
- Adding texture: Sprinkle chopped nuts, sprinkles, or sea salt onto the chocolate lining while it is still wet for added texture and flavor.
- Preventing Soggy Cones: The chocolate lining acts as a barrier, preventing the ice cream from soaking into the cone and making it soggy. This ensures a pleasant eating experience from the first bite to the last.
- Working with White Chocolate: If using white chocolate, be extra careful not to overheat it, as it can scorch easily. Melt it slowly and gently over low heat.
Serving & Storage Suggestions
Serve the chocolate-lined cones immediately after filling them with ice cream, gelato, or frozen yogurt. For a delightful presentation, place the filled cones in a cone holder or stand.
Unfilled chocolate-lined cones can be stored in an airtight container at room temperature for up to a week. To prevent the chocolate from blooming (developing a white, powdery coating), store them in a cool, dry place away from direct sunlight. They can also be stored in the refrigerator for longer storage, but the chocolate may become slightly dull. If refrigerating, allow them to come to room temperature before filling for the best flavor and texture. Do not freeze the lined cones, as this can affect the texture of the chocolate.
Nutritional Information
(Note: Nutritional information is an estimate and may vary based on specific ingredients used.)
| Nutrient | Amount per Serving | % Daily Value |
|---|---|---|
| Calories | 100 kcal | 5% |
| Total Fat | 6g | 8% |
| Saturated Fat | 4g | 20% |
| Cholesterol | 5mg | 2% |
| Sodium | 20mg | 1% |
| Total Carbohydrate | 10g | 4% |
| Dietary Fiber | 0g | 0% |
| Sugars | 7g | |
| Protein | 1g | 2% |
Variations & Substitutions
- Vegan Chocolate: Use vegan dark chocolate to make these cones suitable for a vegan diet. Ensure the waffle cones themselves are also vegan-friendly, as some contain dairy or eggs.
- Gluten-Free Cones: Look for gluten-free waffle cones at specialty stores or online to create a gluten-free version of this treat.
- Different Chocolate Types: Experiment with different types of chocolate, such as semi-sweet, bittersweet, or even flavored chocolate like mint or caramel.
- Nut Butter Swirl: Swirl a spoonful of your favorite nut butter (such as peanut butter, almond butter, or hazelnut butter) into the melted chocolate for a nutty flavor.
- Spice Infusion: Add a pinch of cinnamon, chili powder, or cardamom to the melted chocolate for a warming spice kick.
FAQs (Frequently Asked Questions)
Q: Can I use chocolate chips instead of a chocolate bar?
A: Yes, you can use chocolate chips, but be sure to stir them frequently as they melt to prevent them from burning. A chocolate bar typically melts more smoothly and evenly.
Q: How do I prevent the chocolate from seizing up while melting?
A: Avoid getting any water or steam into the chocolate while it is melting. If the chocolate seizes, try adding a teaspoon of vegetable oil or shortening to help smooth it out.
Q: Can I use a pastry bag to line the cones?
A: Yes, you can transfer the melted chocolate to a pastry bag fitted with a small round tip for more precise application. This can be helpful for achieving a very thin and even coating.
Q: How long do the chocolate-lined cones last?
A: Unfilled chocolate-lined cones can be stored at room temperature for up to a week, or in the refrigerator for longer storage. The chocolate may become slightly dull if refrigerated.
Q: What’s the best way to clean up melted chocolate?
A: Let the chocolate harden, then scrape it off surfaces. For bowls and utensils, soak them in hot, soapy water to dissolve any remaining chocolate.
Final Thoughts
These simple yet elegant chocolate-lined cones are a wonderful way to elevate any ice cream experience. Don’t be afraid to experiment with different types of chocolate, flavorings, and toppings to create your own signature cones. Whether you’re serving them at a summer party or enjoying a quiet treat at home, these cones are sure to bring a smile to your face. So go ahead, indulge in a little bit of chocolatey goodness, and share your creations with friends and family! I’d love to hear about your own variations and experiences, so please leave a comment and let me know how they turned out.